In this post I'm going to show you how to configure the pager lines in FTD. That's to have the display screen paged rather than skipping to the end, and having to scroll back up to search for what we want. In other words, to have the show command output display to work in the same way as the traditional ASA.
I know we can still use the include, exclude, begin and other operators, but some times we want to scroll over the whole output. The reason of this is because the FTD by default scrolls down to the end of the displayed output when we use any show command. If the section we are trying to show is small that would not be an issue. But when we are troubleshooting issues, typically we deal with much longer pages or sections than just a few lines.
When we connect to the FTD through CLI, we will be placed by default into so called CLISH mode. From within the CLISH mode we can't use any shortcut. Which means we have to type the whole commands, or to use the tab key. Tab key is fine, but when we spend a lot of time in front of the screen that would easily become annoying.
Also, as you might have already noticed, there is a slight delay when we type the commands from withing the CLISH mode comparing to the traditional ASA privilege mode.
Due to this little delay and lack of ability to use the shortcuts, many of us prefer going into the Diagnostic mode. It is basically the ASA engine interface. The ASA engine is also called Lina. I believe the name Lina comes from the old days when the ASA code was originally coded. The ASA CLI interface in the FTD world is called Diagnostic mode.
So it would be more handy and practical in my opinion to be in Diagnostic mode when it comes to troubleshooting and verification. However, working from within that mode introduces some limitations.
For instance, we would not be able to use the built-in scripts to do packet capture, tracking user identities, and a few other more cool utilities. I will cover some of them in separate posts. Those utilities would only be available from the CLISH mode.
But it is still worth it to stay into the Diagnostic mode if we don't need to use any of the built-in utilities that would only run from the CLISH mode. So back to the main topic I wanted to talk about in this post, which is how to configure the pager lines in FTD. That will allow us to break down the display output into multiple pages rather than scrolling down right to the end.
The fix is easy, but before we jump to the fix, let's talk about the root cause of this default behavior. Well, the root cause is due to the lack of applying any pager configuration on the FTD by default. If you issue the show running-config pager on the FTD you will see that it will return no pager by default. Obviously, the same if you are in Diagnostic mode.
The no pager command can be very handy if we want to store the display output to a file where we don't want any line breakers to be included. In fact I used to do it often on the ASA. With FTD as we know, no changes could be applied through CLI except for a few ones which are more management orientated. And also a very little changes for some other features, such as disabling or enabling some protocol inspection as an example.
This means that we need to set the pager configuration through the FMC. But I could not find a way to do it from the UI. If you know any way to do it directly from the UI, please share it in the comments below. Now as a rule'ish when it comes to the FMC would be, if the FMC UI does not support a feature that is supported on the ASA, it would mean FlexConfig would support it.
Otherwise, if you try to push a FlexConfig policy of a command that is supported through the FMC UI, you will get an error stating that the command you are using are not supported through FlexConfig. However, there might be some commands that are supported on both the FMC UI and FlexConfig.
FlexConfig in a nutshell is a tool that allows us to configure a set of commands and push them manually to the FTD appliances. As mentioned the commands that would be supported through FlexConfig most likely are not supported through the FMC UI. We can also create a FlexConfig policy with a single command, does not have to be a set of commands really. In fact, this is what we are going to do in this post.
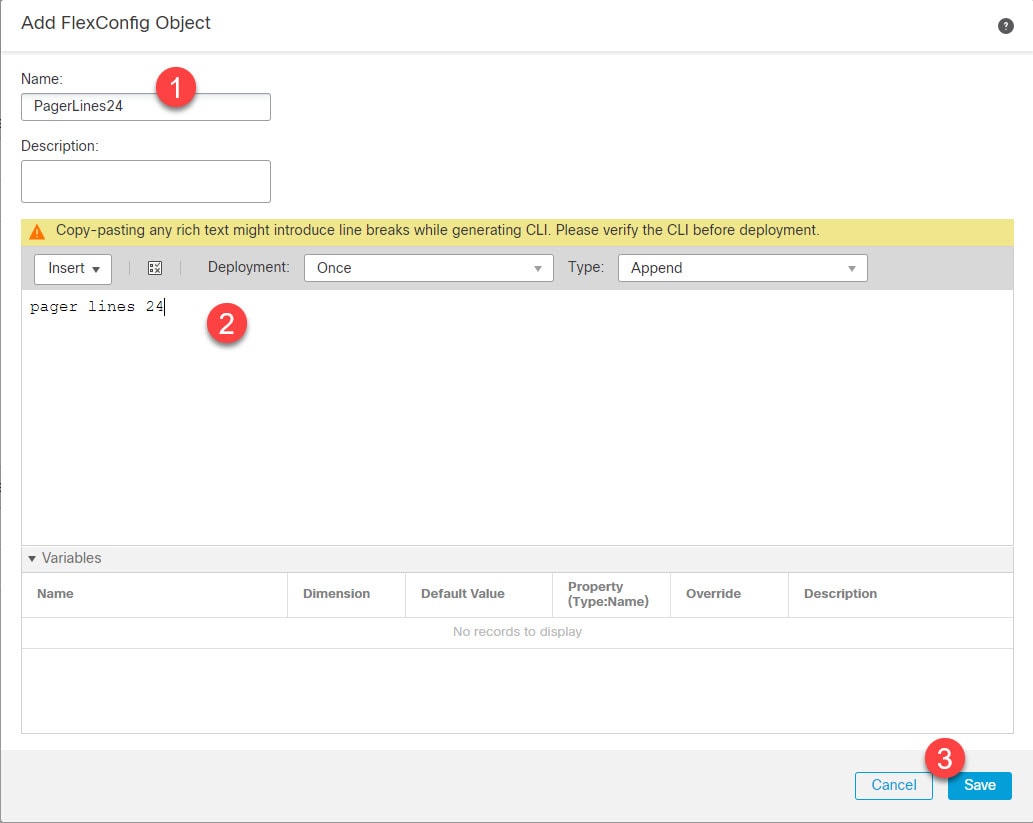
Here is what we need to configure the pager lines in FTD. We need to do in this lab is to create a FlexConfig policy, assign our FTD to it, create a FlexConfig object, define our command which will be pager lines 24, and finally save and deploy. Let's have some fun with the configuration.
Step 1: Go to Devices > FlexConfig
Step 2: Click on New Policy or Add a new policy
Step 3: Give the policy a name, click on the FTD appliance you want to assign to the FlexConfig policy. And then click on Add to Policy and finally click on Save
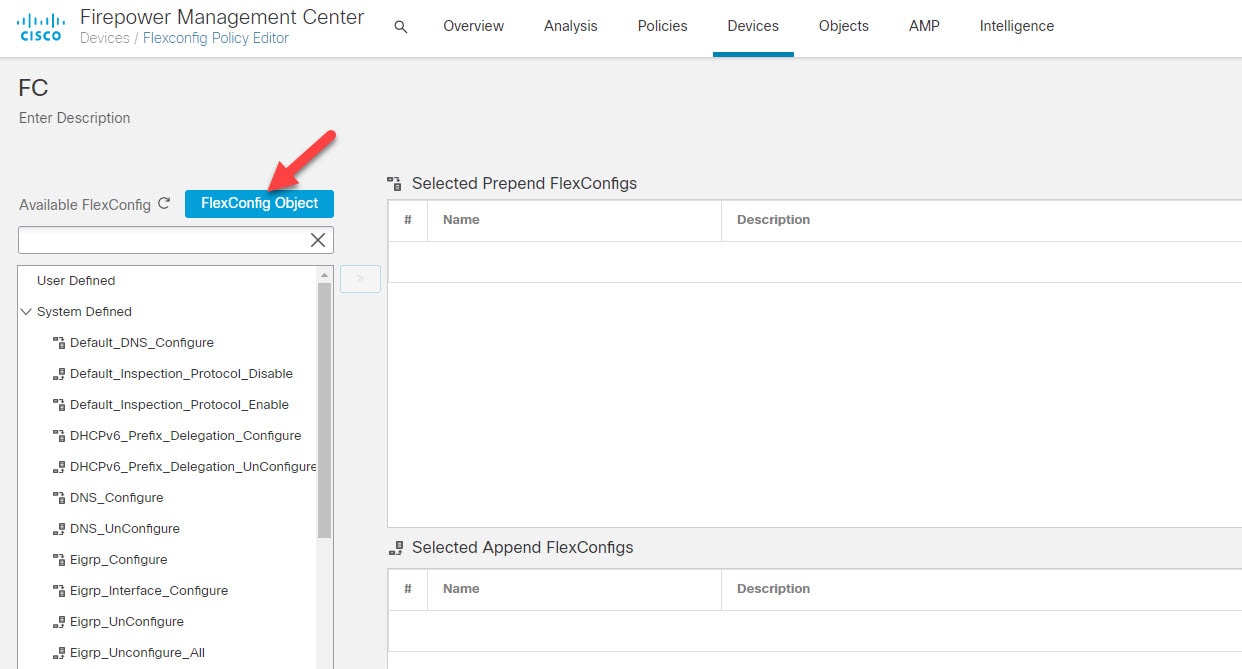
Step 4: Click on FlexConfig Object, give it a name, place the pager lines 24 command in the code section. Finally, click Save
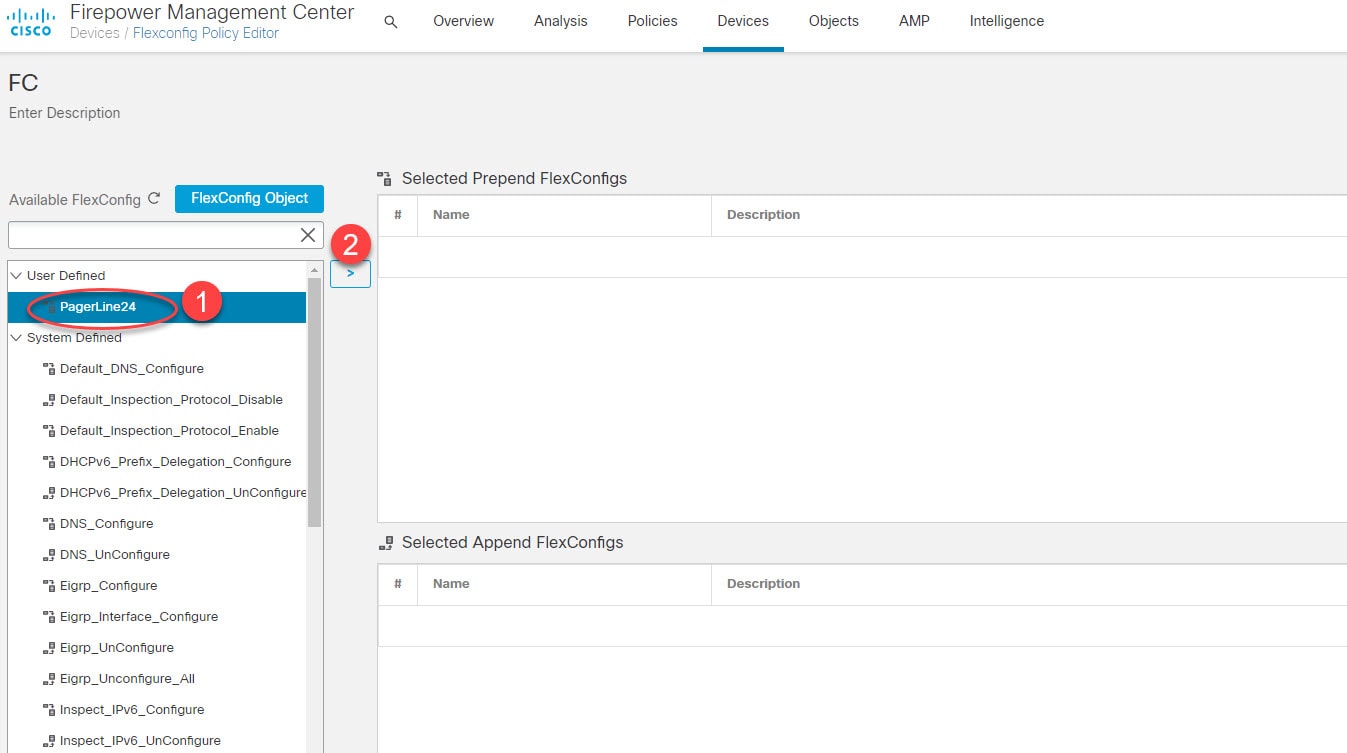
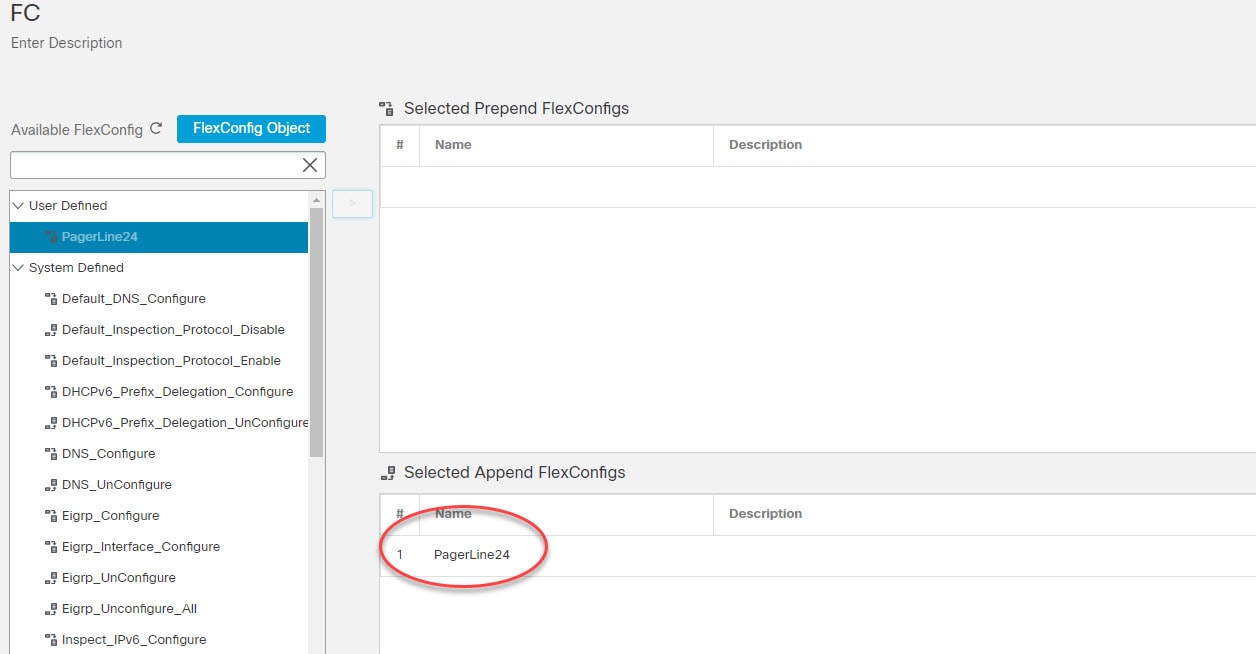
Step 5: Click on the object you've just created and click on the little arrow to move it to the Selected Append FlexConfigs
Step 6: Let's test it and verify the pager settings on the FTD before we deploy the changes
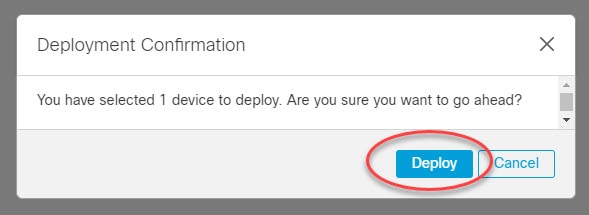
Step 7: Save and deploy
Step 8: It should work now, let's test it
Just two more things I want to show you before we wrap up this post how to configure the pager lines command in FTD. The FlexConfig object we created in step 4, can also be created from the Object Management. In fact, the one we created in step 4 has been already populated into the FlexConfig section in the Object Management.
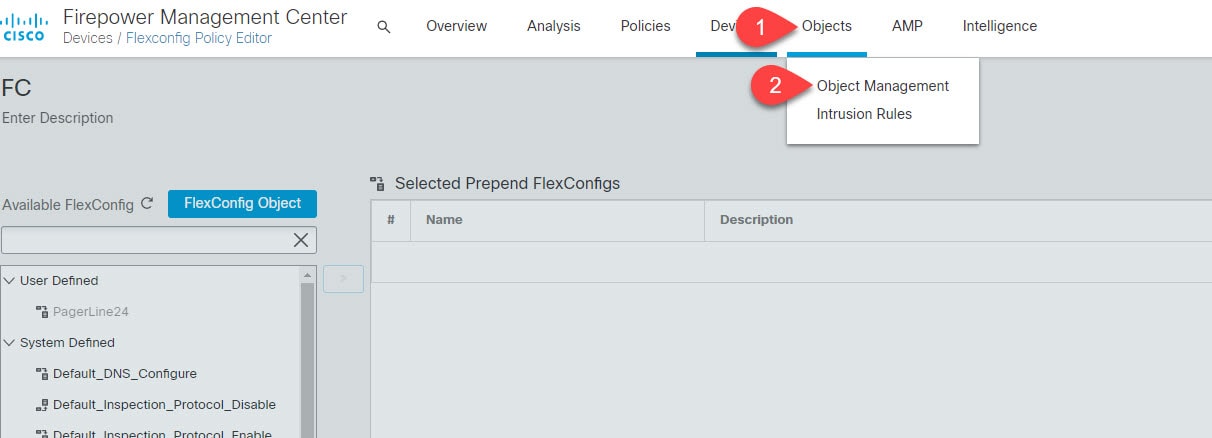
You can check that by going to Objects > Object Management > FlexConfig > FlexConfig Object and search for PagerLines24. And by clicking on the Add FlexConfig Object you can create a new one as well. Lastly, if you want to remove the object we created you can simply do so by clicking on the bin icon to the right.
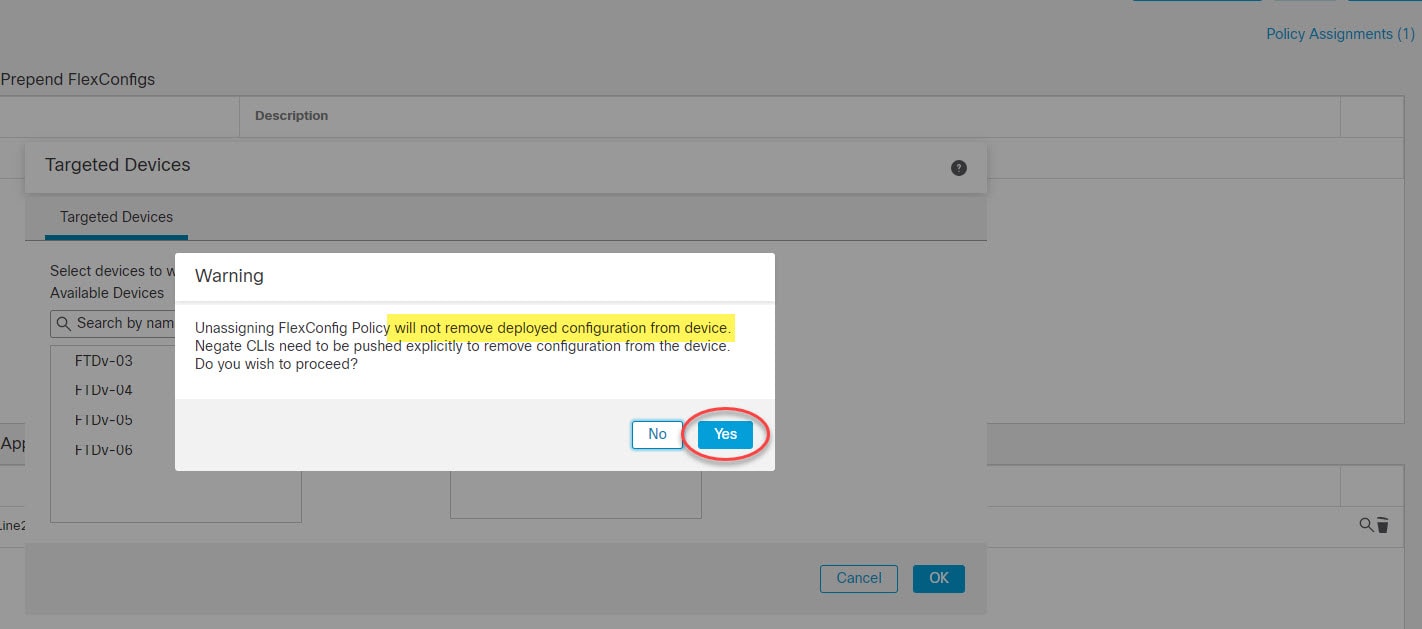
Last thing before we go. The FlexConfig policies do not negate the applied FlexConfig objects by unassigning the FTD from the policy. In fact there is a warning message that will appear when you unassign a device from the policy.
However, this is not always the case. With the pager lines command, as soon as you unassign the FTD from the policy, and you deploy the changes, the applied pager lines command will be removed and the no pager configuration will be reverted back.
I've seen similar behaviors on the FDM. FlexConfig works in a very similar way on FDM. And in there in fact if you remove the policy, it will auto remove some commands. I am saying some because obviously I am not sure which commands are subject to this behavior and which not.
But, on the other hand, I've seen commands that would stick there forever, untill we negate them through a FlexConfig policy. And that would be simply by placing the no keyword in front and pushing that policy to the device.
Here is a similar message of what you will get when you try to unassign an FTD from the FlexConfig policy:
This wraps up this post about how to configure the pager lines in FTD.
Thank you for reading!


