In this post I will show you how easy is to use Active Directory OUs in Cisco ISE authorization rules. Although it is not very common, but there are still a lot of companies around that are using the Active Directory OUs to segregate the users in Active Directory rather than using the groups.
In our lab we have an FTD appliance already configured with AnyConnect VPN profile. ISE is also configured on the FTD appliance as the authentication and authorization server. The AnyConnect authentication method we are going to use is username and password based.
Our ISE policy set for AnyConnect users is going to allow the users that are part of the Active Directory OU that is called MyUsers. We will be focusing only on the authorization part of the configuration.
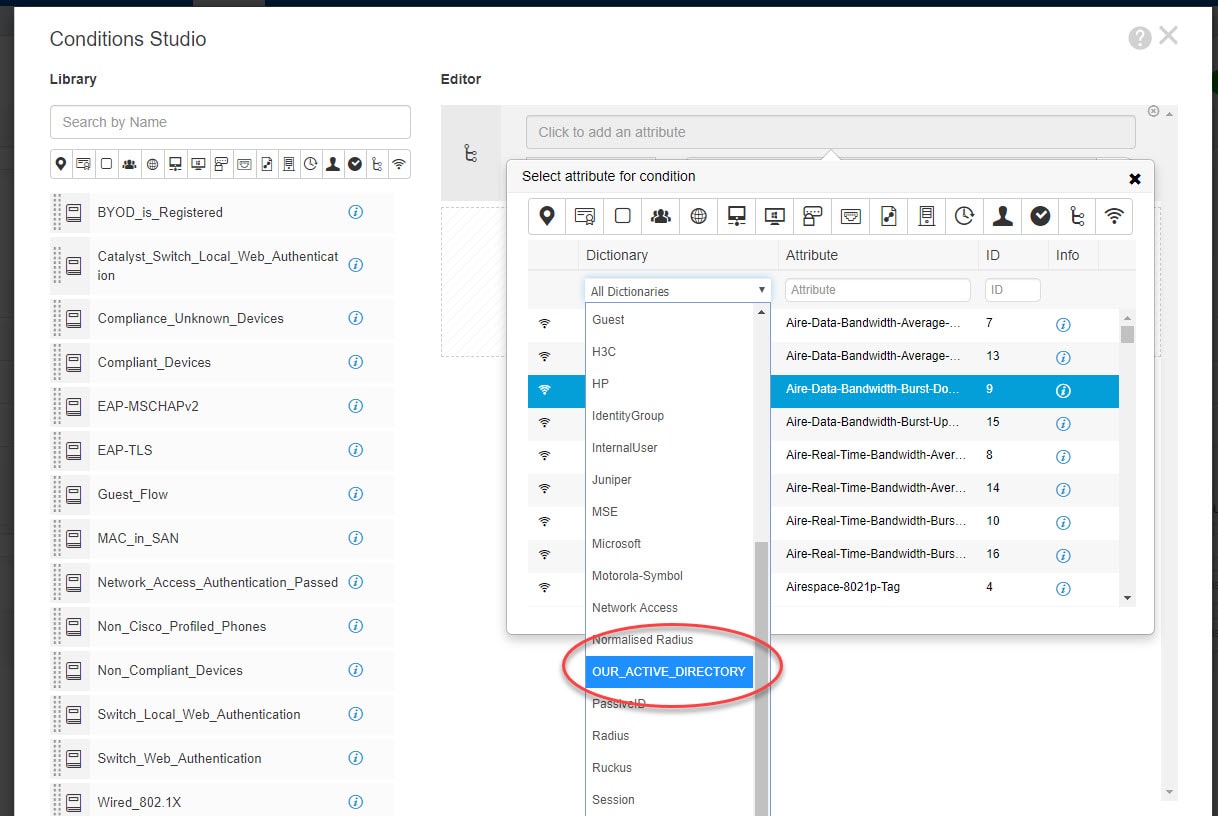
First thing we need to do will be adding an Active Directory attribute which will allow us to use the OUs in our policy set. Then we will move on to create an authorization rule to only match the users that are part of our Active Directory OU MyUsers as mentioned above. Let's get started.
Step 1: Add Active Directory Attribute
Go to Administration > Identity Management > External Identity Sources > Attributes > Add > Select Attributes From Directory
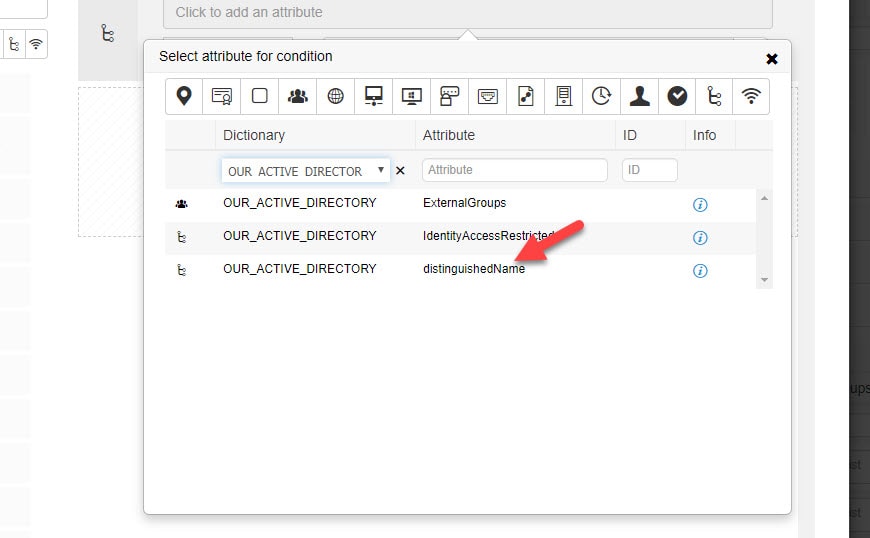
Step 2: Select Active Directory distinguishedName
Type any existing username on Active Directory and click Retrieve Attributes and finally select distinguishedName and click OK
Click Save
Step 3: Add Authorization Rule
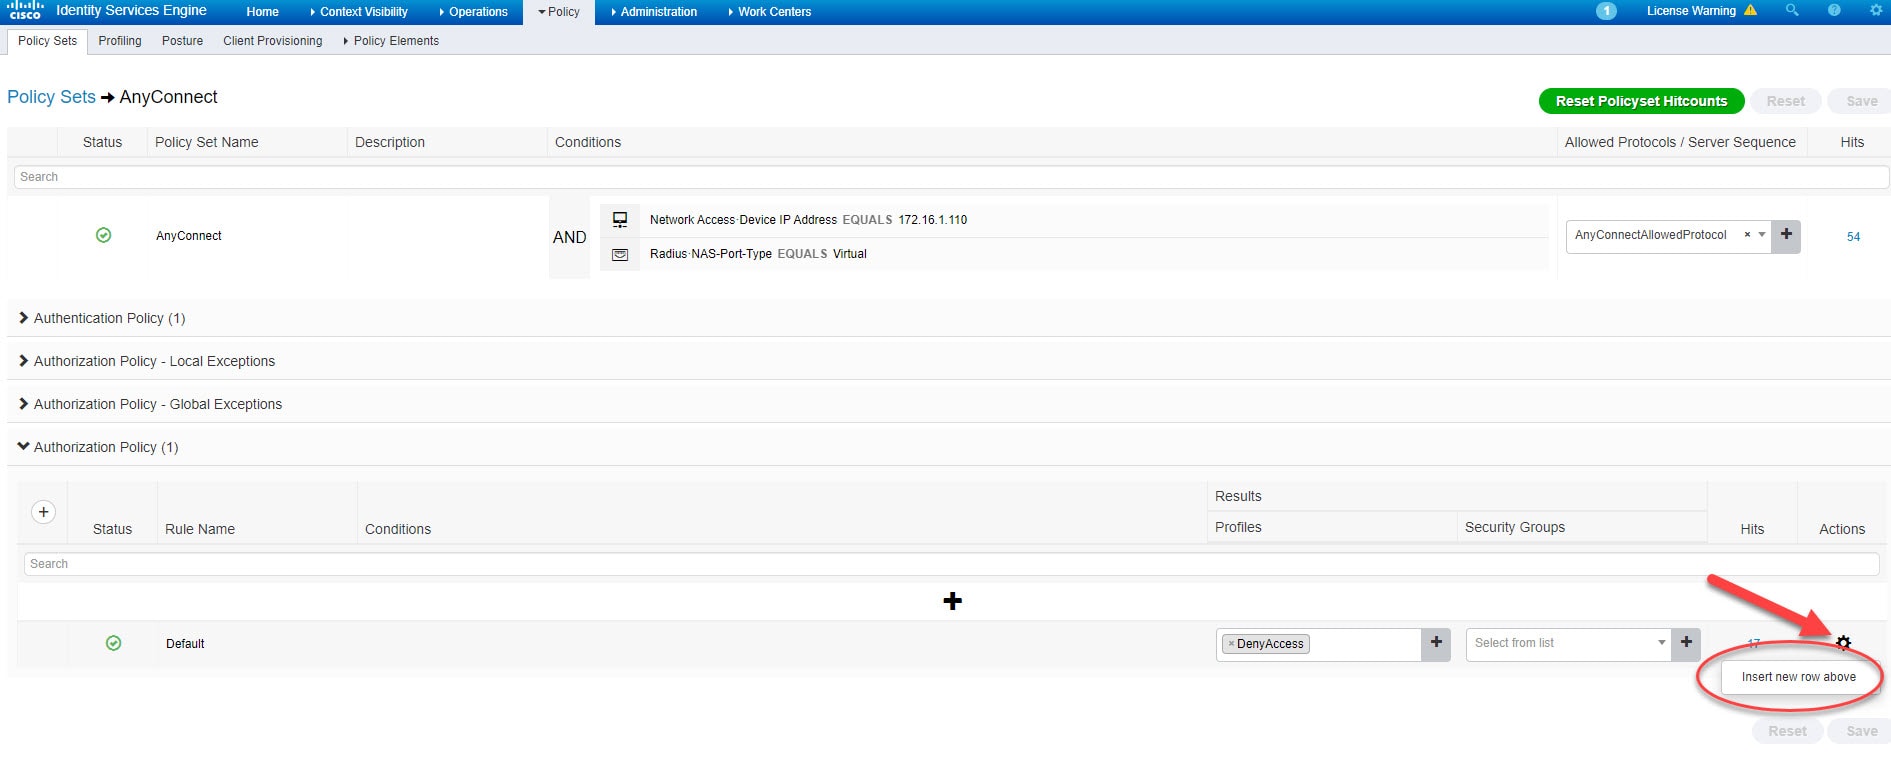
Go to Policy > Policy Sets > Authorization Policy
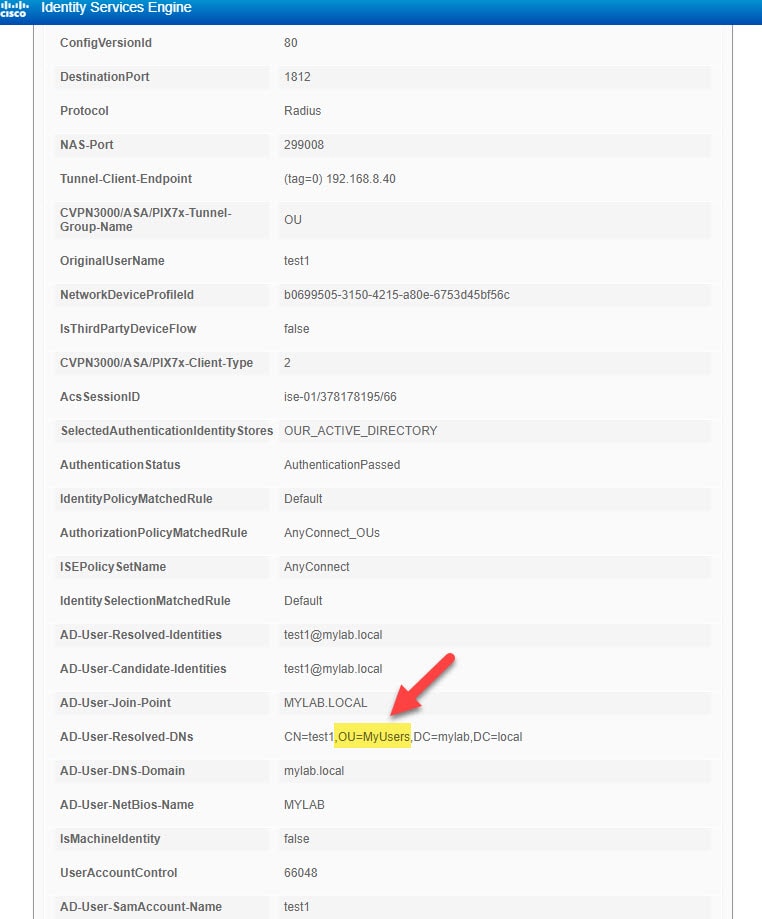
Verification
Before we wrap up this post about how to use Active Directory OUs in Cisco ISE authorization rules, I want to show you how you can set up ISE authorization rule to distinguish the exact path of the OU rather than using the individual OU names.
For instance, say you have two OUs with the same name, but each one is located in a different place. The way how to set up ISE authorization rule in that case should include the whole OU path. For example, say we have two OUs called test, but one is located under MyUsers OU and the other is located under MyDevices OU. In that case, the authorization rule on ISE should look similar to this:
This wraps up this post about how to use Active Directory OUs in Cisco ISE authorization rules.
Thank you for reading!


