Adding a virtual or a physical FTD appliance to the FMC is a fairly simple process. In this post I will show you how to do it and we will be working on an FMC appliance running version 6.6.0. Cisco just released the version 6.6.0 which has a few new features and a bunch of improvements.
However, like any other x.x.0 versions, the rule of thump is not to install it in a production environment. Those zero releases most likely are not going to be stable, and will most likely have some software bugs. I think it would take some time before Cisco suggests a 6.6.x release as the gold release. You can check the 6.6.0 release notes through this link.
We have to meet some pre-reqs before we can add an FTD appliance to an FMC. We must complete these pre-reqs through the FTD CLI. Once we completed the pre-reqs, all the remaining tasks to complete the addition of the FTD to the FMC are going to be done via the FMC managemtn console.
The first pre-req is that the FTD must have its management interface fully operational. And the second is to register the FMC as its manager. Let's jump into this lab!
Step 1: Verify the FTD management interface settings
> show network
===============[ System Information ]===============
Hostname : ftd-02.mylab.local
Domains : mylab.local
DNS Servers : 172.16.1.229
8.8.8.8
Management port : 8305
IPv4 Default route
Gateway : 172.16.1.229
======================[ eth0 ]======================
State : Enabled
Link : Up
Channels : Management & Events
Mode : Non-Autonegotiation
MDI/MDIX : Auto/MDIX
MTU : 1500
MAC Address : 00:0C:29:81:61:B1
----------------------[ IPv4 ]----------------------
Configuration : Manual
Address : 172.16.1.242
Netmask : 255.255.255.0
Broadcast : 172.16.1.255
----------------------[ IPv6 ]----------------------
Configuration : Disabled
===============[ Proxy Information ]================
State : Disabled
Authentication : Disabled
>
Step 2: Add the FMC as the manager
> configure manager add 172.16.1.246 WHATEVERPASSWORD
Manager successfully configured.
Please make note of reg_key as this will be required while adding Device in FMC.
>
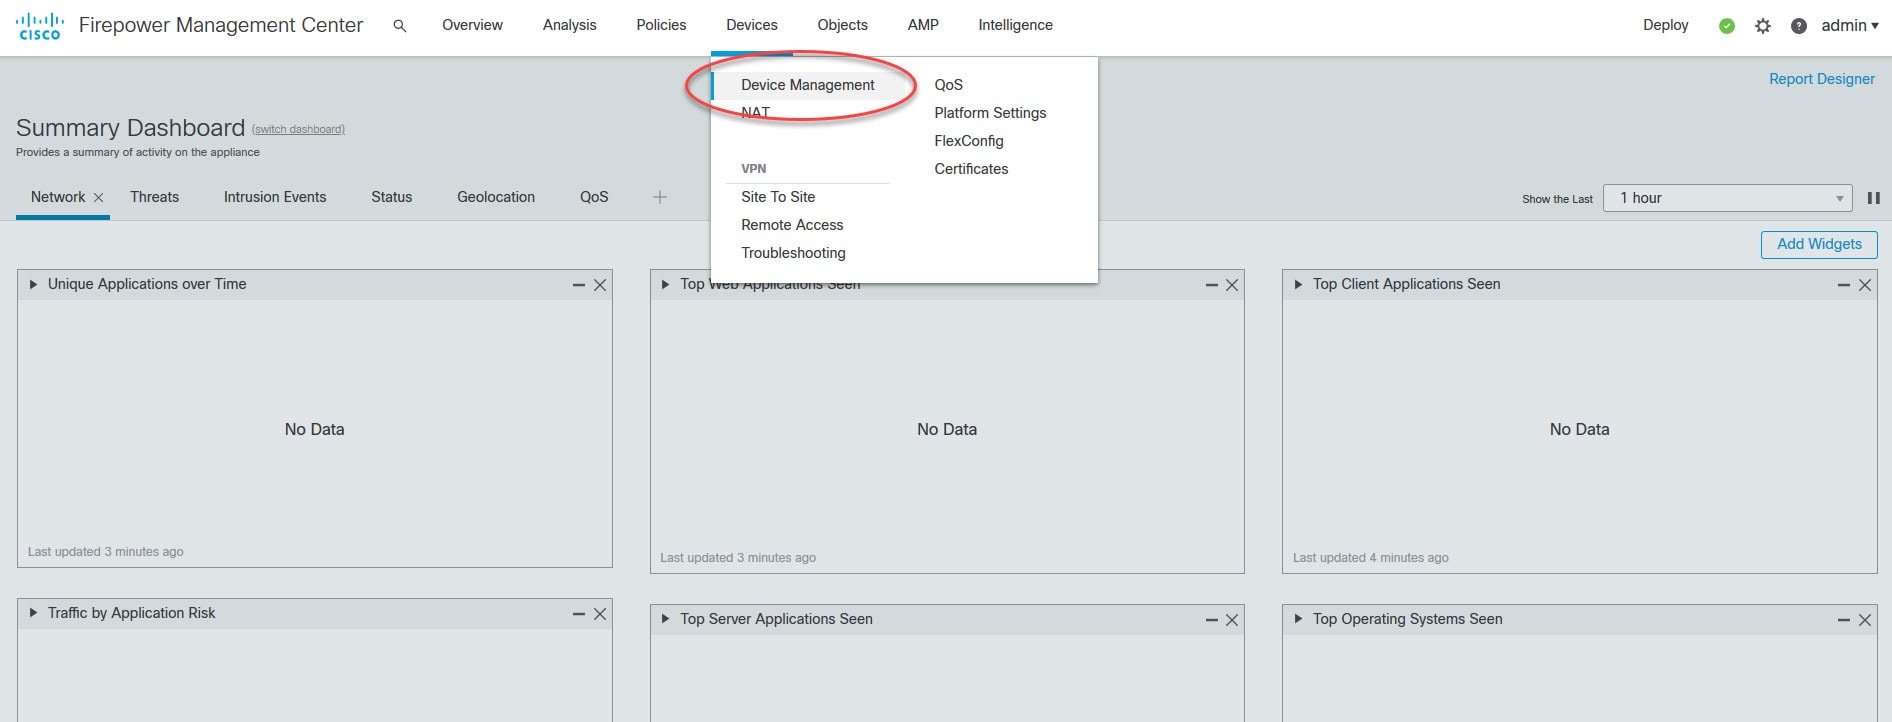
Step 3: Log in to the FMC dashboard and go to Devices > Device Management
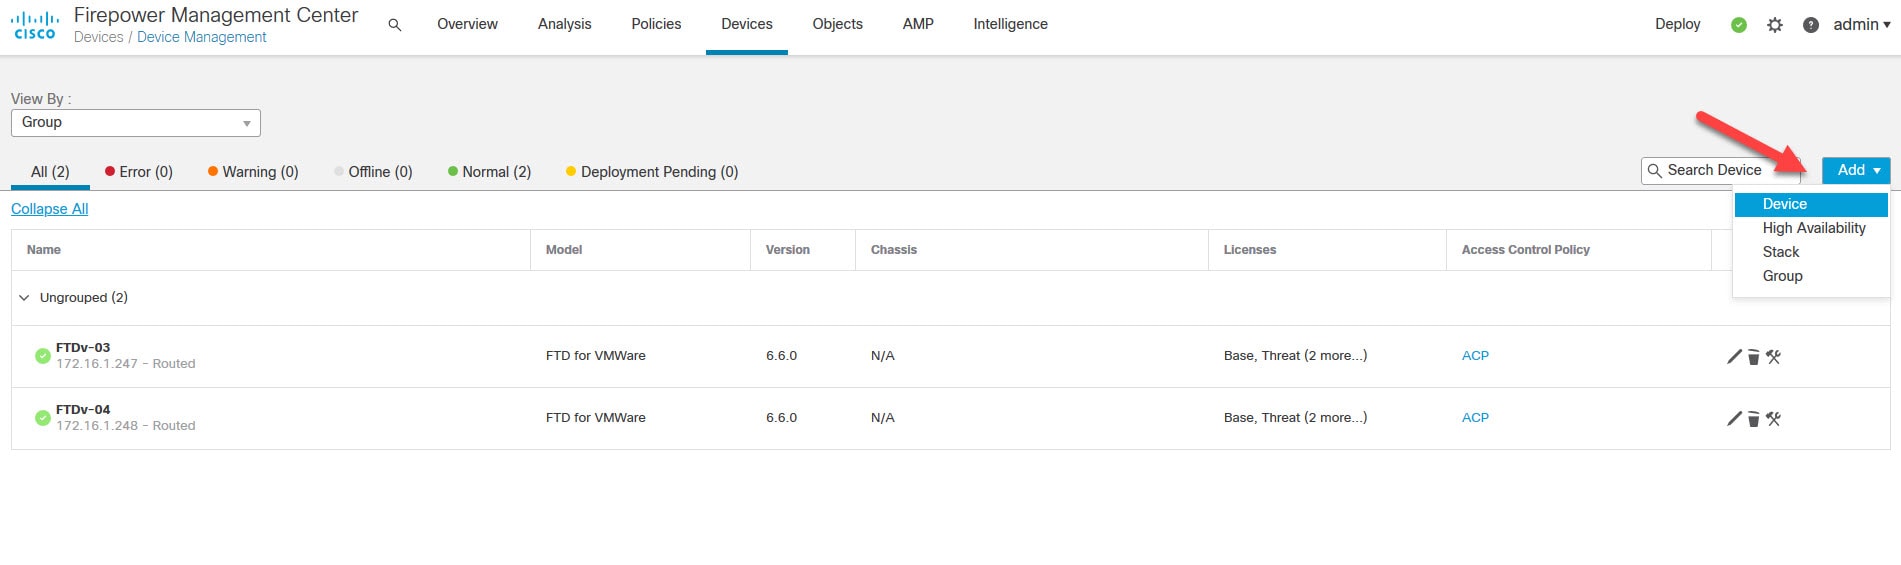
Step 4: Click on Add > Device
Step 5: Add the FTD device details
The registration key is the one we used previously when we added the FMC as the manager on the FTD appliance. Associating the FTD with an access control policy during the addition process is mandatory. You can create a new access control policy from the Add Device windows if you have not already created one on the FMC.
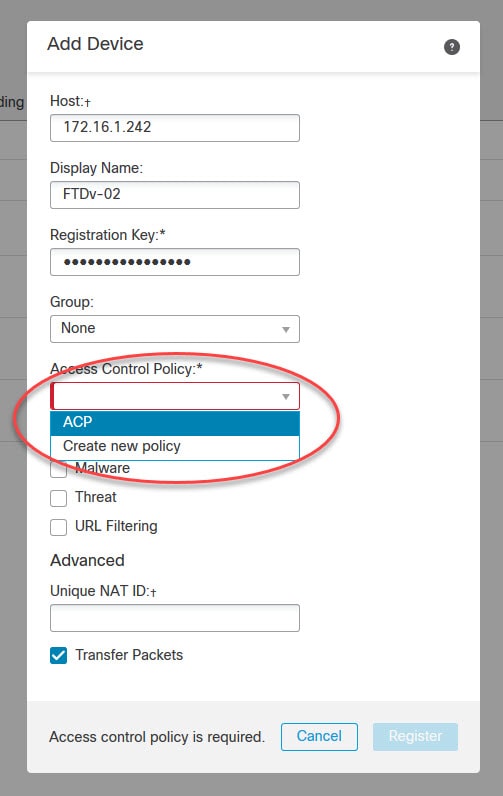
You might be wondering what the Transfer Packets option is all about!. This option is very important. When it is enabled, it allows the FTD to send any security events metadata and potential packets along with the security events to the FMC that would have been triggered by a security feature. Instead if you disable this option, the FTD will only be sending the security events to the FMC.
You might also be wondering what the Unique NAT ID option is and when we would need to use it! The unique NAT ID is a value that we would use in very specific cases. Think about it as a tag that will be associated to the traffic coming from a device.
For instance, say we have an FTD appliance behind a router with a dynamic public IP address. In this case, we would not be able to rely on the FTD IP address since it would keep changing. To solve this issue the Unique NAT ID feature comes to rescue.
What we need to do in that case is specifying a unique NAT ID value on the FTD when we add the FMC as the manager. Then, on the FMC we just need to fill up that unique NAT ID on the Add Device window. In this case we don't have to fill up the FTD IP address, we can just leave it blank.
Another use case of Unique NAT ID is when we have multiple FTD appliances behind a unique NAT device. Say for instance we have a couple of FTD appliances behind a router that is NAT'ing all the internal traffic to a single private or public IP. And say we configured both of them to register with the FMC using the traditional method of specifying only the FMC IP address.
In this case the FMC would not be able to distinguish from which FTD appliance the request is coming from. Accordingly, the FMC would not be able to authenticate that FTD device. To resolve this issue, we just need to add a unique NAT ID value on each FTD appliance. That value will be used on the FMC to lookup the initiator FTD. Similar to the above, in this case as well you can just leave the IP address field blank and use the NAT ID value instead.
Enough with the Unique NAT ID feature for now. I will dedicate a separate post showing how it is exactly work, but for now let's move on with our lab.
Step 6: Click Register to start adding the FTD device process

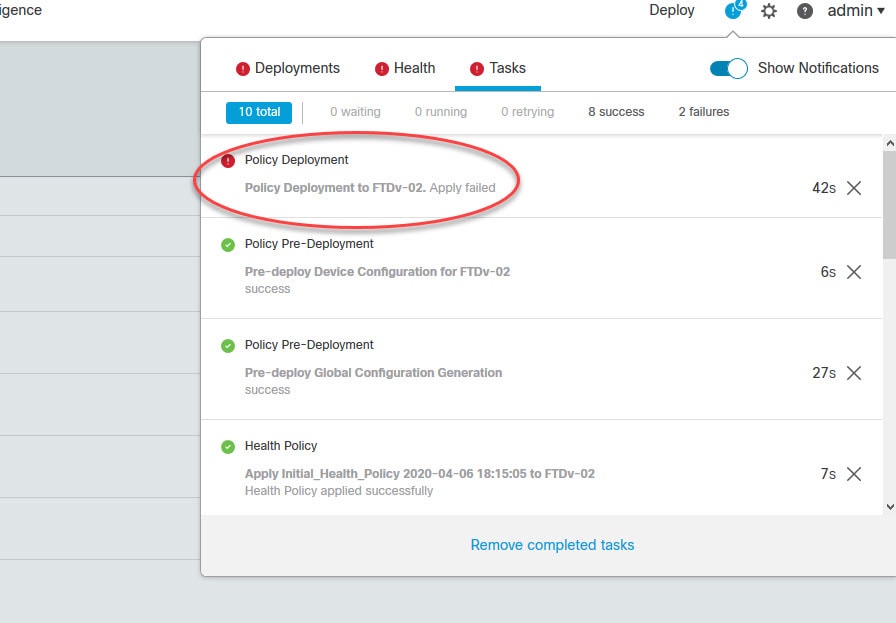
The FMC would take a few minutes before completing the FTD registration. You can check the status by going to the Notifications > Tasks menu on the top right side:
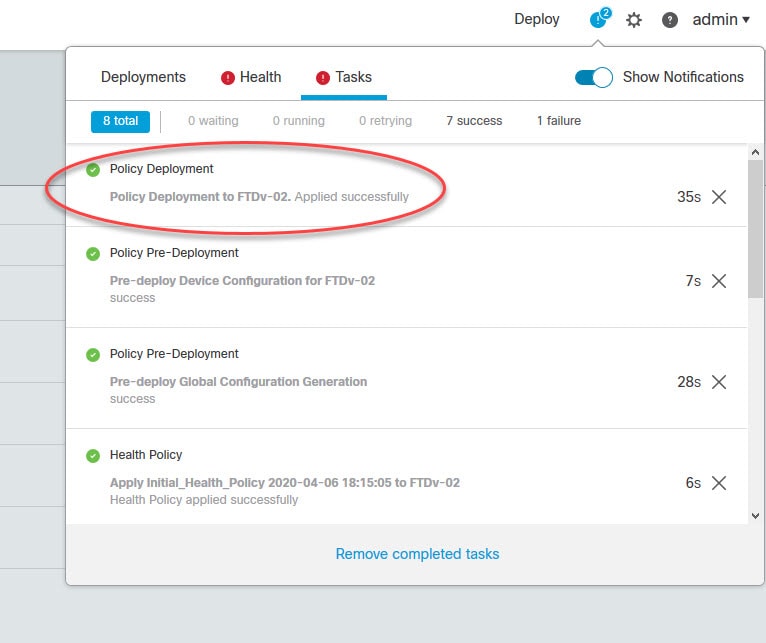
If the FMC should fail deploying the access control policy to the FTD on the first attempt, give it another try by clicking on Deploy button. I've seen this happening a couple of times with different FTD appliances. This might be a software bug on version 6.6.0:
Thank you for reading!
Thanks for this. You circled the ACP but did not explain what it is and why we need to configure one at this stage.