Menu Close

FMC AnyConnect SSL VPN

This post will show you how to configure AnyConnect SSL VPN in FMC. However, it will show you a slightly different configuration comparing to the common one we mostly use. In this lab we will have a DHCP server inside our network, and that DHCP server will assign the AnyConnect clients IP addresses from the same internal range.

Therefore, both the internal and the AnyConnect clients will be served by the same DHCP scope. You might be wondering why we would need this rather than dedicating a specific pool for AnyConnect clients!, well, there is no specific answer or requirement for that.

The only thing I would think about that could be a reason is if you have a bunch of applications that restrict the accesses based on the clients IP addresses in addition to the usernames. Maybe it would not be easy enough to change those applications security policies.

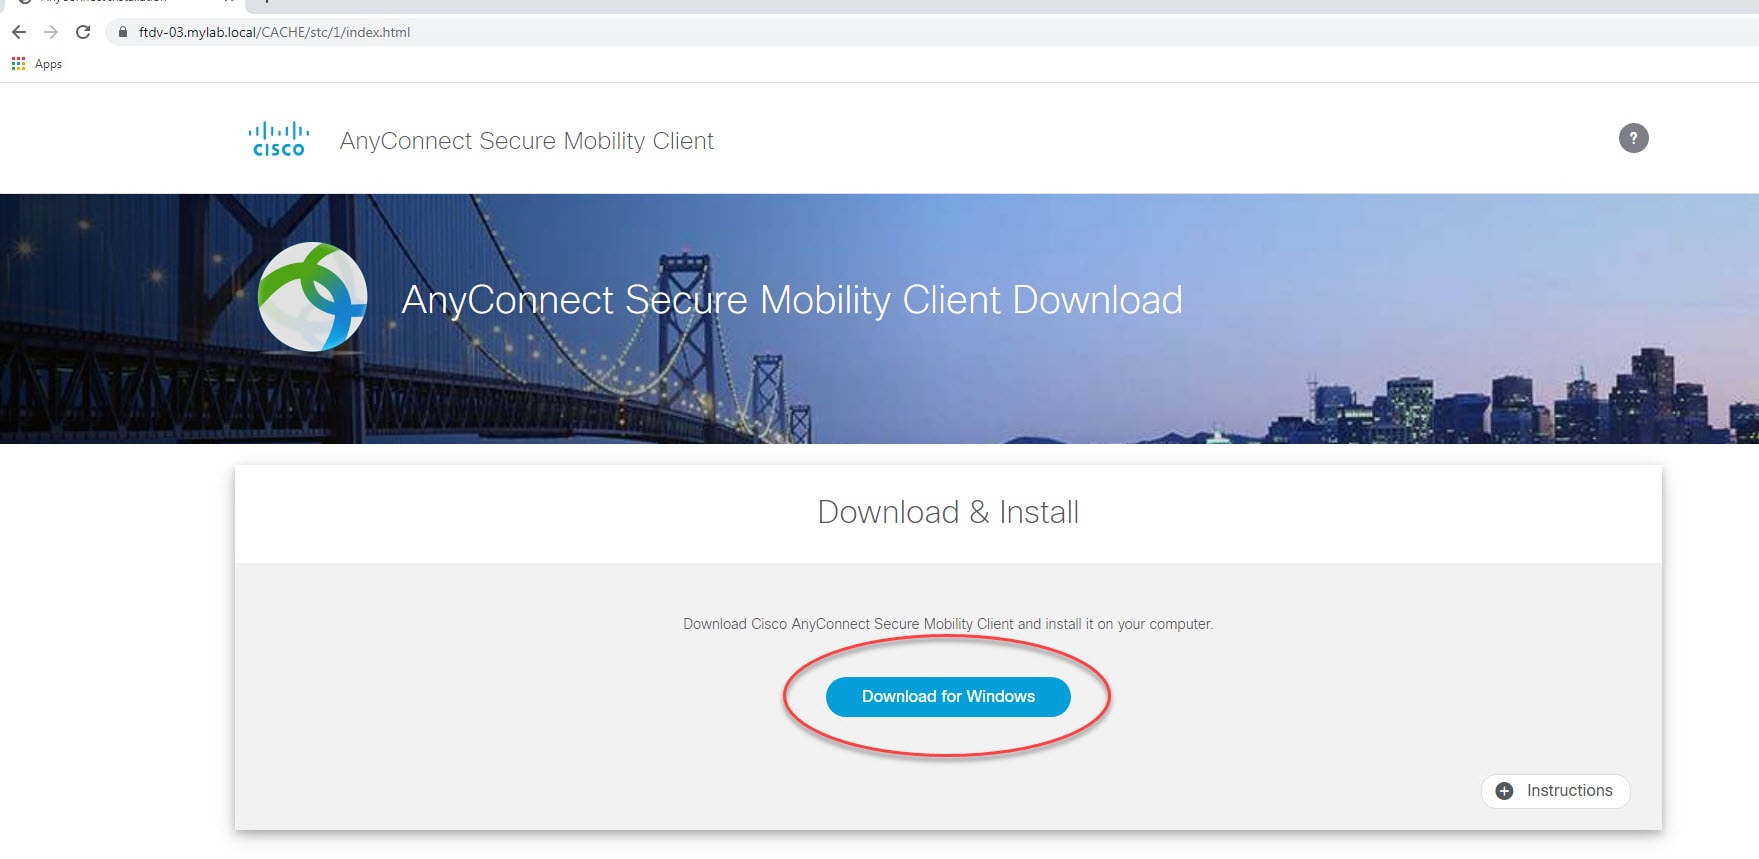
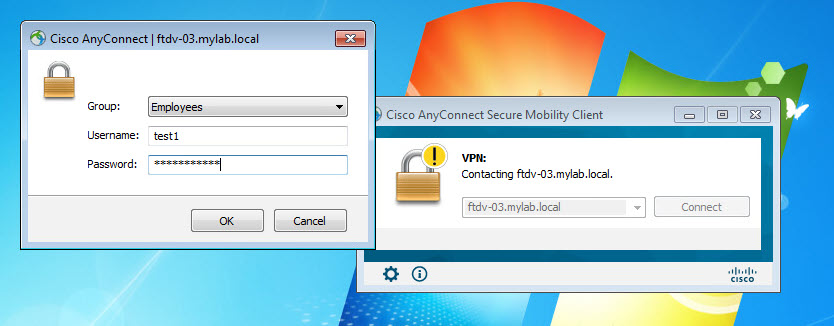
Both the FMC and the FTD device in our lab are running version 6.6.0. And AnyConnect version we are going to use is 4.8.03043. The design requires AnyConnect clients to connect to the FTD device VPN SSL webpage to download the AnyConnect client. And then they will connect to the VPN with their AD usernames and passwords.

The RADIUS server we will be using is ISE. It is already joined to our Active Directory. I will cover ISE configuration for the AnyConnect SSL VPN in another post, stay tuned!

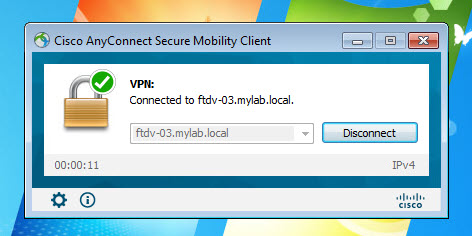
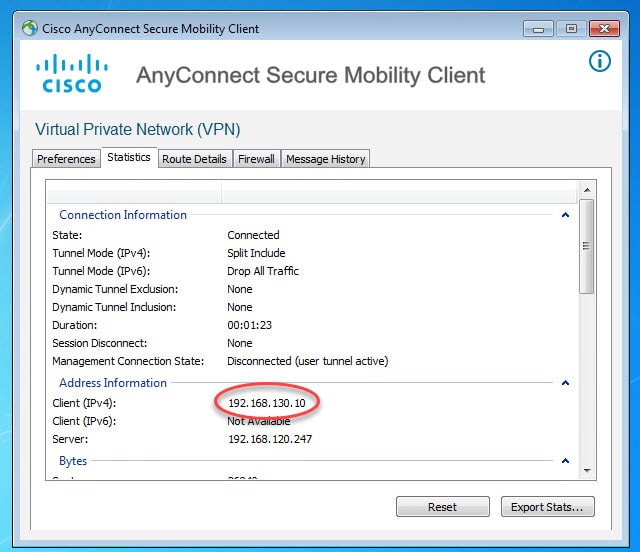
The AnyConnect SSL VPN tunnel will have ISE as its authentication, authorization, and accounting server. Once the clients are connected to the VPN, they will be assigned an IP address from the DHCP scope 192.168.130.0/24 which is configured on our AD.

Topology

Step 1: Verify AnyConnect licenses on the FMC

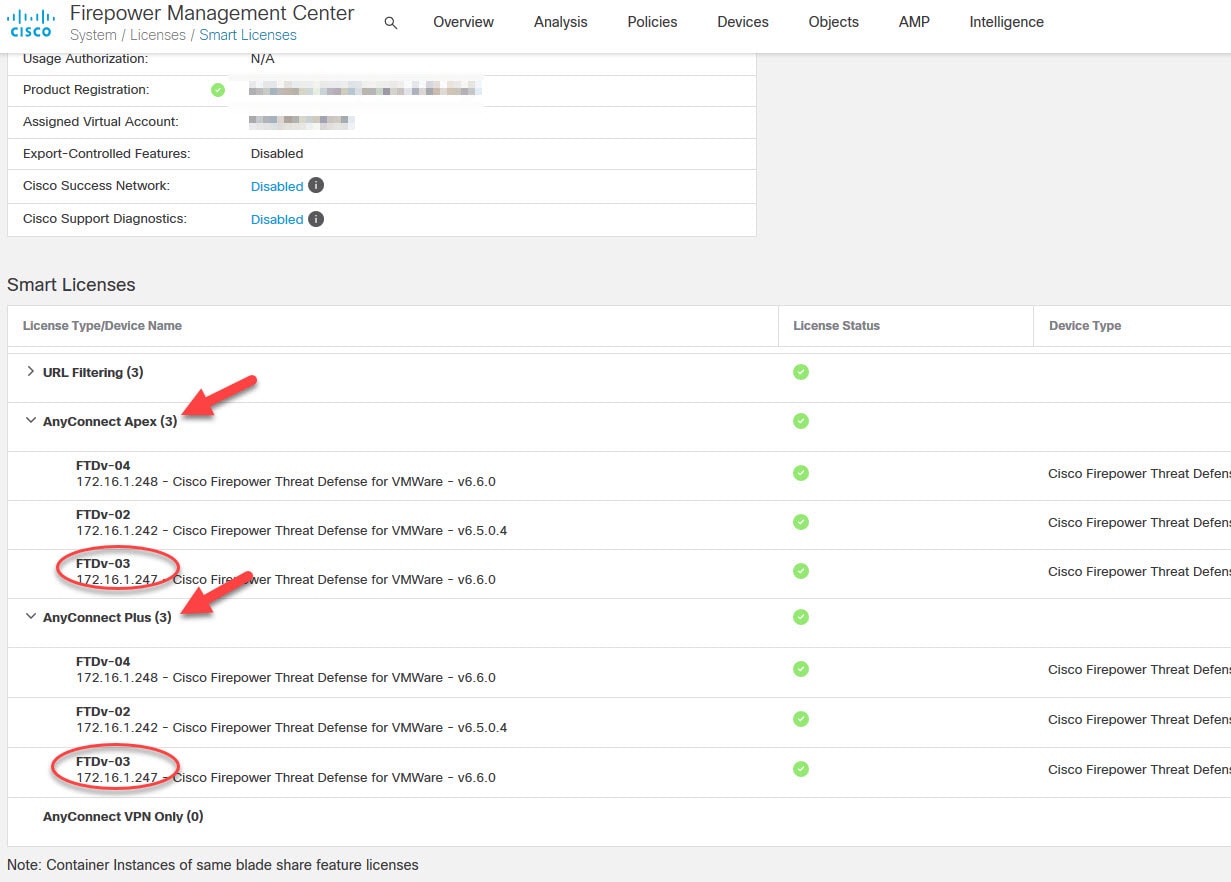
Go to the cog icon > Licenses > Smart Licenses

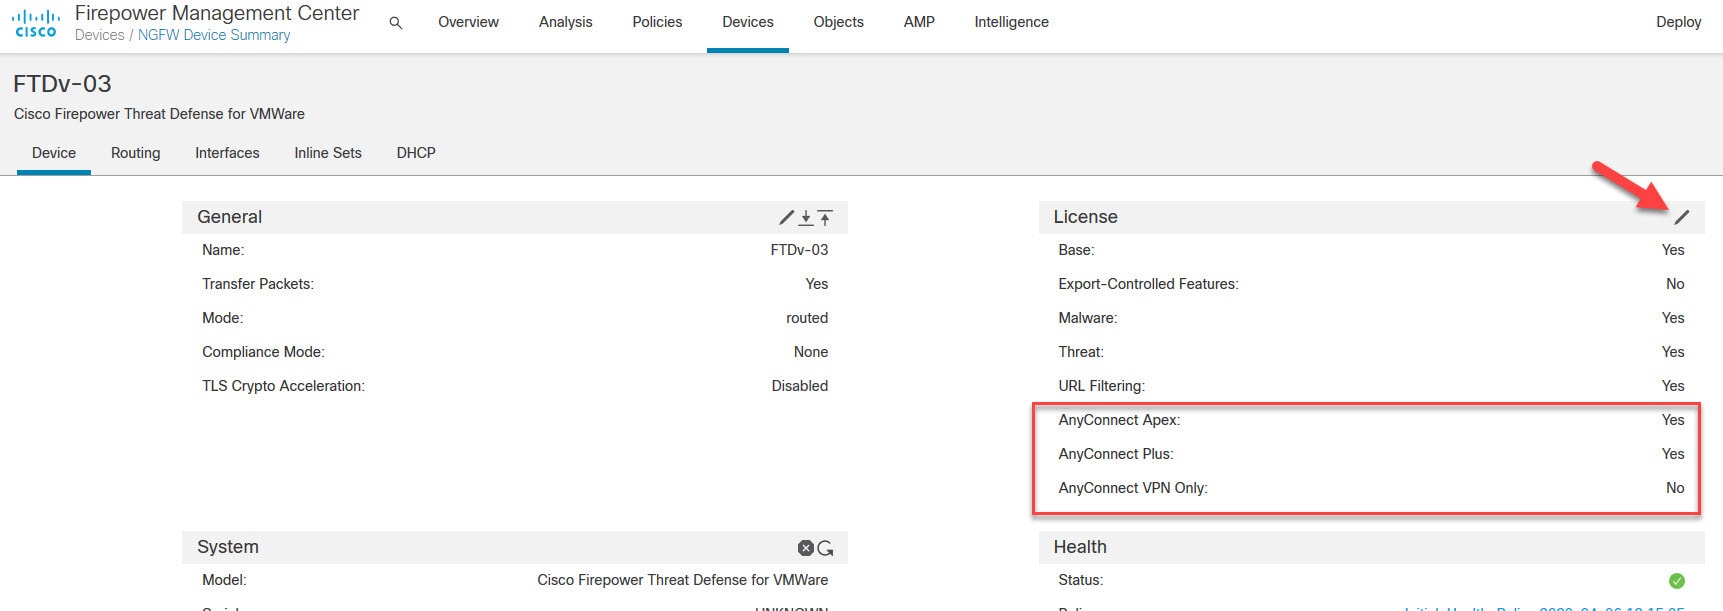
In my lab I have both AnyConnect Plus and Apex licenses enabled. However, you probably will have one type of those licenses associated to your FTD. Below is another way to check the licenses is through the device management dashboard. But you can also edit the licenses by clicking on the Edit Licenses button on the right side of the Smart Licenses section in the previous screen.

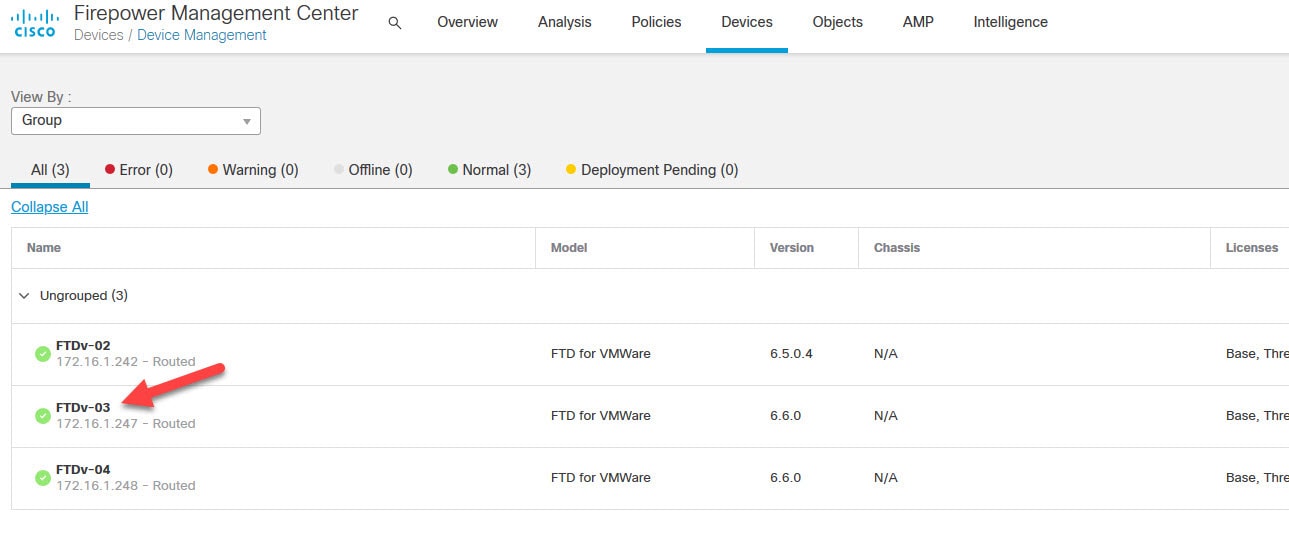
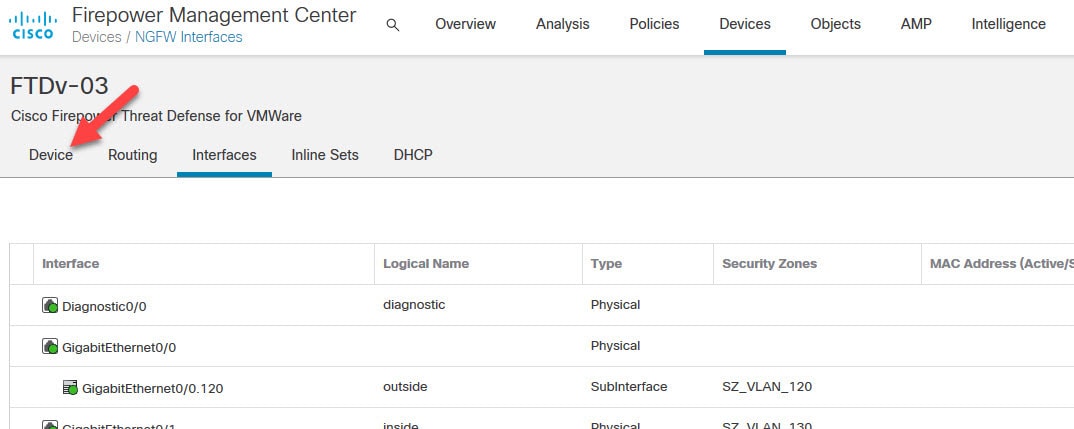
Go to Devices > Device Management and click on the interested FTD, and then click on Device tab

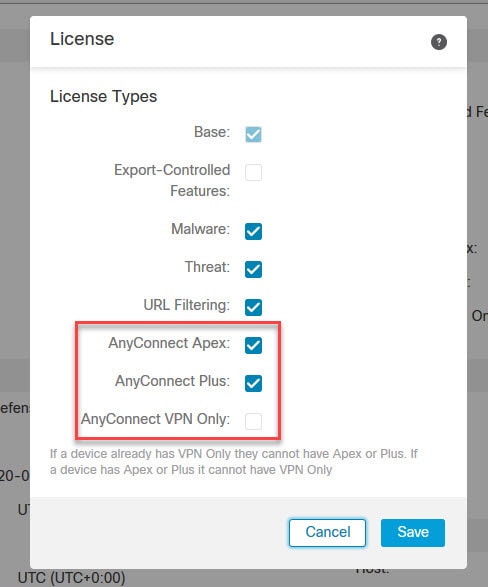
You should see the licenses associated to that FTD in the License section. If they are not enabled on that device, click on the pencil icon and tick the boxes next to the interested licenses.

Now let's move to objects management section to create some objects that we need to configure AnyConnect SSL VPN in FMC.

Step 2: Deploy AnyConnect Package

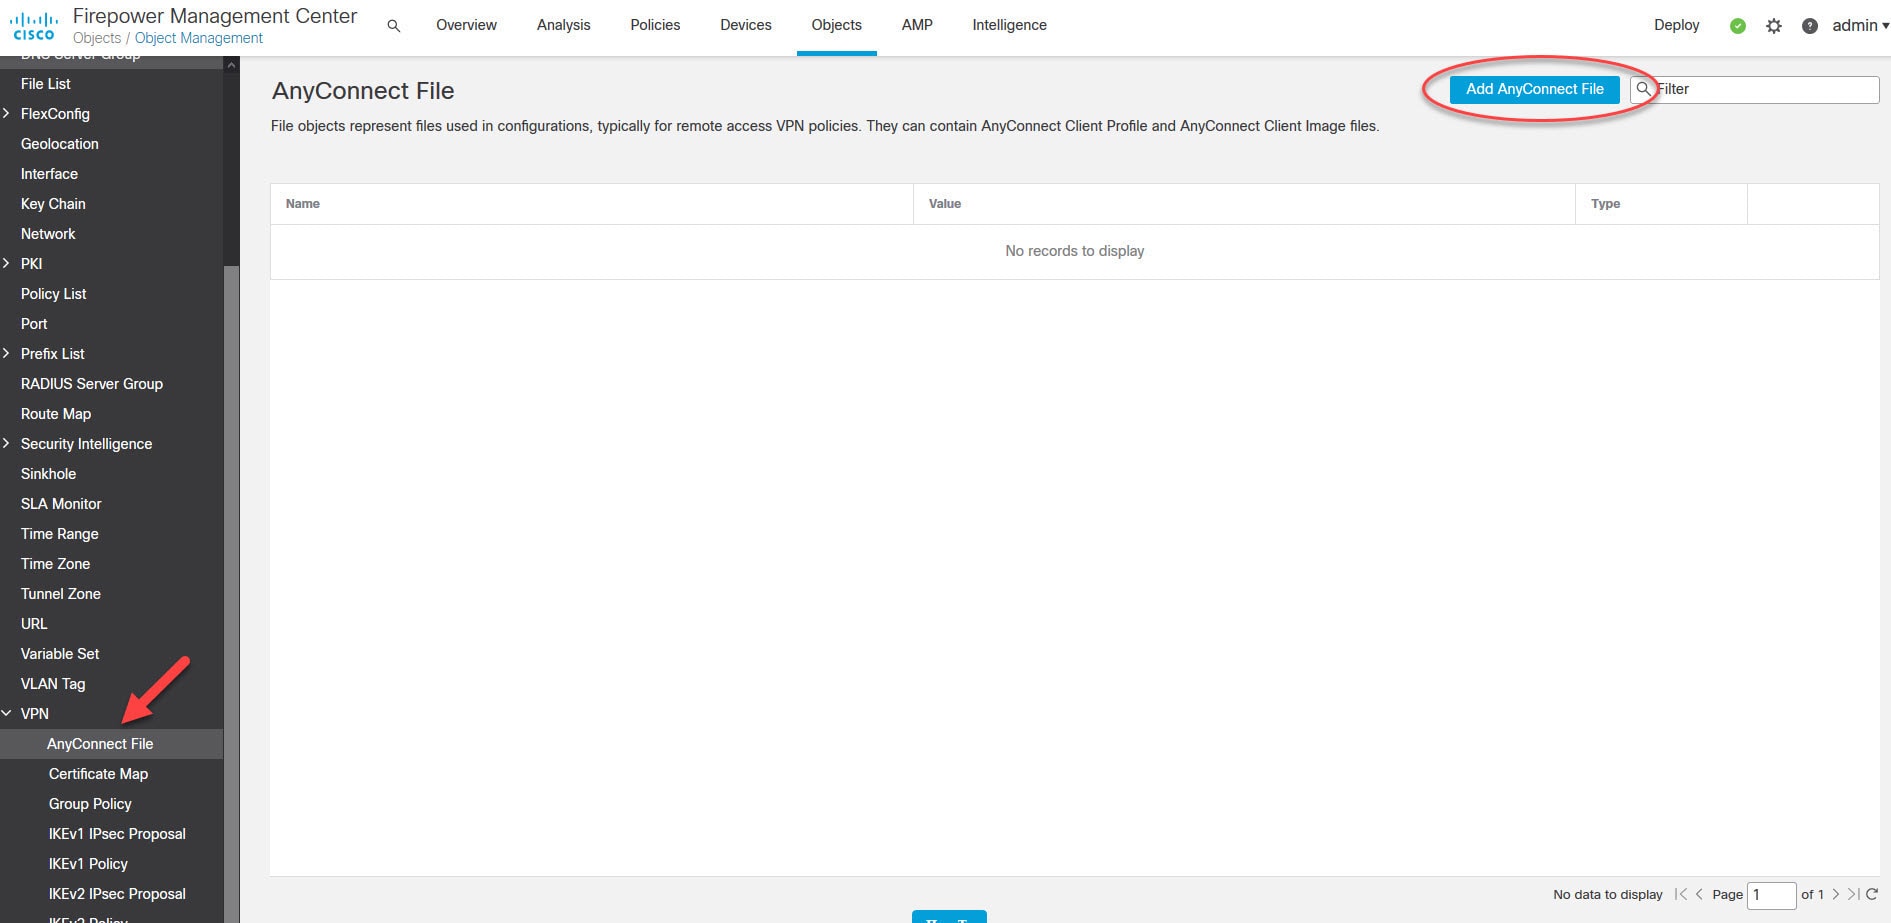
Go to Objects > Object Management > VPN > AnyConnect File > Add AnyConnect File

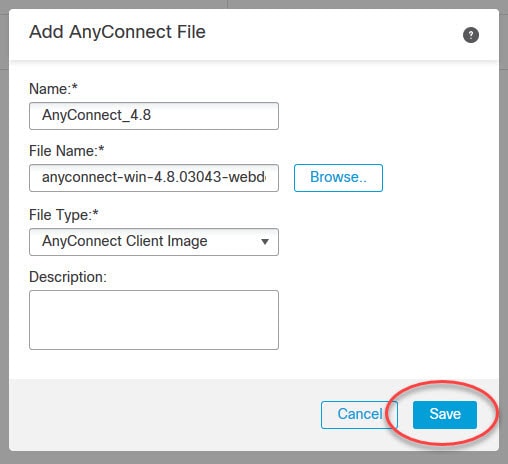
Give the profile a name, browse the AnyConnect package that you downloaded from Cisco website, and save. You can find the AnyConnect software at this link.

Step 3: Create the split tunnel access list for the AnyConnect SSL VPN tunnel

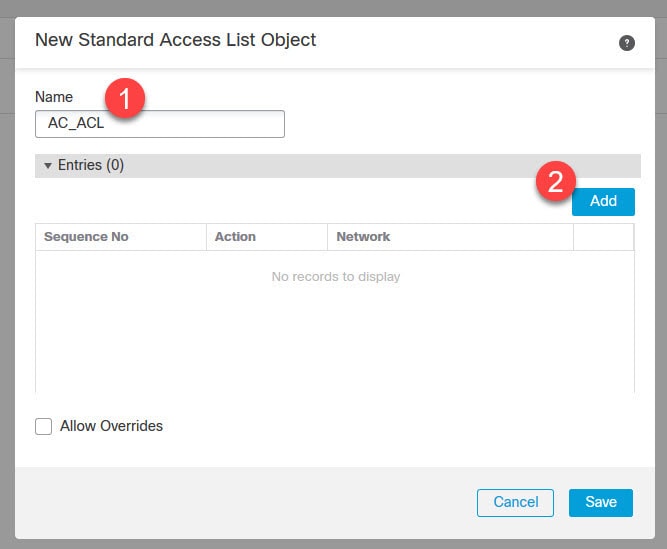
Go to Access List > Standard > Add Standard Access List

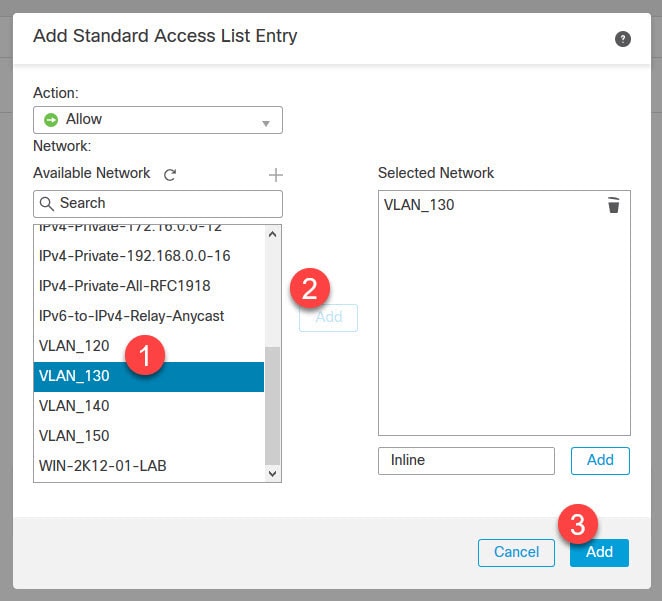
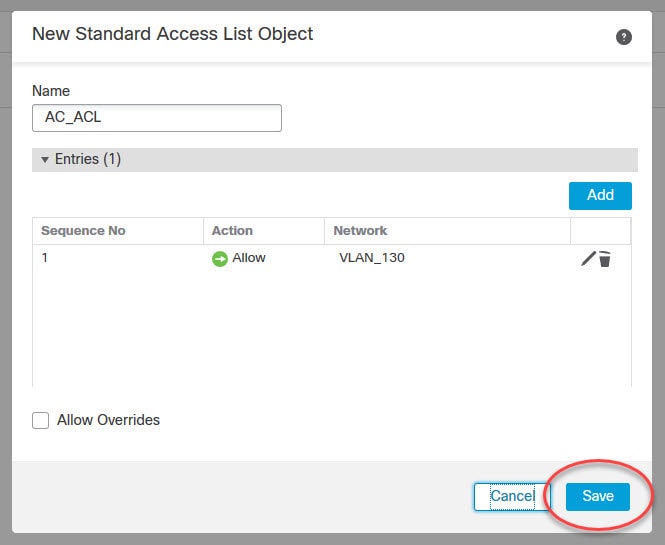
Give the access list a name, and click on Add to add the access list entry with the inside subnet we want to protect. In our case it is subnet 192.168.130.0/24.

The extended access lists are not supported with AnyConnect split tunnel. You can still configure and apply them to the AnyConnect policy. In that case, the FTD would ignore the destination bit and would only consider the source. However, I will show you a use case where using extended access lists would make sense in another post.

Step 4: Create the AnyConnect SSL VPN Group Policy

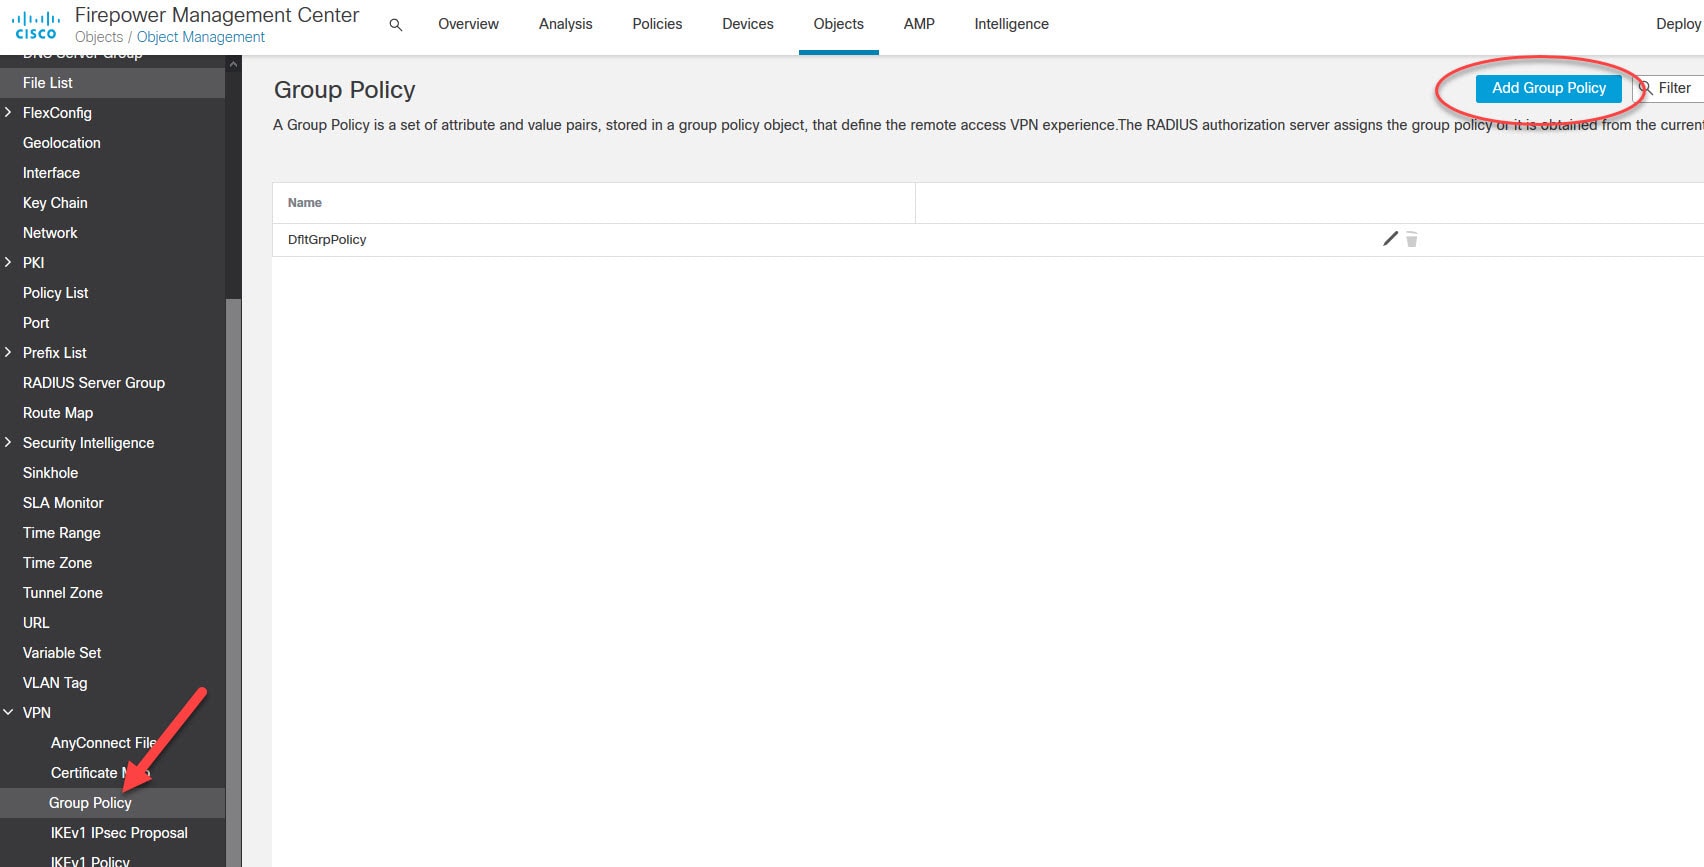
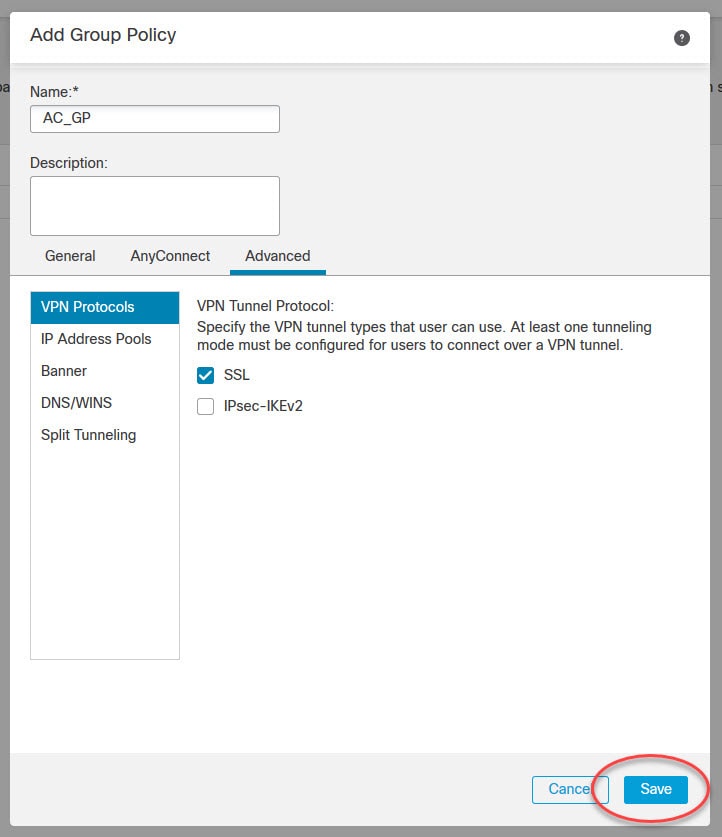
Go to VPN > Group Policy > Add Group Policy

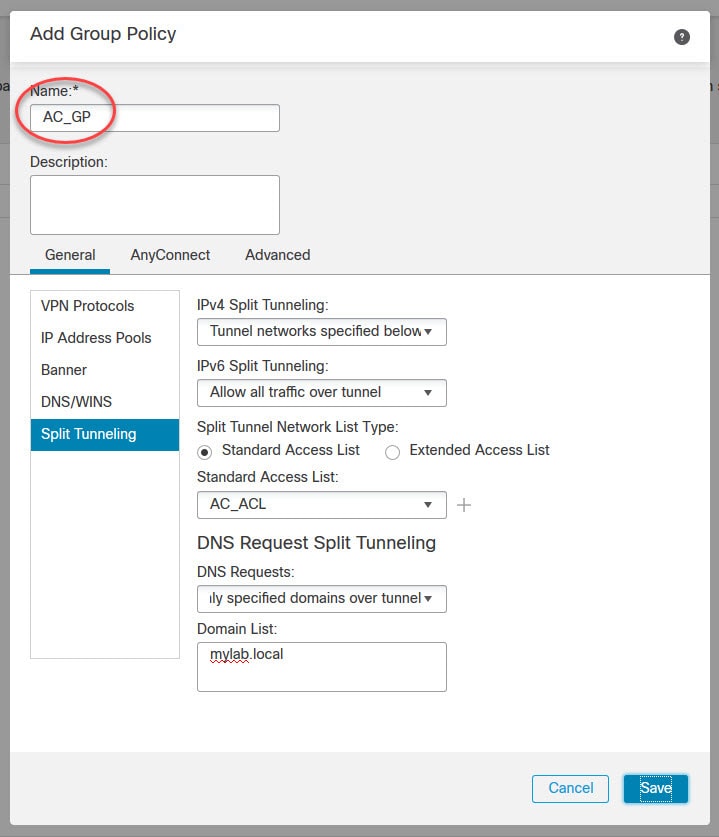
As you can see, I used the Send only specified domains over tunnel DNS split request option. This will allow the AnyConnect clients to send the DNS queries for any subdomain of mylab.local over the VPN tunnel.

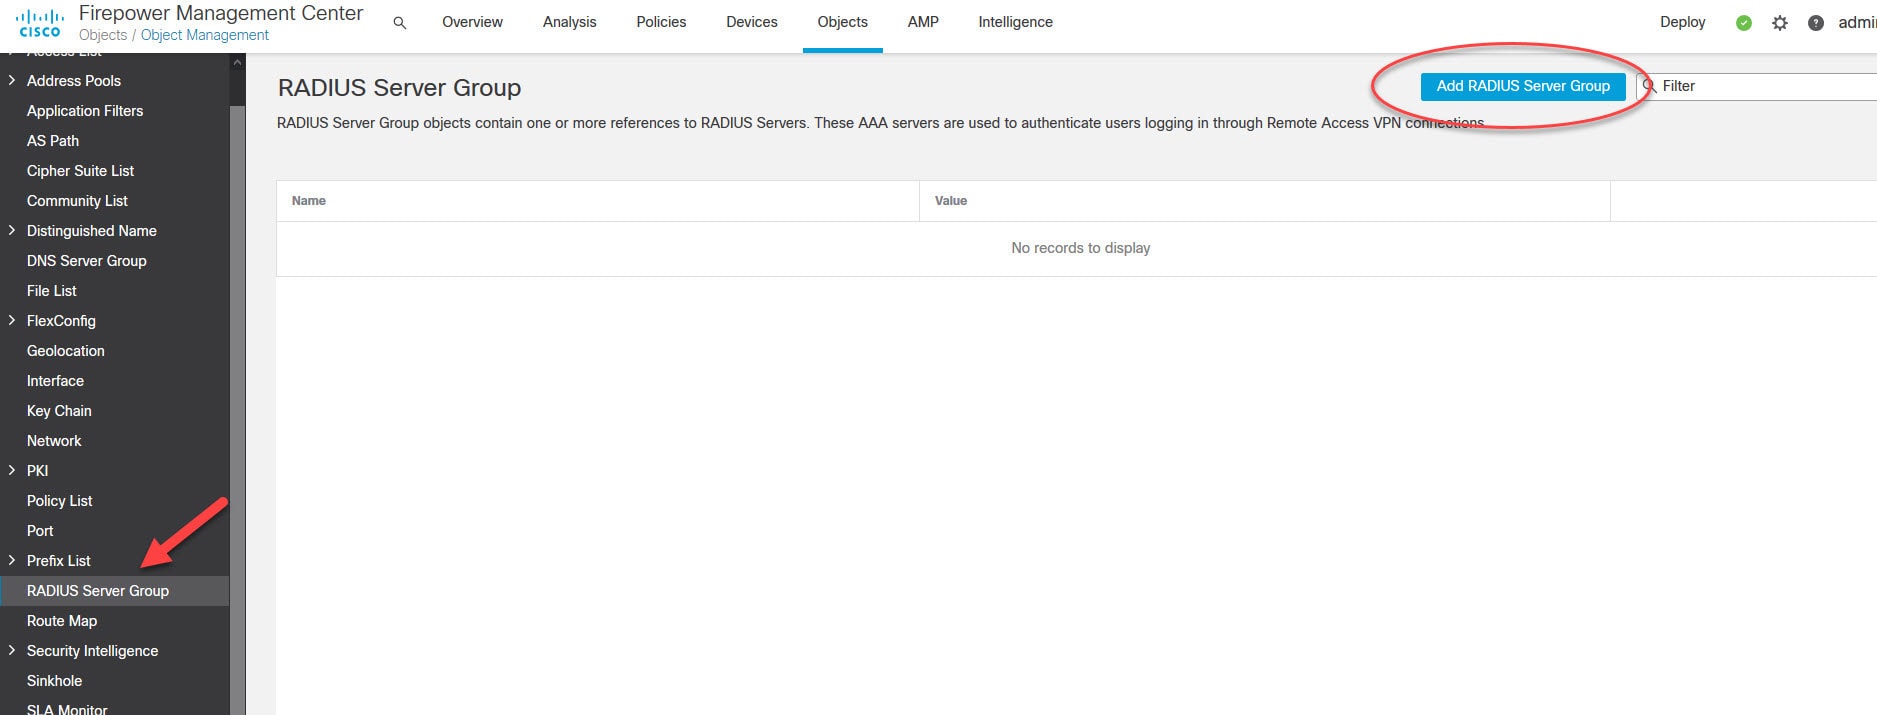
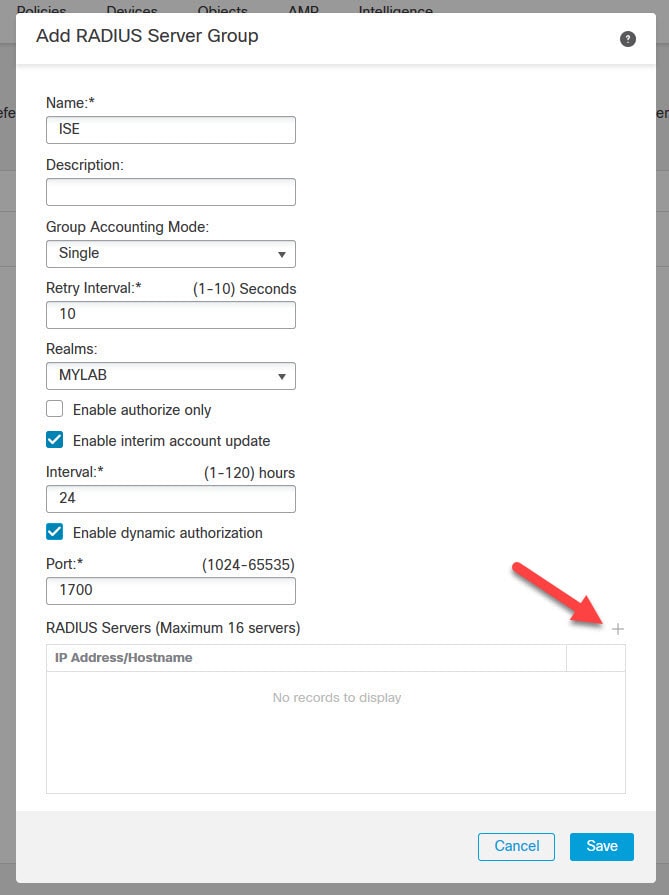
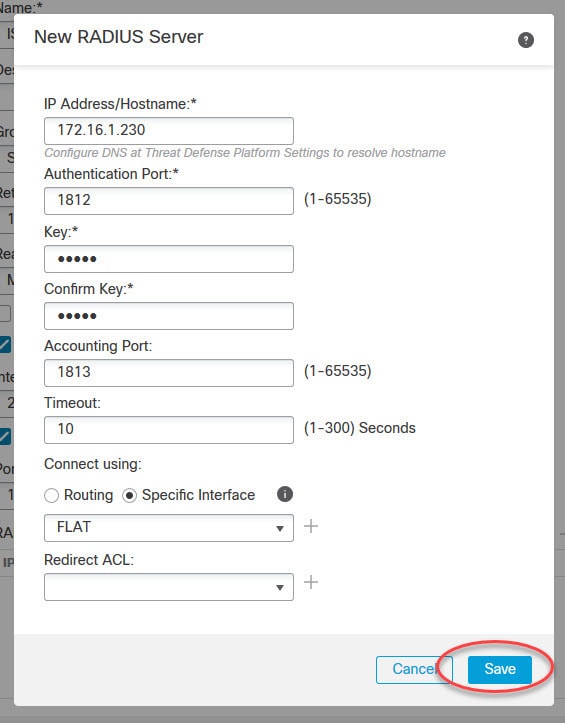
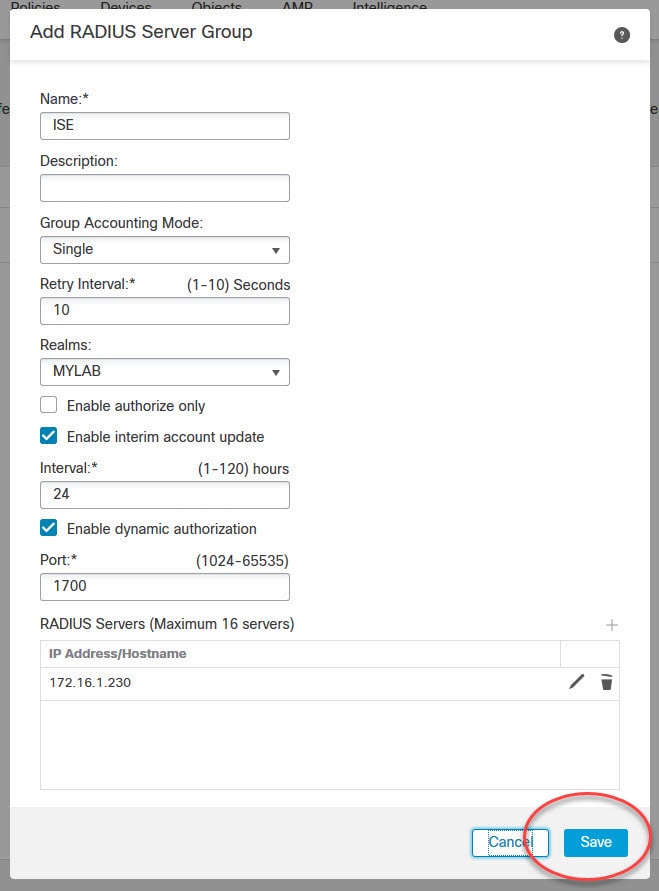
Step 5: Create the RADIUS Server Group

Go to RADIUS Server Group > Add RADIUS Server Group

Step 6: Create the trust point on the FTD

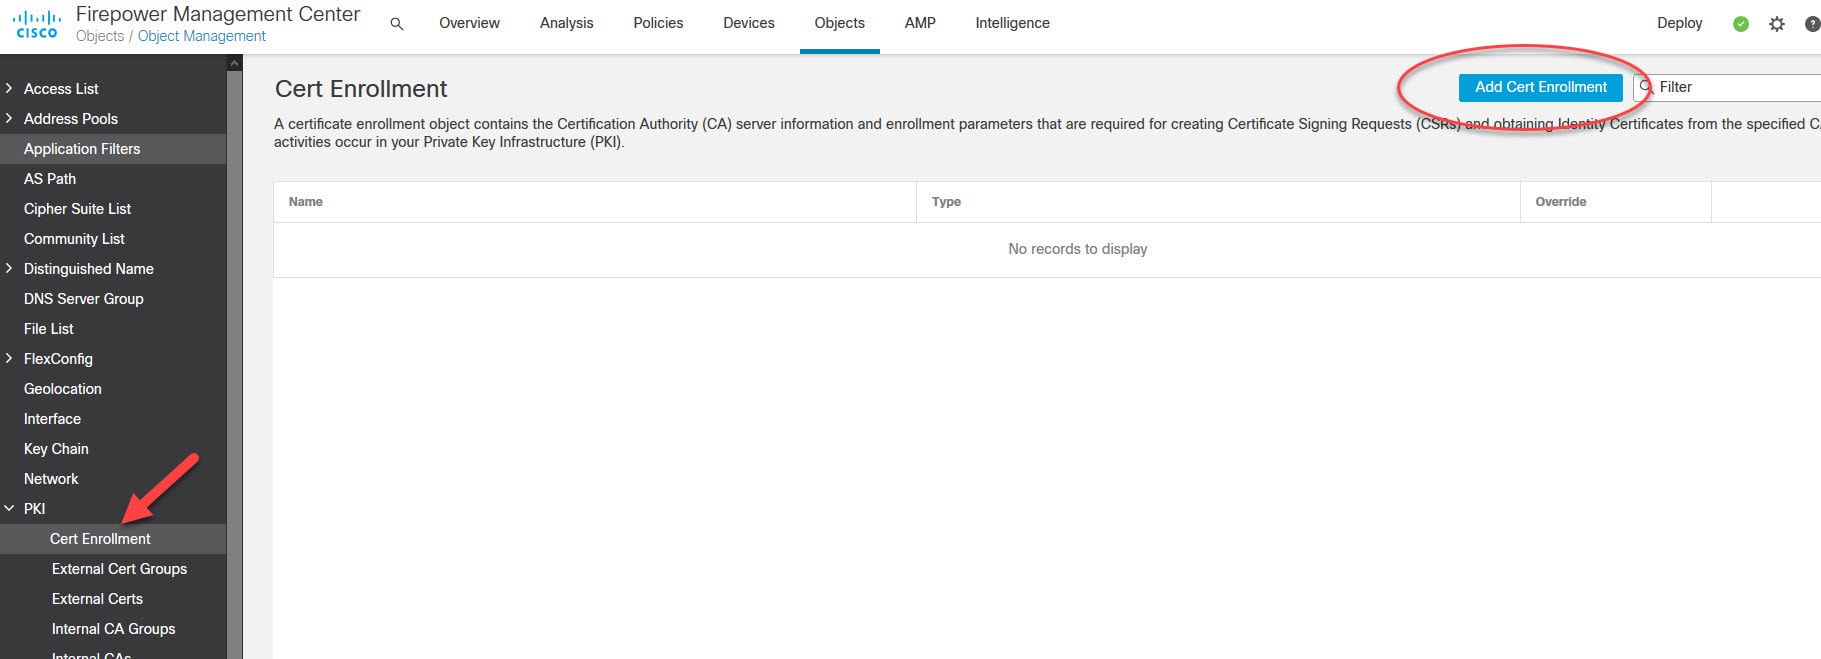
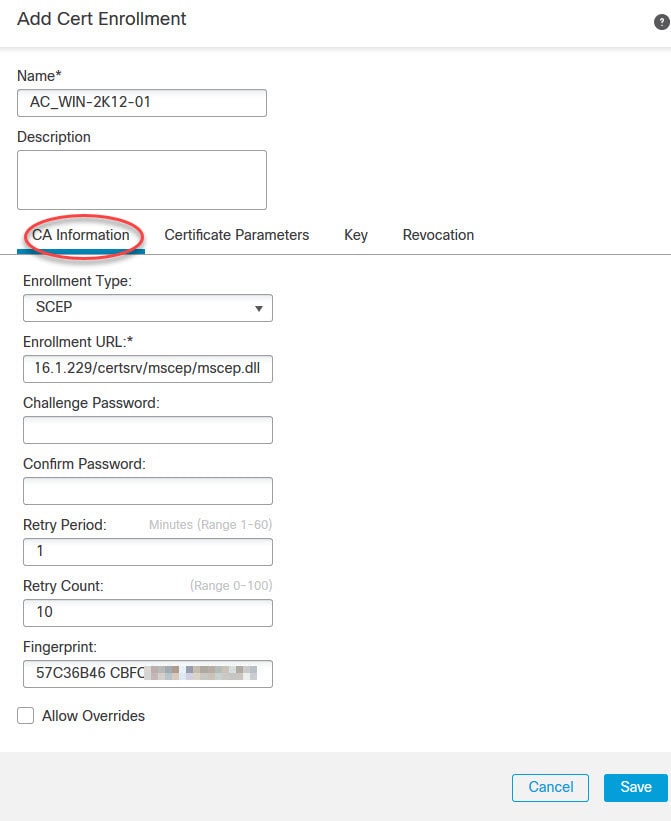
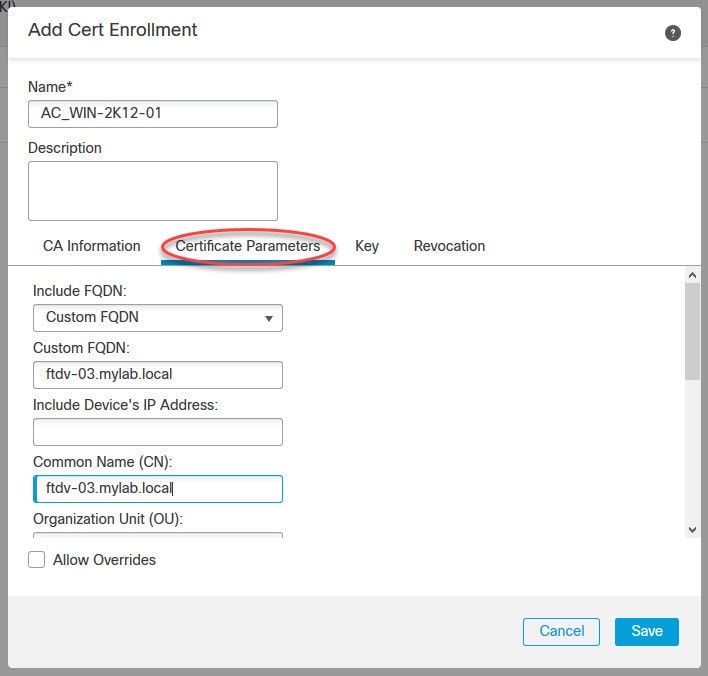
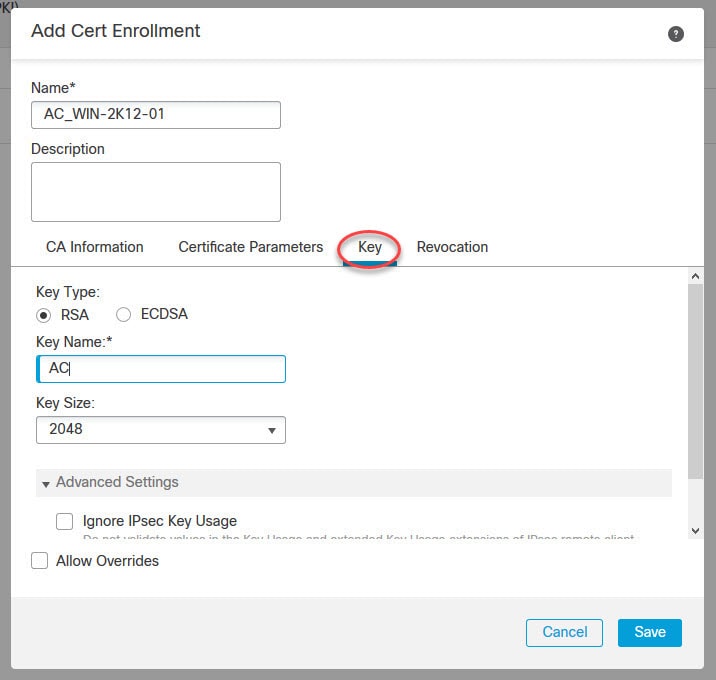
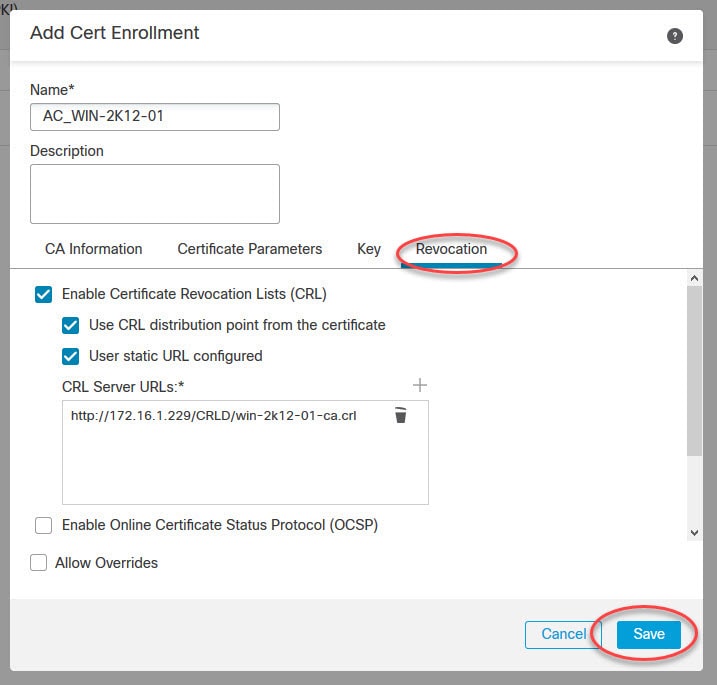
Go to Object > Object Management > PKI > Cert Enrollment > Add Cert Enrollment

I used SCEP as the enrollment type. However, you can change that use the type that works better for your environment.

I used the traditional CRL check, however, you can change this based on your environment.

Step 7: Create the AnyConnect SSL VPN Policy

Go to Devices > VPN > Remote Access > Add

You can use either the Add button or the Add a new configuration hyperlink in the middle of the page. Both will take you to the Remote Access VPN Policy Wizard.

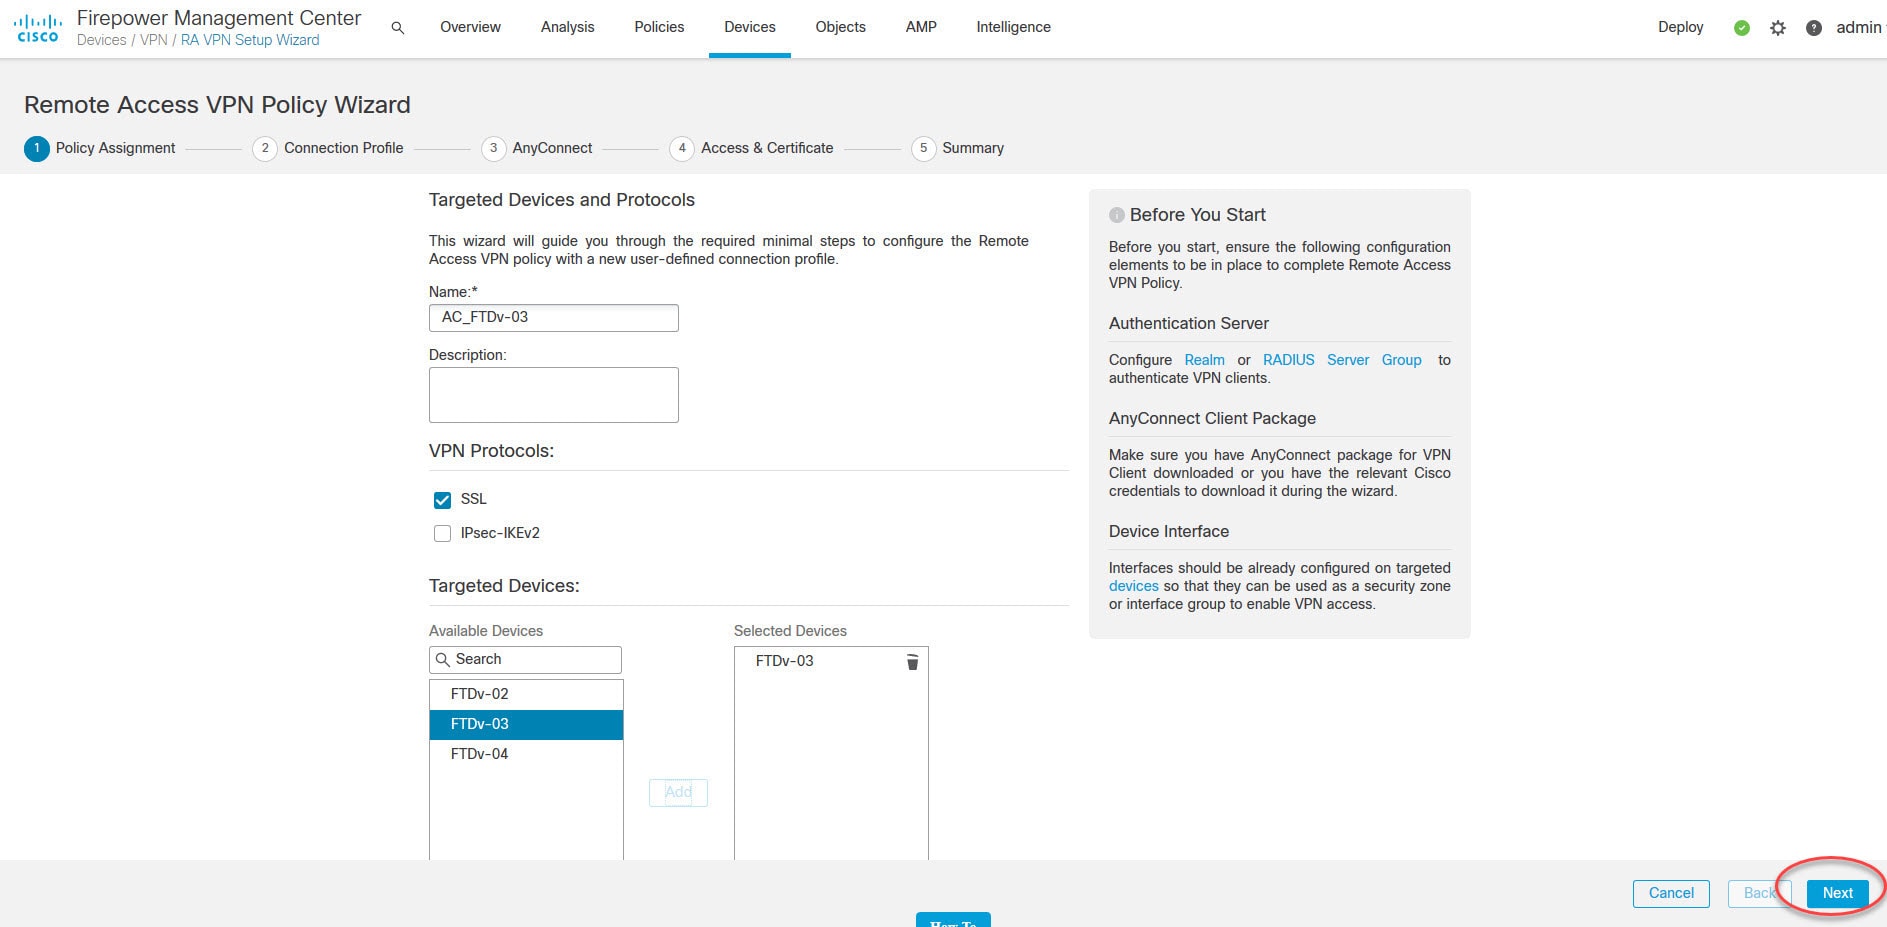
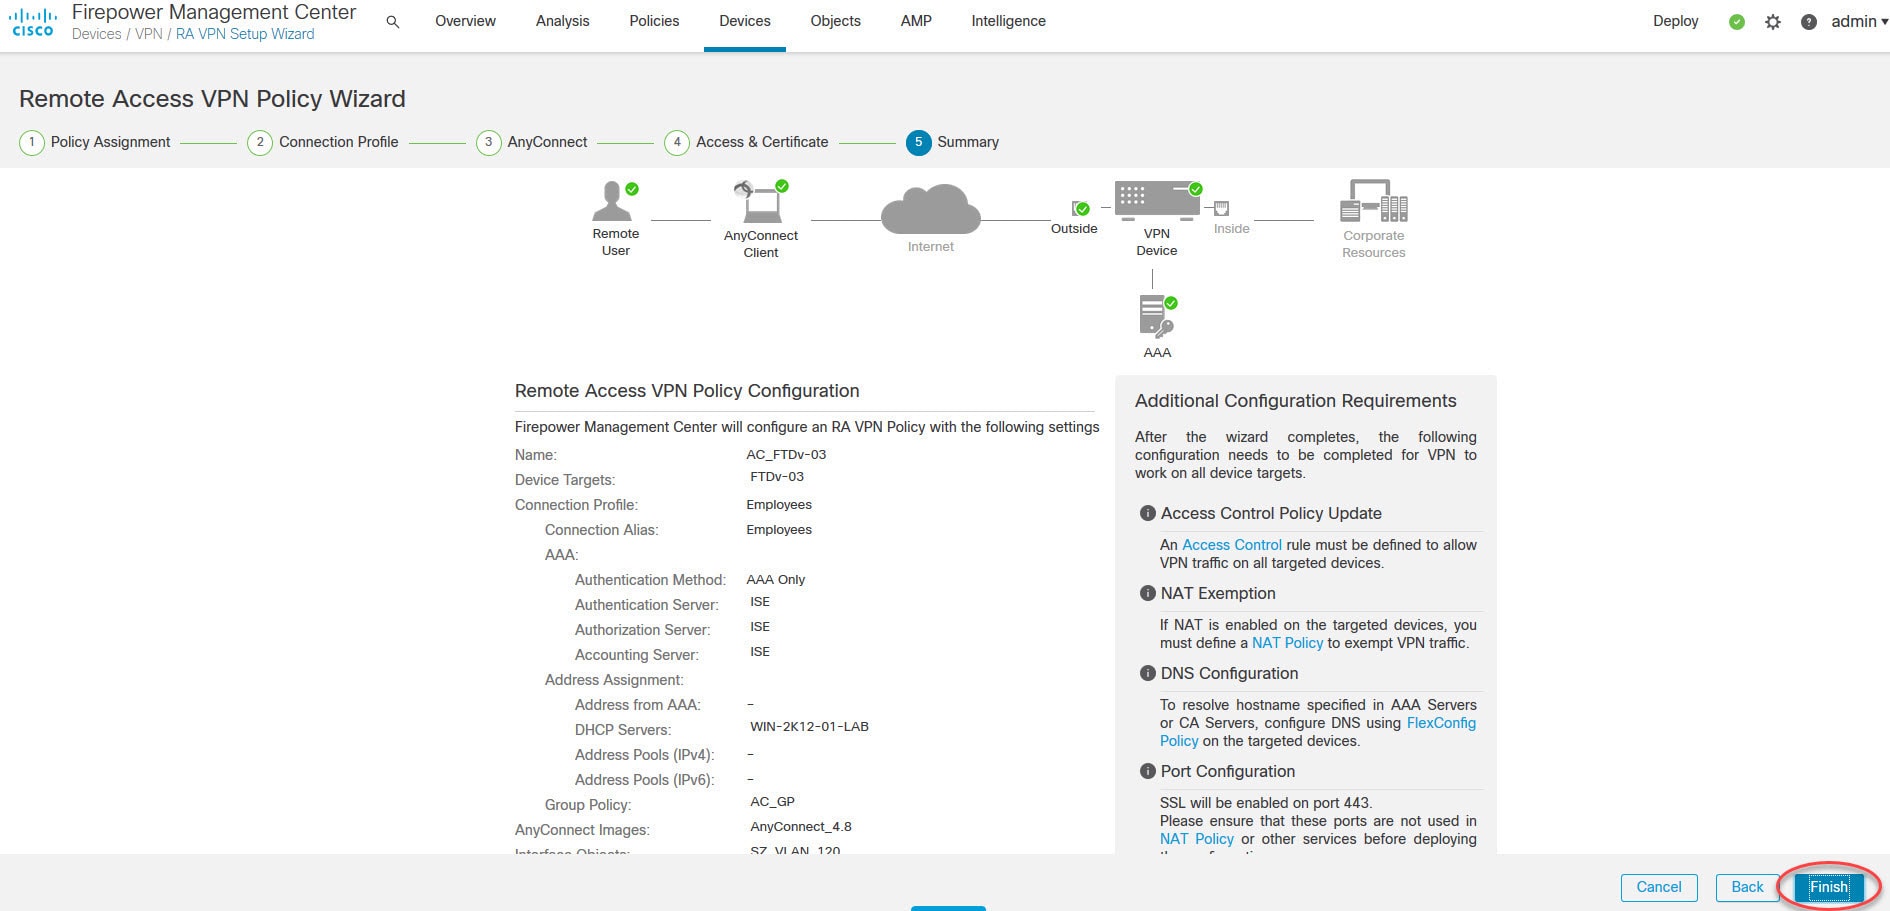
Give the policy a name, deselect IPsec-IKEv2, select the interested FTD device and click Next

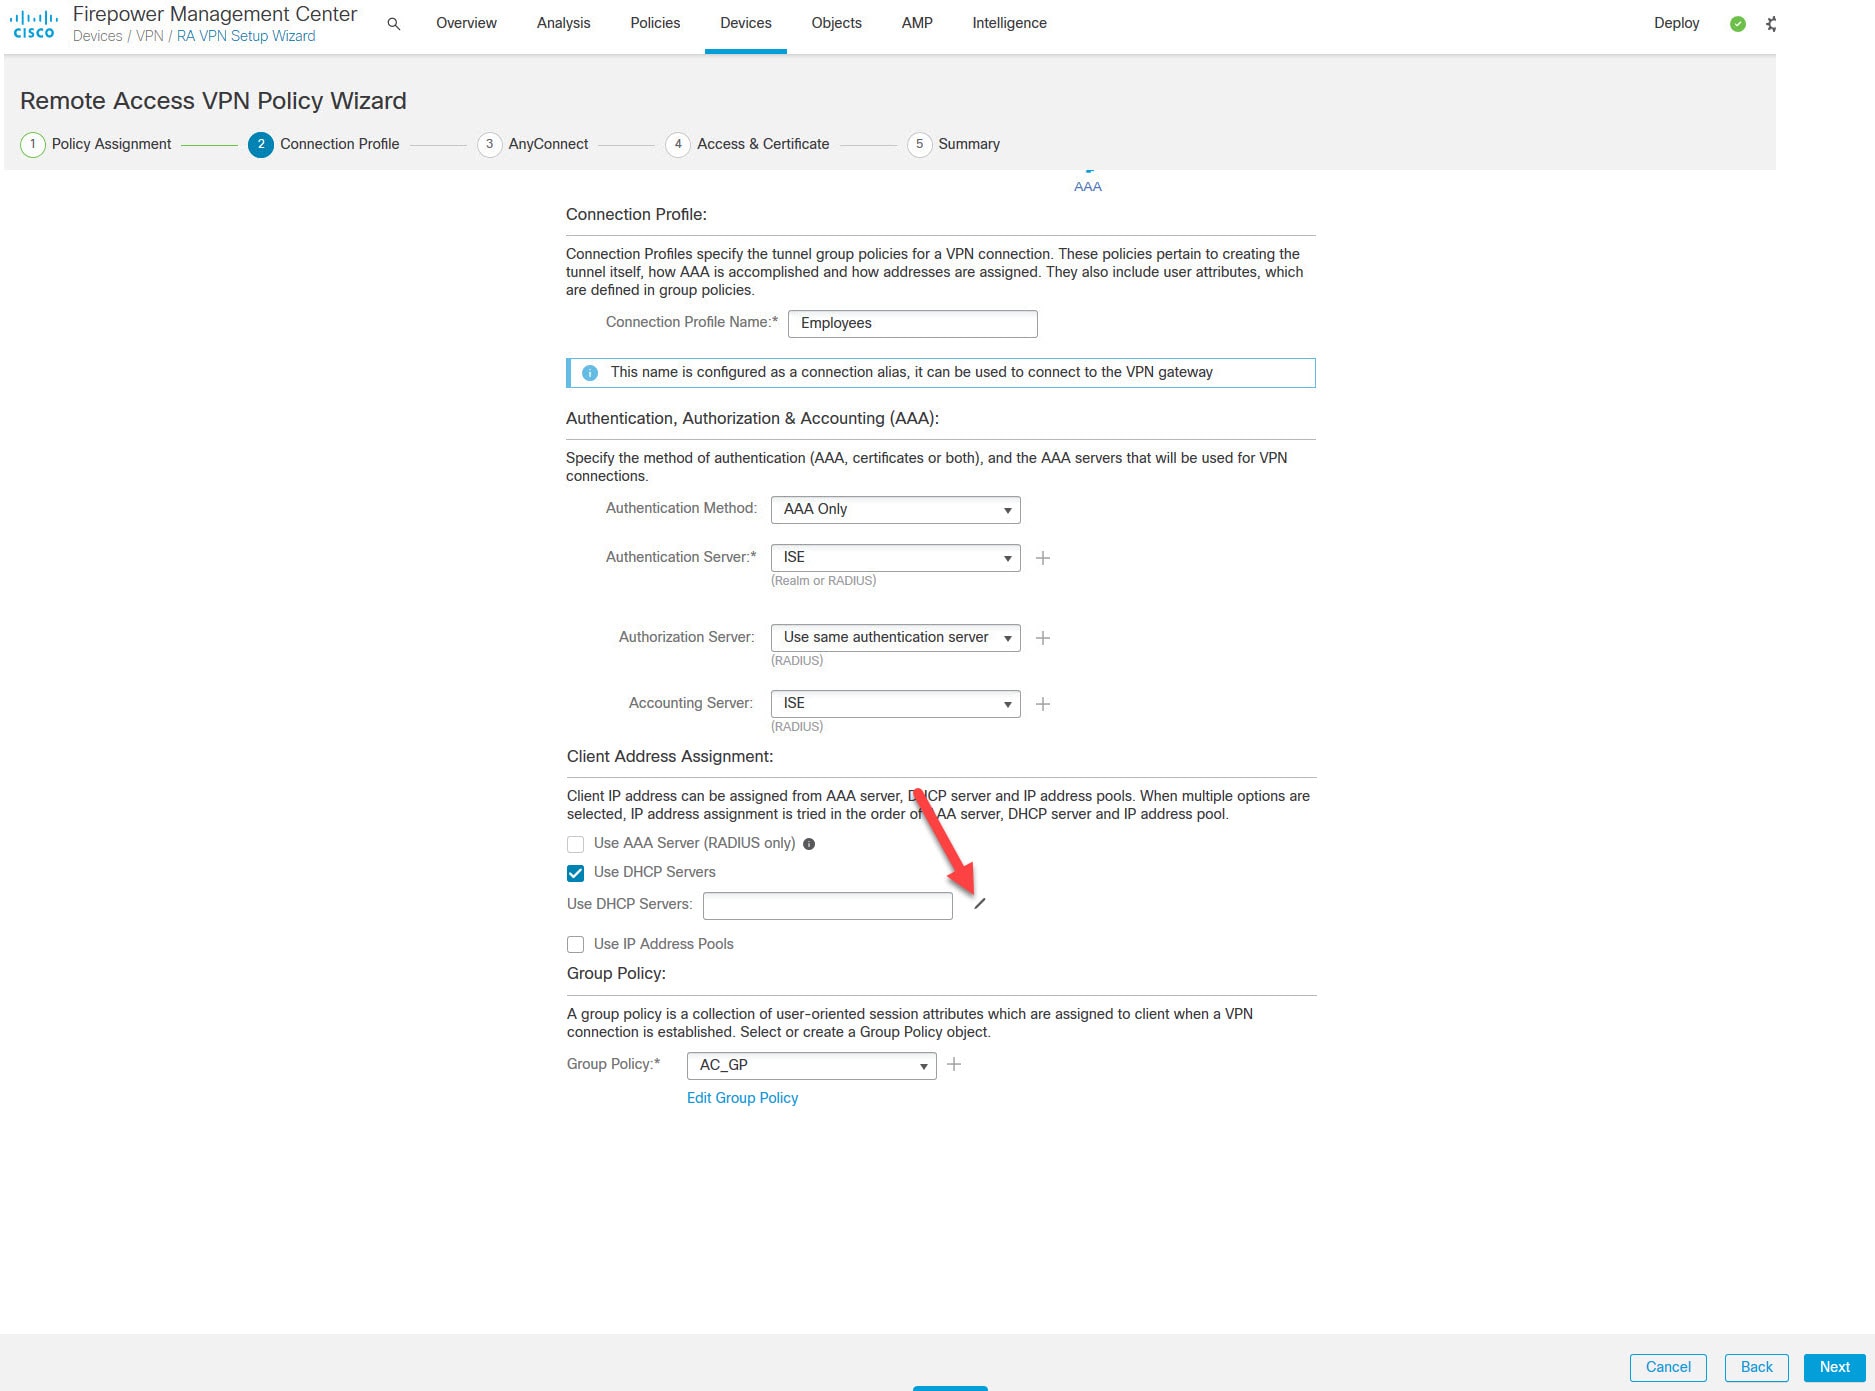
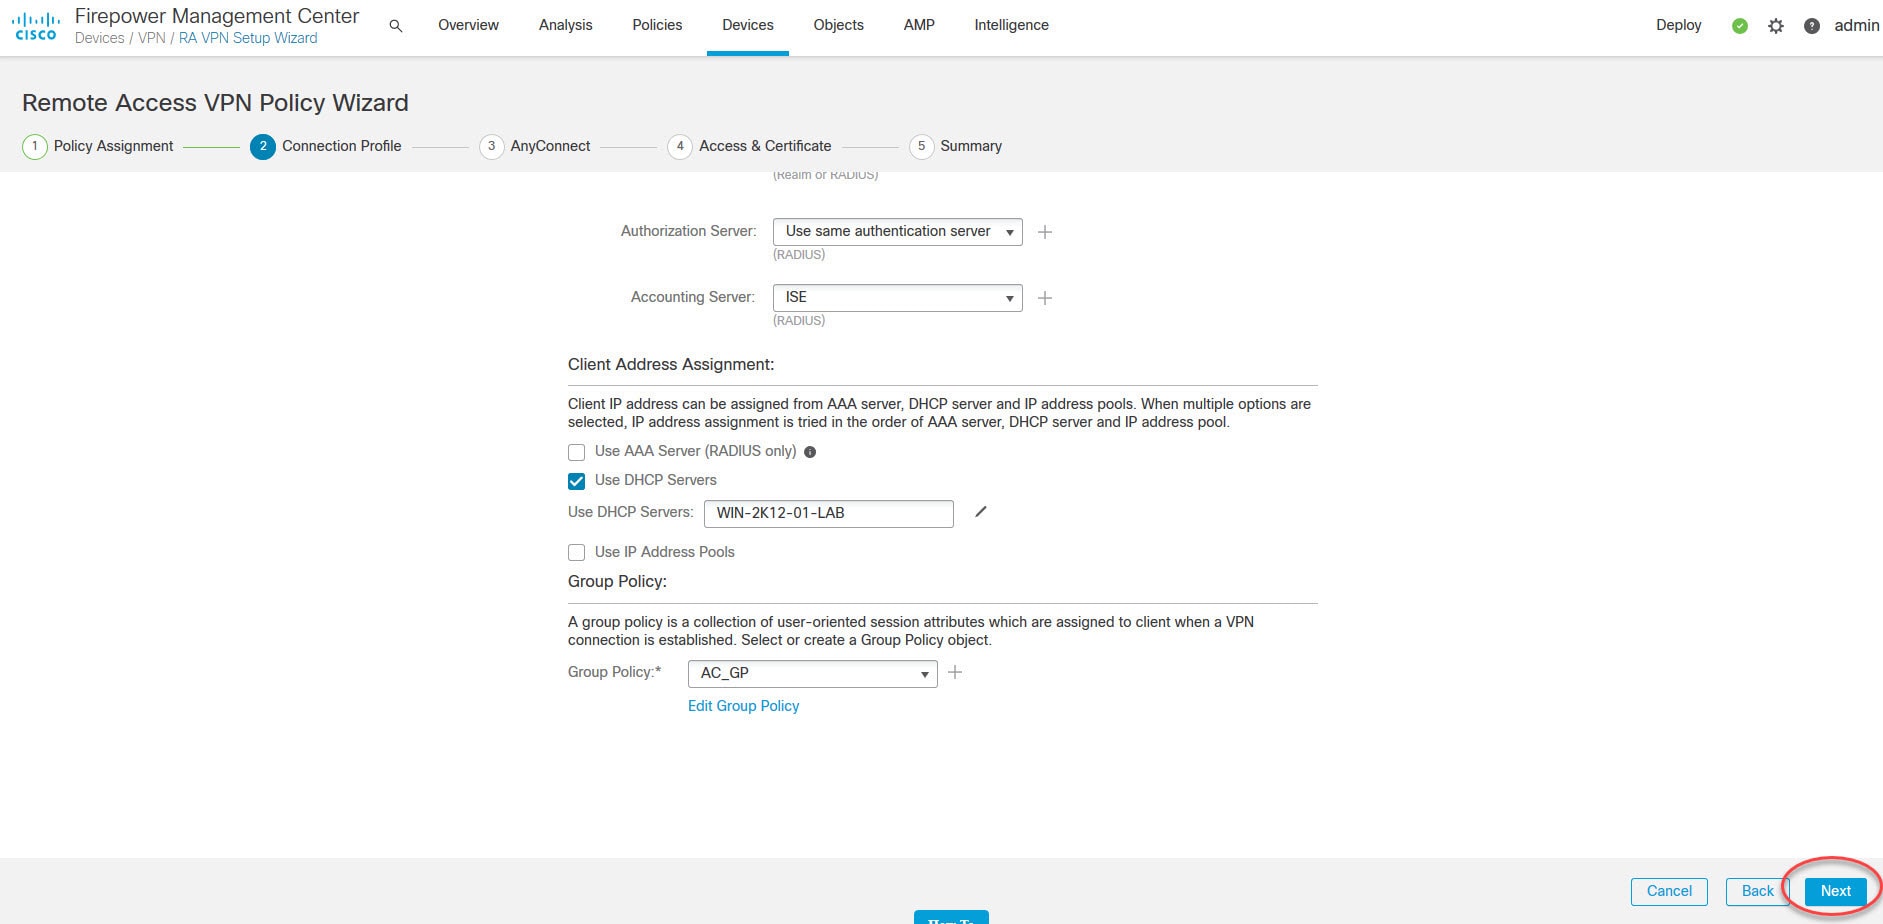
Select the RADIUS server we created in step 5 for AAA, select the group policy we created in step 4, select Use DHCP Servers and click on the pencil icon to add the internal DHCP server to the policy

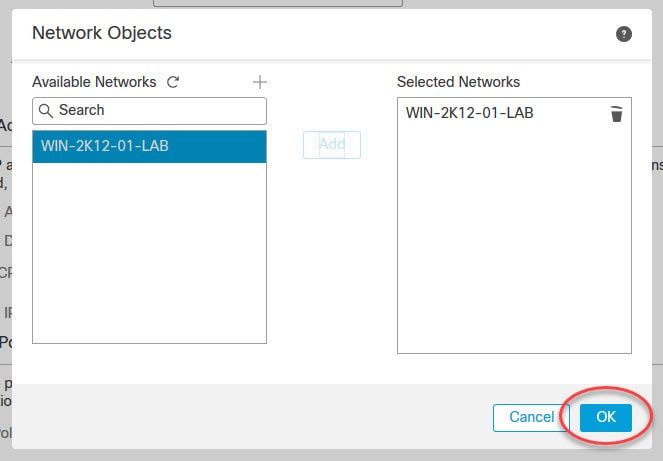
An object with the WIN-2K12-01-LAB was already created in my lab. To create a new one go to Objects > Object Management > Network > Add Object. Otherwise, you can create one by clicking on the plus sign in the below screen.

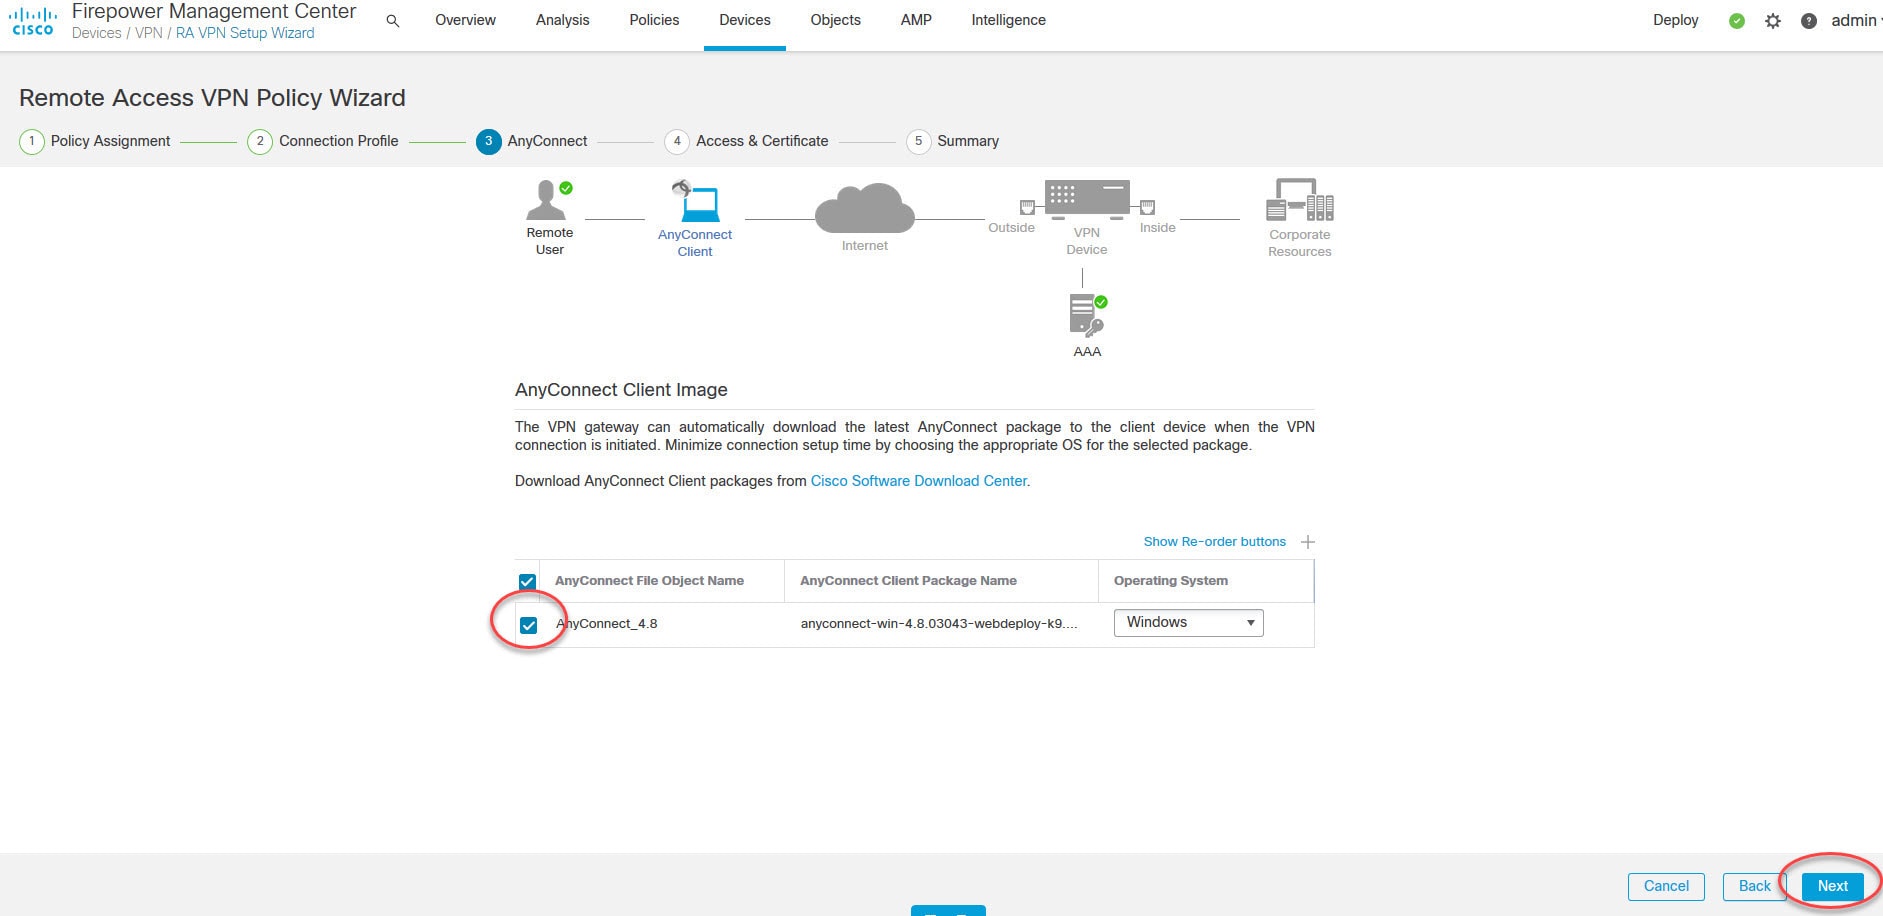
Select the AnyConnect package we uploaded in step 2 and click Next

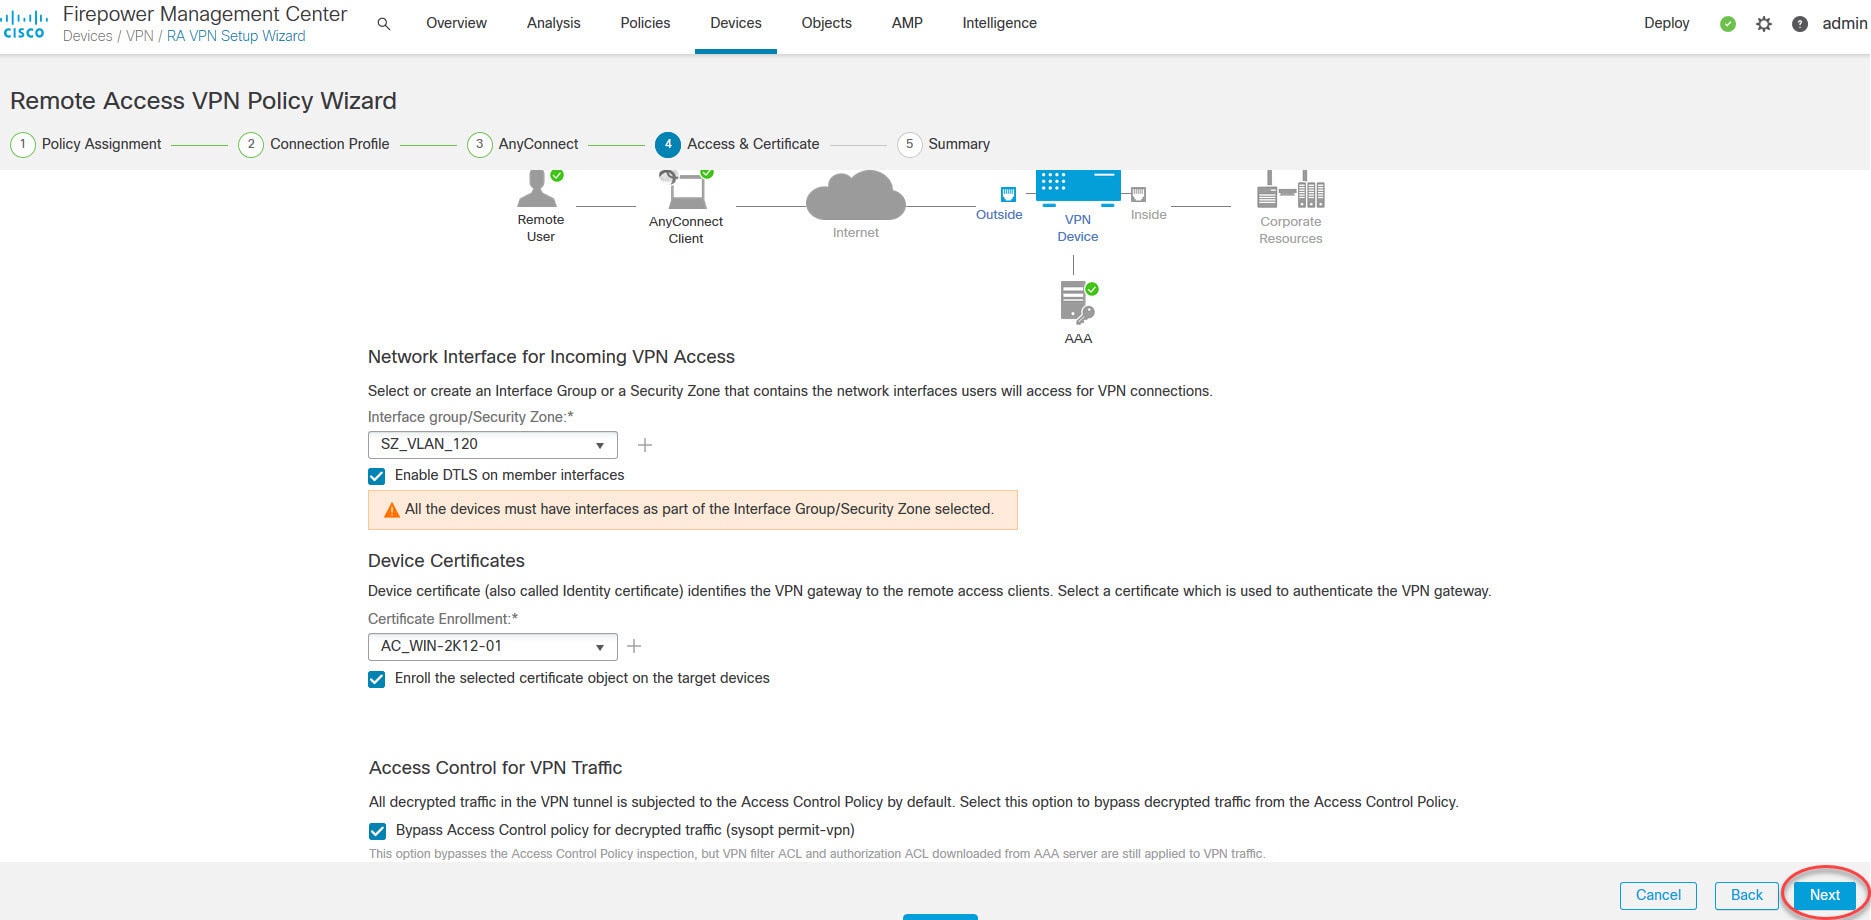
Select the outside security zone, the trust point we created in step 6 and tick the check box in the Access Control for VPN Traffic, and click Next

Enabling Bypass Access Control policy for decrypted traffic will allow the AnyConnect SSL VPN traffic to bypass the security policies check on the FTD. This means AnyConnect clients will have full access to your entire network. Therefore, you should implement some VPN filtering measures when you enable this feature to only allow the required traffic.

Step 8: Create NAT exemption for the AnyConnect SSL VPN traffic

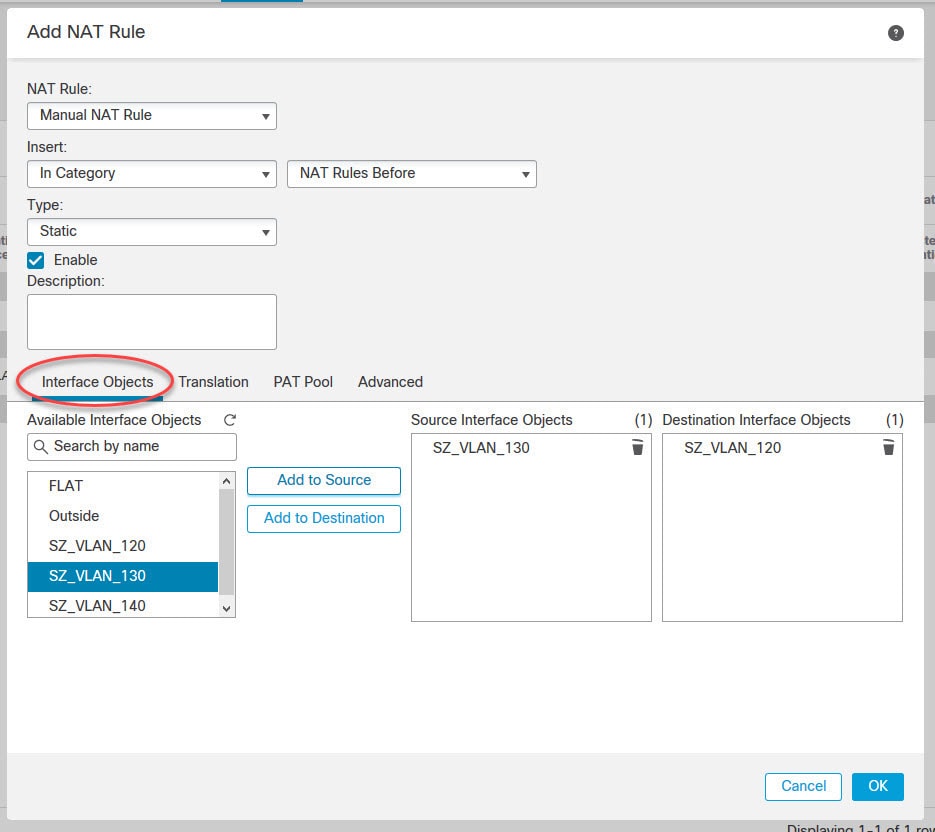
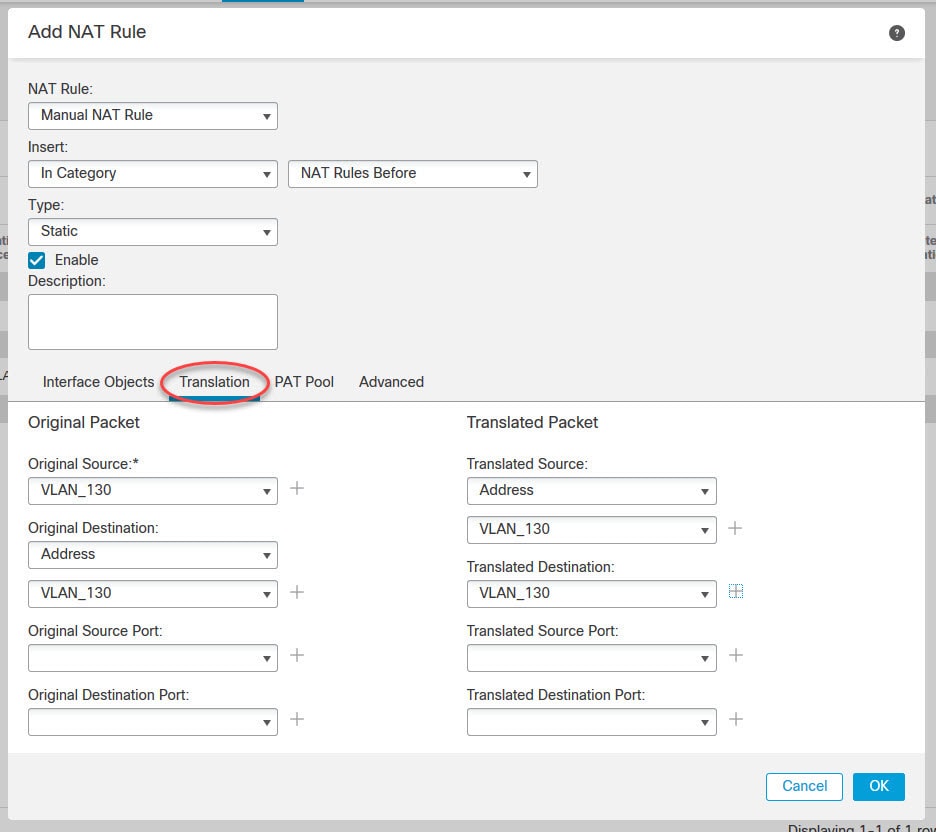
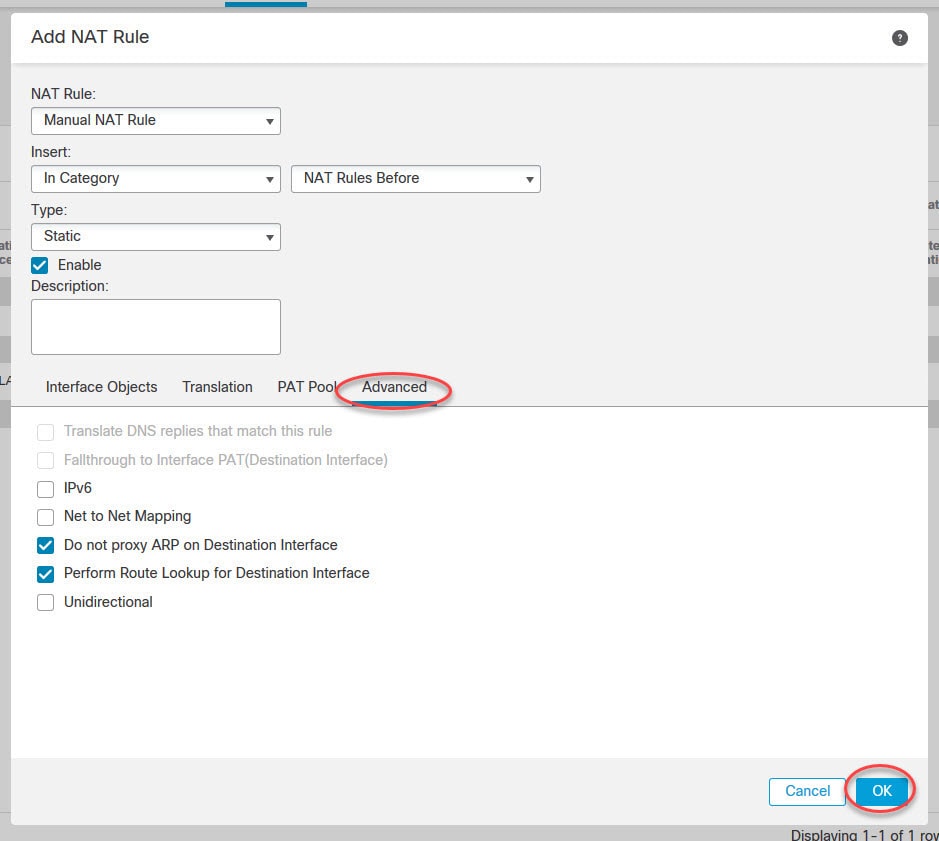
Go to Devices > NAT >click the pencil icon to edit the NAT policy of the interested FTD device, and click on Add Rule

As you can see above, we selected the subnet 192.168.130.0/24 for both Original and Translated source and destination. This basically translated the subnet 192.168.130.0/24 to itself. This is called Identity NAT which is the same as NAT exemption.

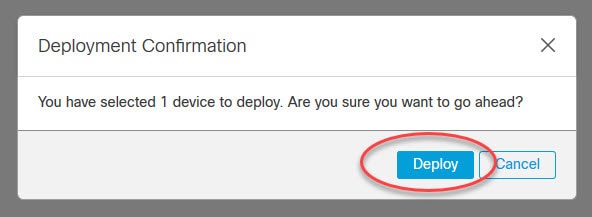
Step 9: Deploy the changes

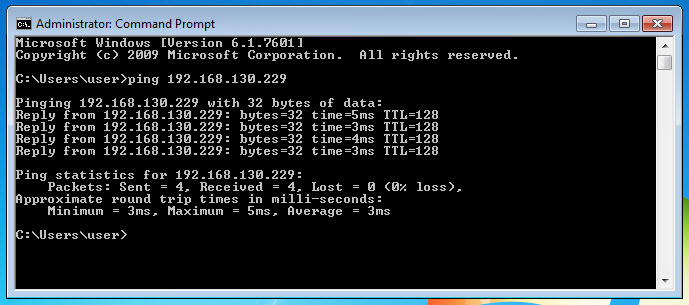
Verification

This wraps up this post about how to configure AnyConnect SSL VPN in FMC.
Thank you for reading!

Posted in Blog, Firepower, FMC, FTD, Security, Tips & Tricks

Related Posts

  • Hi, Can you please show how to configure Dynamic Split Tunneling Using FlexConfig, I want send/excluse FDQN based urls rather than IP address in split tunnel.

    • I will do my best to put something in in the next coming few weeks. You might want to subscribe to my newsletter to ensure you get the latest posts updates.

  • >
    Scroll To Top
    Share via
    Copy link
    Powered by Social Snap