In this post, I am going to show you how to set up FMC external authentication with RADIUS. Why we would need that?!, simply put, to have a scalable solution in our environment that will allow us to manage accesses to our FMC appliance. Even if we configure the FMC with an external authentication server, we do still have the local admin account enabled that we can use in case the external authentication server is down.
In this lab, we will configure two types of web accesses to FMC, one for admins with full access level, and another for read-only users with minimal access level. We will also configure the FMC access through CLI for admin users.
Configuring FMC external authentication with RADIUS is pretty straightforward, there are a couple of things we need to consider when configuring it, but the rest of the steps are pretty simple. Our RADIUS server in this lab is ISE, we have two ISE nodes for redundancy. The topology is simple, we have both ISE and FMC connected in the same broadcast domain. Please note that in my posts I use authC as a shortcut for authentication, and authZ as a shortcut for authorization.
TOPOLOGY:

Our configuration will be divided into two parts, one part on ISE and another on FMC, let’s get started with ISE first. On ISE we need to configure a few things beginning from network devices going through authZ profiles and finally the policy set.
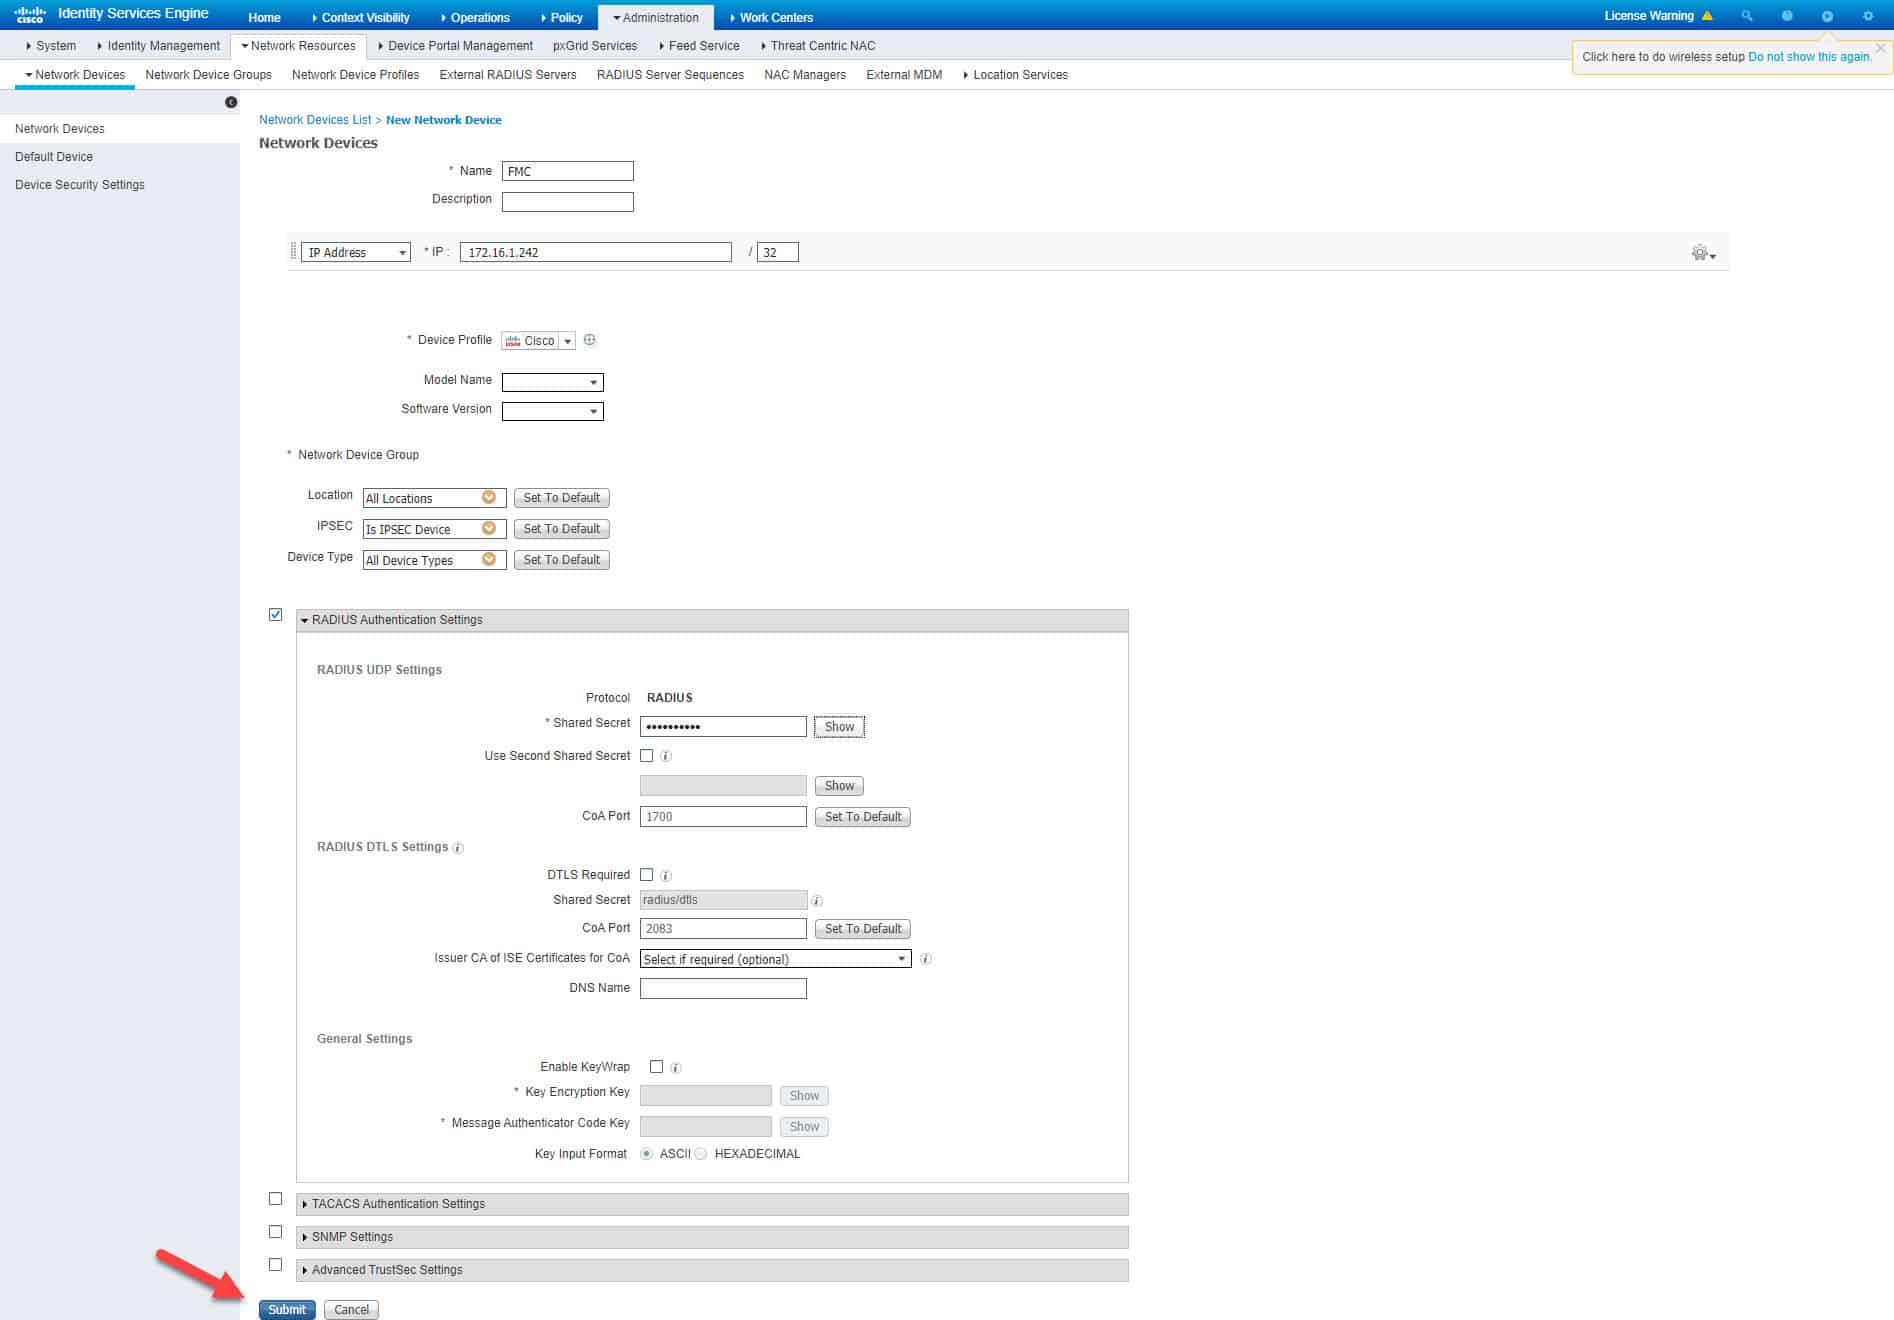
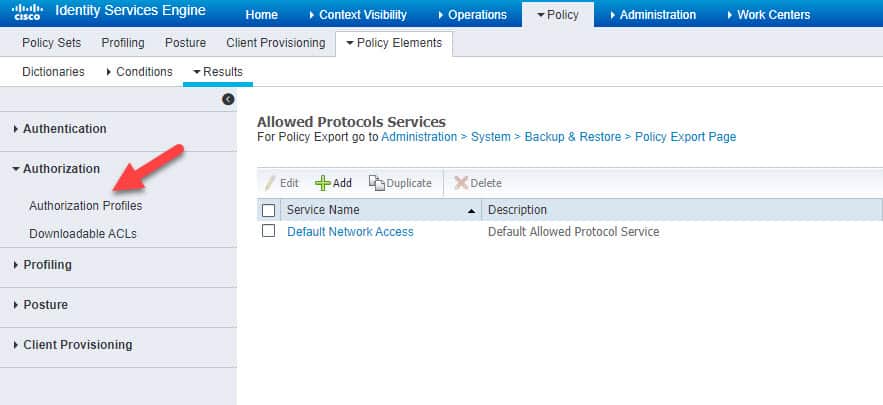
STEP 1: ADD FMC TO THE NETWORK DEVICES

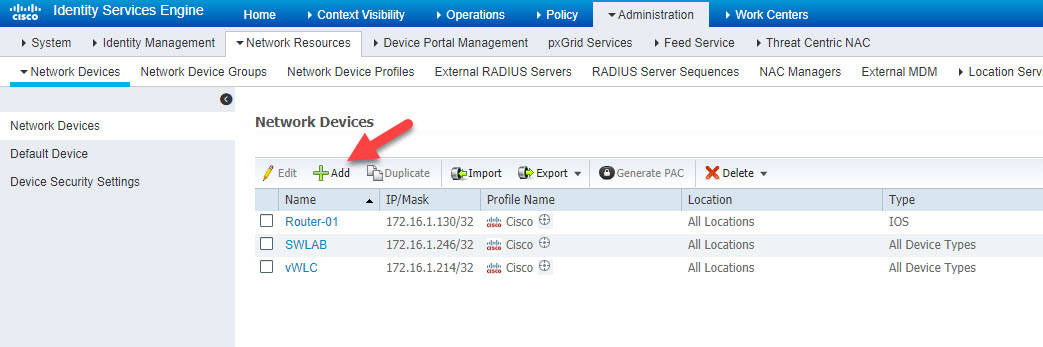
Give the network device object a name and insert the FMC IP address and a RADIUS preshared key. This preshared key is going to be used on FMC configuration when we will get there. Once done, hit Submit to save:
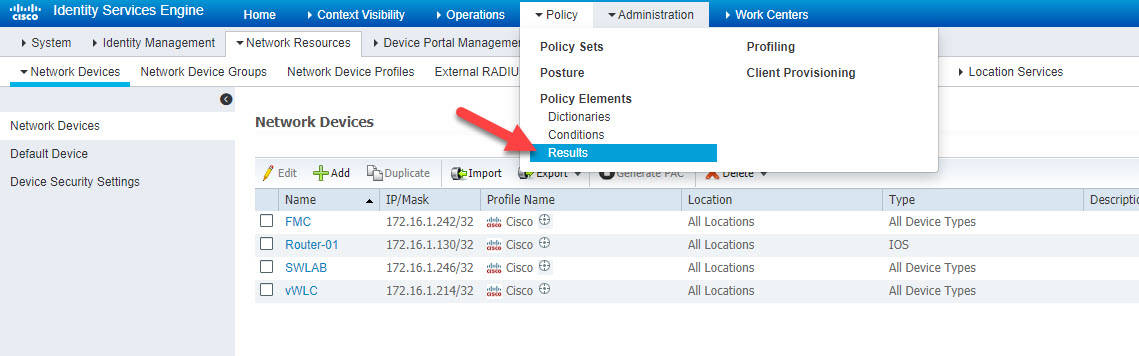
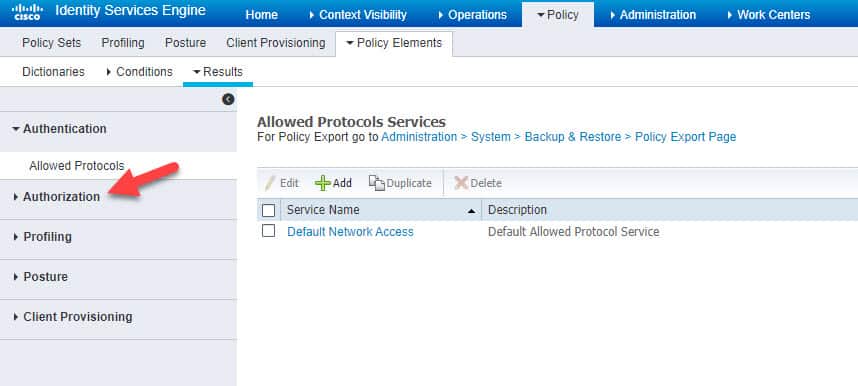
STEP 2: CREATE AUTHZ PROFILE FOR ADMIN USERS
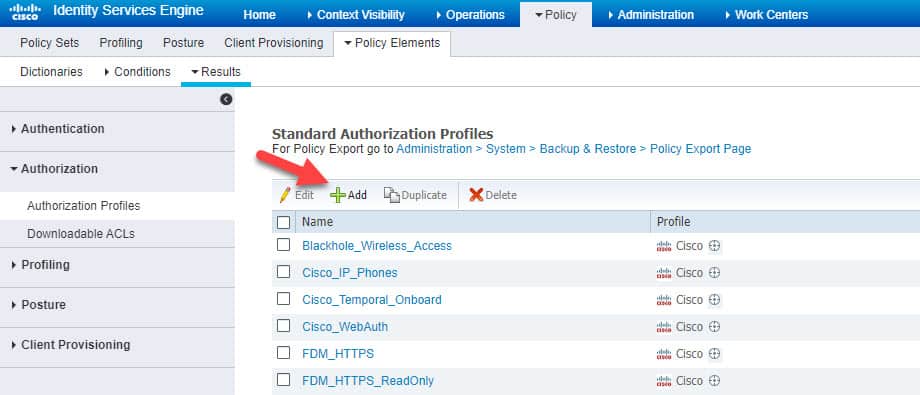
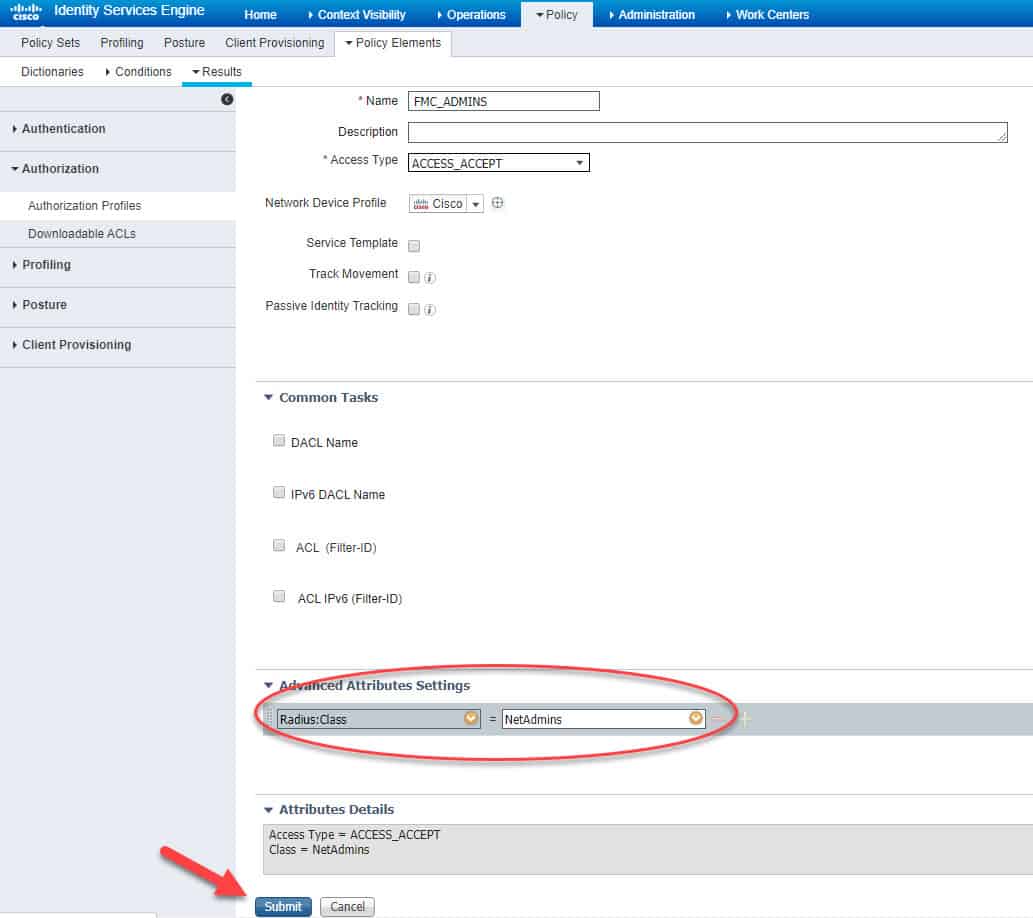
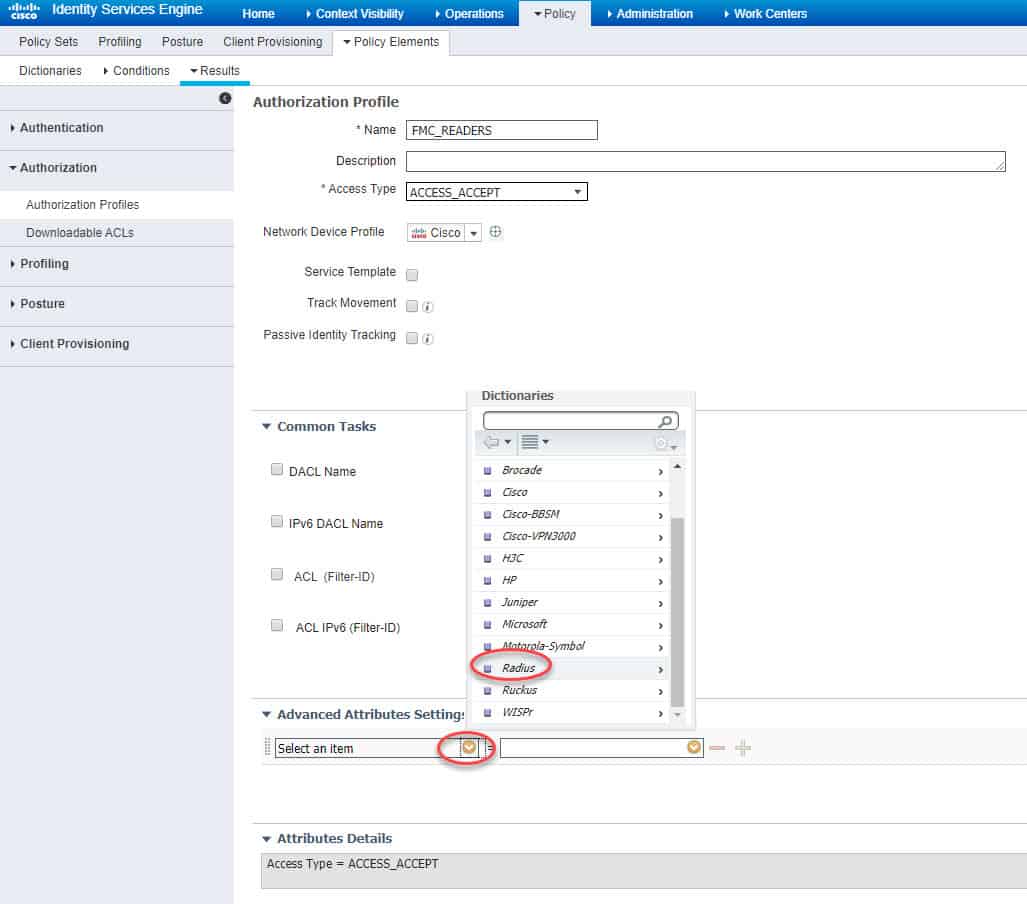
Give the authZ profile a name and then click on the little yellow icon next to Select an item in the Advanced Attributes Settings section, and click on Radius in the Dictionaries list. In our lab we will call the authZ profile name as FMC_ADMINS:

Search and click on the RADIUS attribute Class–[25]:
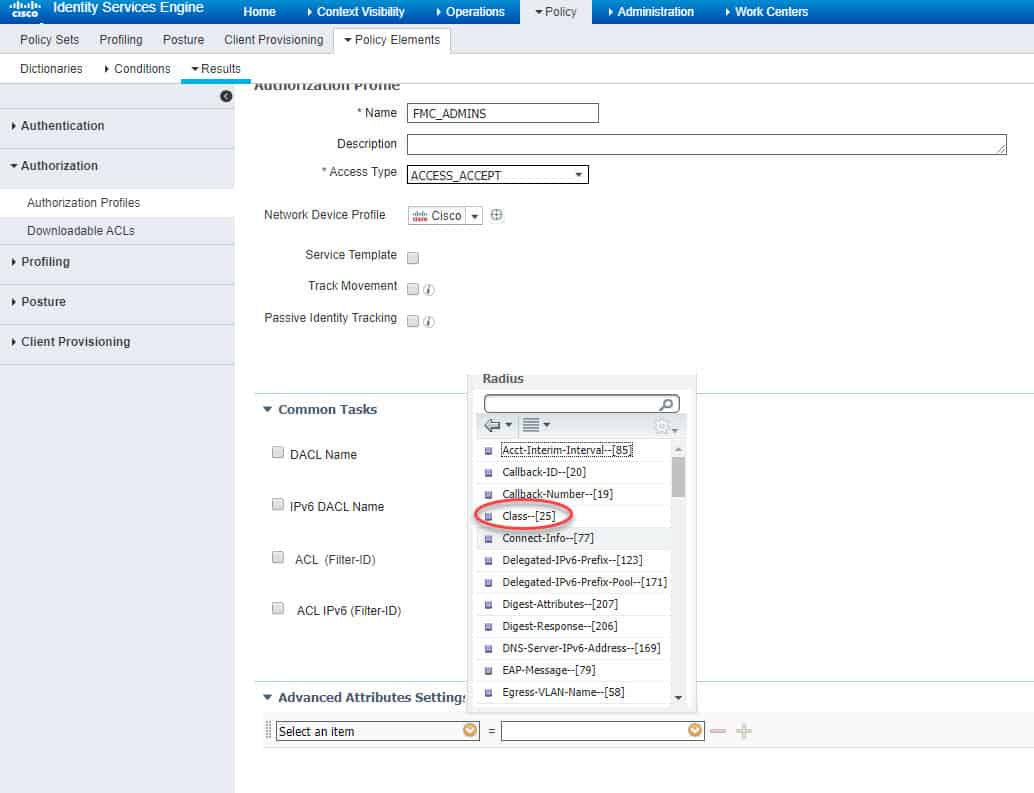
Insert the RADIUS attribute value you want ISE to sends back to the FMC in the authentication response RADIUS packet. This value can be anything, it is just a text value. However, the key thing to remember here is that this value must match the RADIUS Class value we will configure on FMC. We will see that when we get there. In our example, we will use NetAdmins for the admin users, and NetReaders for the read-only users. Don’t forget to hit Submit to save once done:
STEP 3: CREATE AUTHZ PROFILE FOR READ-ONLY USERS
We will call this authZ profile as FMC_READERS, and then we need to go to the same menu as we have done with the FMC_ADMINS authZ profile:
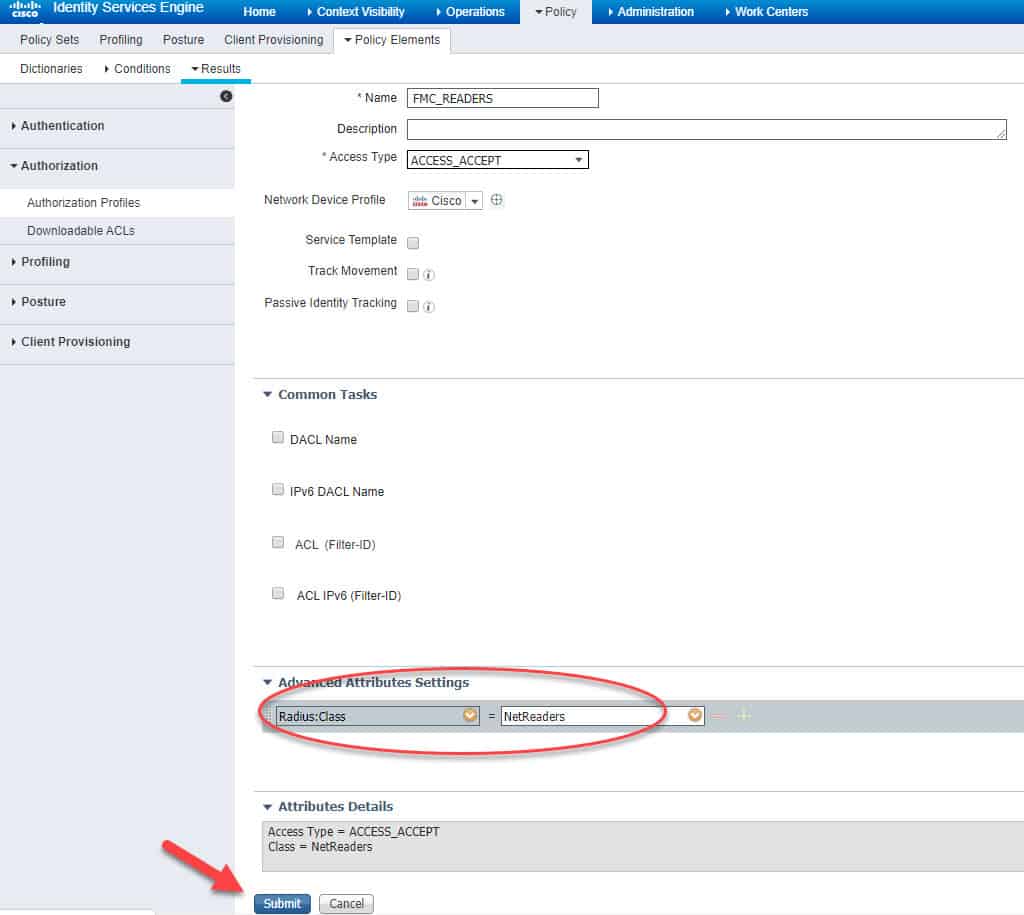
Similar to what we have done previously, we need to select RADIUS Class–[25] from the Radius attributes list and then for this authZ profile we need to set the RADIUS Class attribute as NetReaders. Don’t forget to hit Submit once done to save:

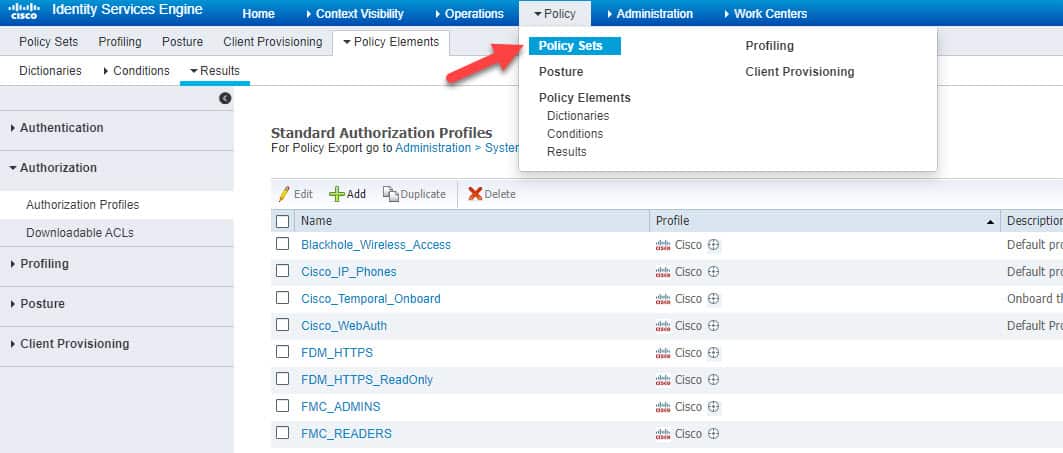
We’ve completed the authZ profiles configuration. Now we will move on to the Policy Sets where we will create our new policy set for admin and read-only accesses based on some conditions that we will apply.
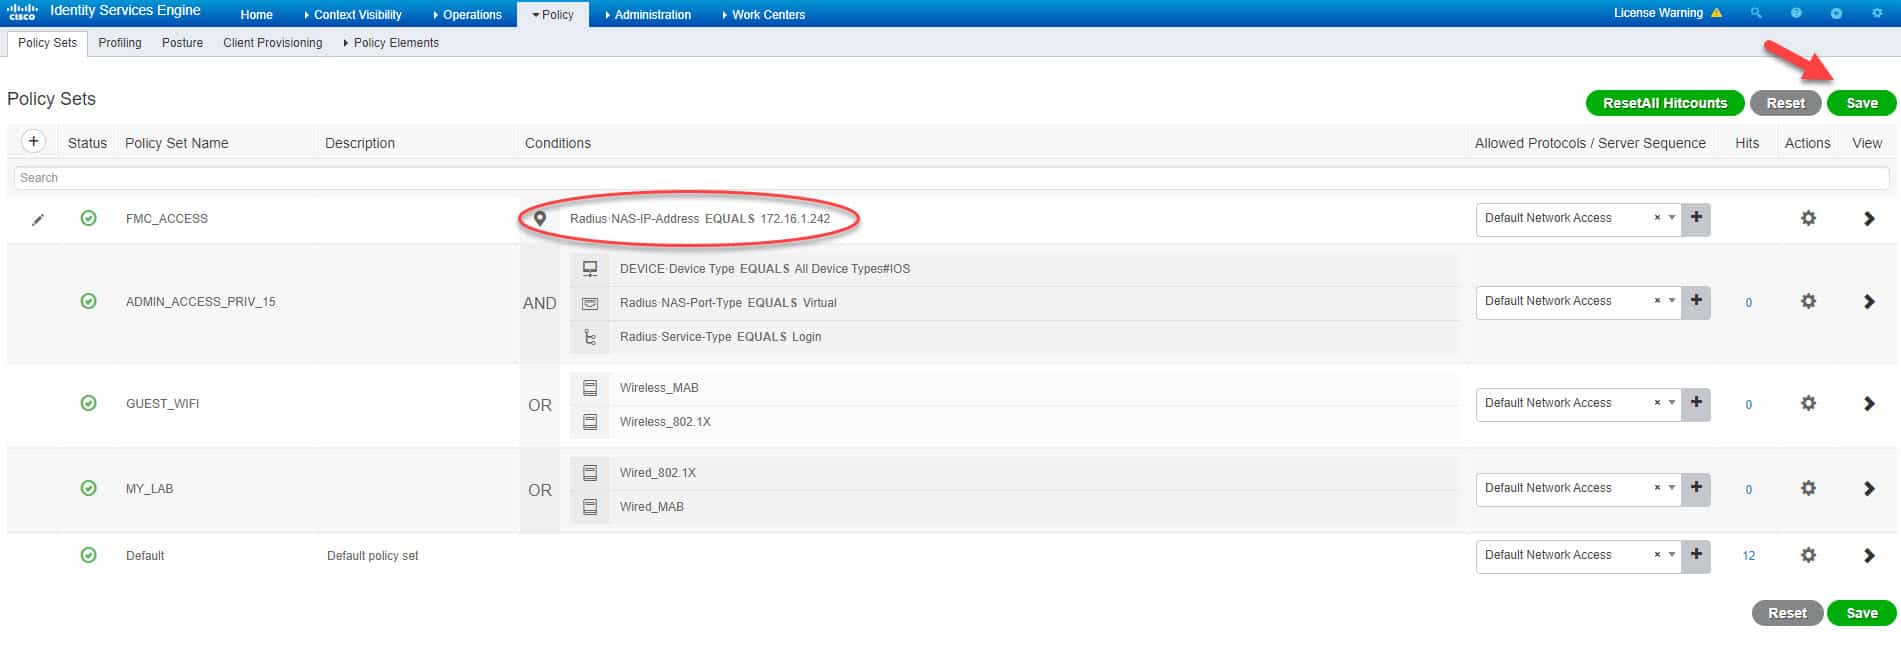
STEP 4: CREATE POLICY SET FOR ADMIN USERS
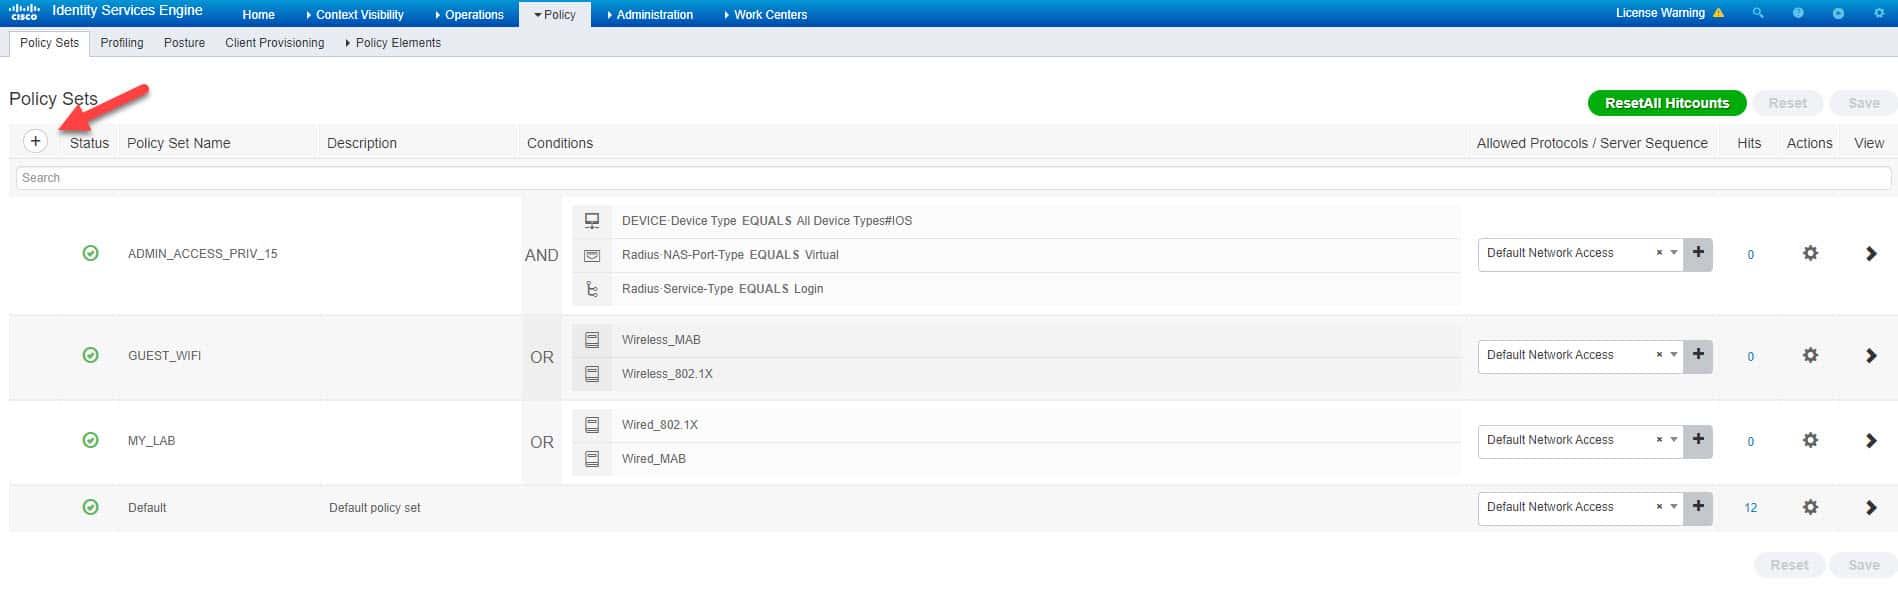
In the new policy set, we will create a top condition with RADIUS NAS-IP-Address attribute to match the FMC IP address. By doing so, only the FMC will be checked against this policy set for authC and authZ. We’ve also selected the Default Network Access protocols list which is fine for out lab but feel free to narrow it down if needed. Once done hit Save:
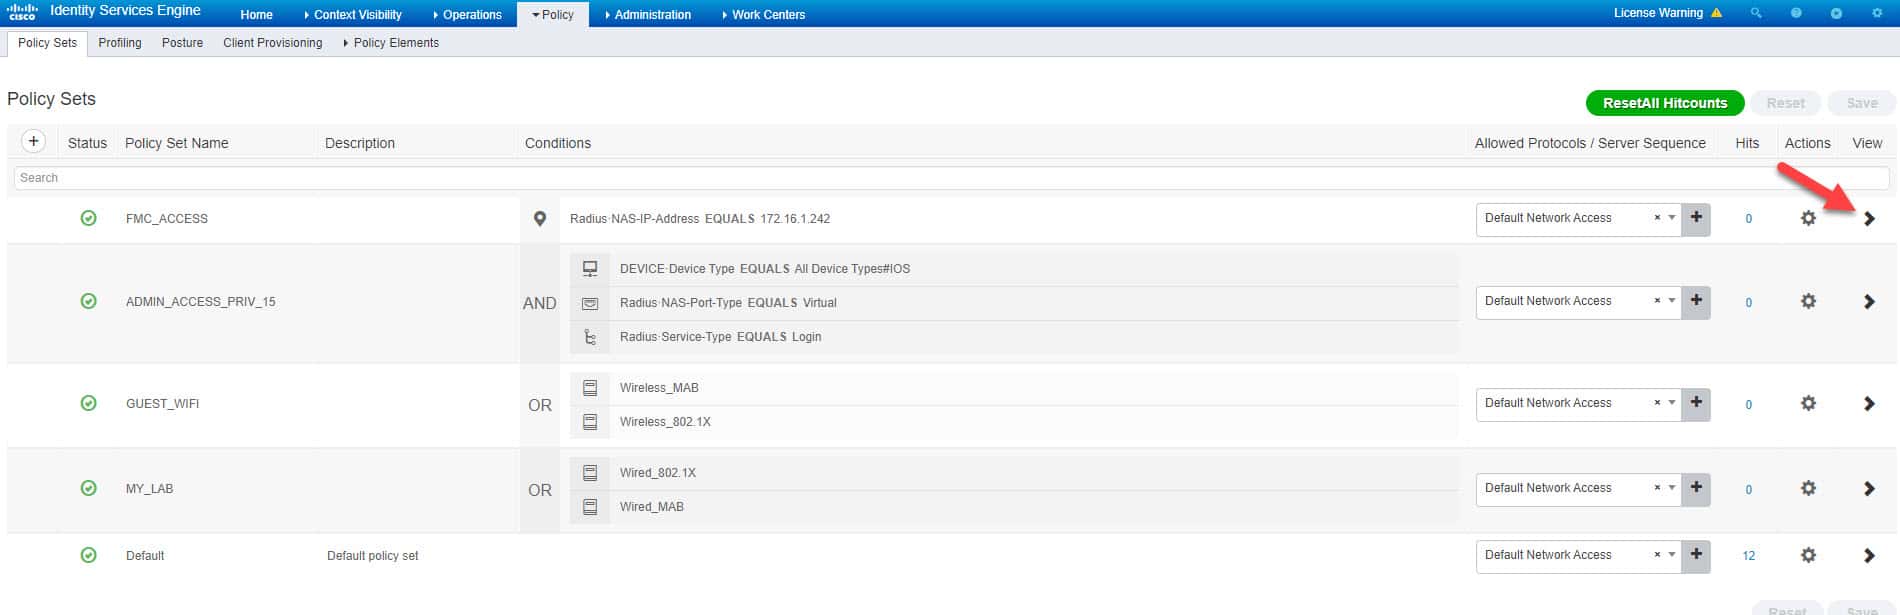
Now click on the little black arrow to go inside the new policy set configuration page where we will mainly configure the authZ rules:
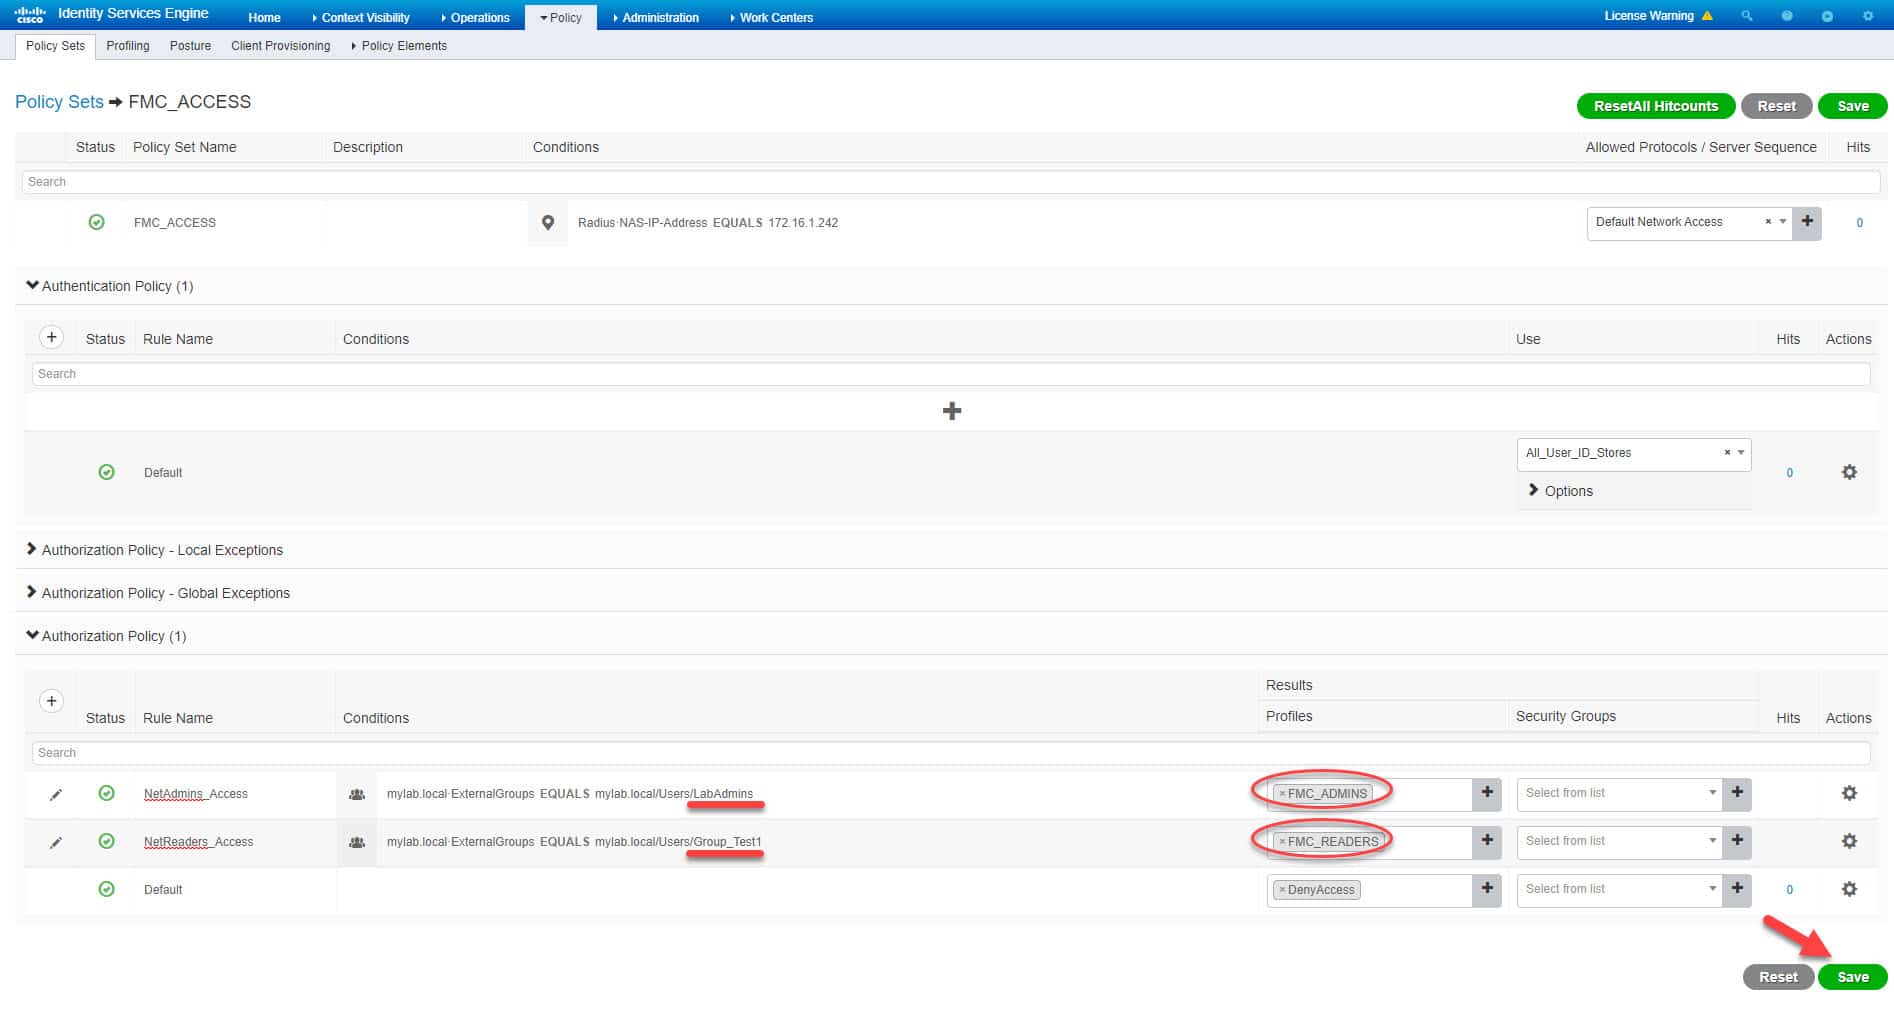
In the policy set configuration page we will leave the authC default settings as they are, and we will add two authZ rules with two different conditions one for the admin users and another for the read-only users. The admin users’ condition will check if the user is part of the AD group LabAdmins, and the read-only users’ condition will check against the AD group Group_Test1. The AD was already joined to ISE, so we don’t have to do anything for that. Each rule will then apply the relevant authZ profile we created before. The admin rule called NetAdmins_Access will apply the authZ profile FMC_ADMINS, and the read-only rule called NetReaders_Access will apply the authZ profile FMC_READERS. Don’t forget to hit Save once done:
With this we’ve completed ISE configuration parts. Now we will move to the FMC. The configuration on the FMC is simpler, we just need to create the external authC object, enable it, enable the FMC shell authC object for CLI, and apply the changes.
STEP 5: CREATE THE EXTERNAL AUTHENTICATION OBJECT
Go to System -> Users:

Click on External Authentication tab:

Click on Add External Authentication Object:

In the External Authentication Object configuration page we need to apply a few settings such as the object name, ISE RADIUS related settings, the RADIUS Class attributes we have configured on ISE previously, and the account that will be allowed to access FMC through CLI.
Because we want to configure FMC external authentication with RADIUS, we need to select RADIUS as the authC method from the list, then we need to insert both ISE nodes IP addresses and the RADIUS preshared key we configured previously on ISE.
As you can see, there are a few predefined user-roles in RADIUS-Specific Parameters section, each user-role has some permissions applied, the permissions are the menus a user-role would be allowed to see and navigate through. The user-roles we care about in this lab are the Administrator and the Security Analyst (Read Only). We need to insert the RADIUS Class attributes values we configured previously on ISE, so we need to type Class=NetAdmins next to Administrator and Class-NetReaders next to Security Analyst (Read Only).
The last section we need to configure in the External Authentication Object configuration page is the Administrator Shell Access User List under Shell Access Filter. In this section, we will type the account name of the admin that we want to enable for FMC CLI accesses. In our case we will enable the admin1 accont. Don’t forget to hist Save once all is done.


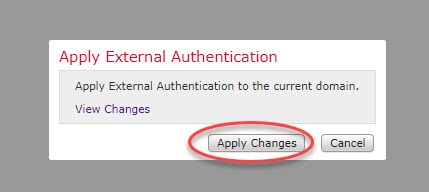
As you can see once we saved the External Authentication Object, the object will not be enabled by default. Also, notice the Shell Authentication menu to the left, even this one is disabled by default. What we need to do here is to enable the External Authentication Object, and enable it also in the Shell Authentication menu to enable CLI access. Once all is done, we need to click on Save and Apply. It is important to remember to click on Save and Apply rather than just Save. If we click on the Save button only, the new External Authentication Object will not be applied until we click on the Save and Apply button:

One thing to keep in mind here is that the Shell Authentication will only show the first External Authentication Object in the list, which means that we can enable Shell Authentication only with the first External Authentication Object in the list. Now let’s save and apply our changes:

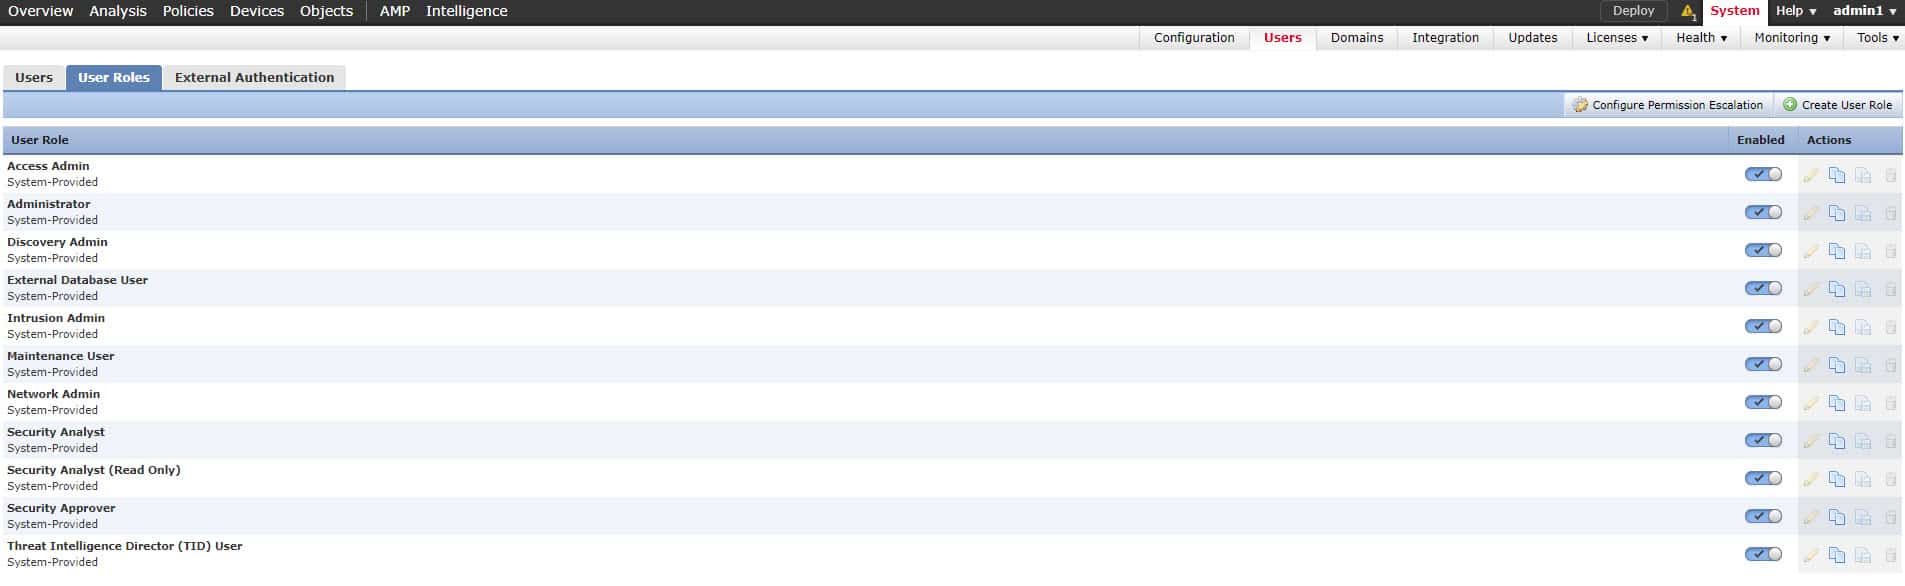
Here is the list of the predefined user-roles we have on FMC for reference, you can disable all the ones that you will not use or you can edit their permissions if needed:
With this we’ve completed our configuration, now it is time to test. Although we could do some initial tests through the Additional Test Parameters section in the External Authentication Object configuration page, we will do our tests live by trying to access the FMC through the GUI. We will begin with the admin1 account:
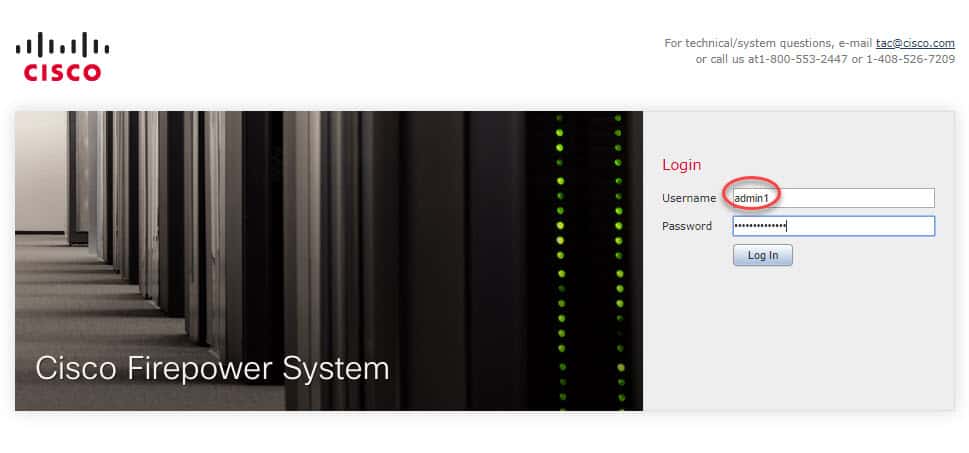


As you can see, we could access to FMC as admin1 user successfully and we can see all the menus to the left and the ones under System without any restriction. This means we have a full access level similar to the local admin account. Now let’s test the read-only access by trying to use the account test1 for our access:


Great, as we can see, the user test1 has minimal access and no configuration menus are available at all. Remember the menus that the user test1 can see are the ones predefined in the user-role Security Analyst (Read Only) in the User Roles section referenced above. Now that the read-only access works as expected let’s test the FMC access through SSH with the admin1 account as our last testing task for this lab:
Connecting to 172.16.1.242:22…
Connection established.
To escape to local shell, press ‘Ctrl+Alt+]’.
Creating directory ‘/Volume/home/admin1‘.
Copyright 2004-2019, Cisco and/or its affiliates. All rights reserved.
Cisco is a registered trademark of Cisco Systems, Inc.
All other trademarks are property of their respective owners.
Cisco Fire Linux OS v6.4.0 (build 2)
Cisco Firepower Management Center for VMWare v6.4.0 (build 102)
admin1@fmc:~$
The CLI access works as expected as well. One thing worth mentioning is how the admin1 and test1 accounts are seen from the FMC perspective. Let’s go to System -> Users -> Users and check that out:

Notice that both the admin1 and test1 accounts have been categorized as External under the Authentication Method column. That’s because these two accounts have been connected to the FMC through an external authC server. However, the local admin account shows as Internal.
I want to show you one last thing before wrapping up this post. Remember when we configured the RADIUS Class attributes in the authZ profiles on ISE?! We went through the Advanced Attributes Settings menus to set our Class–[25] values. If we need to configure multiple authZ profiles then that navigation might become a bit time consuming. There is a simpler way to do that, let’s check it out.
Go back to ISE and open up one of the two profiles we created. In the middle of the page scroll down the Common Tasks section and you will see a common task called ASA VPN. We did not set that attribute in our configuration, so why we have it configured?! The reason is because this common task uses RADIUS Class attribute, which means when we configured the RADIUS Class attribute manually through the Advanced Attributes Settings, that common task got automatically updated with the manual value we configured. You won’t see the ASA VPN value until you save the authZ profile. With this being said, it is a valid option to use the ASA VPN common task to configure the RADIUS Class attribute without having to go through the Advanced Attributes Settings menus manually.
This wraps up the FMC external authentication with RADIUS post. I hope you enjoyed reading it, and as always, I would love to hear your feedback. Thanks for reading!
Share via:
Hi, Aref.
Such a great article. Finally managed to set up the authentication 🙂
Thanks
Suresh
Hello Aref,
Awesome article and clear explanation. but I’m facing a different scenario is that I need to use an internal user and not an AD user, so in that case what i need to do exactly, i have tried the same config and in the authZ i choosed the internal user but it didn’y work.
Thanks.
Regards,
Bilal
Do you know if something changed for CLI/RADIUS with 6.6.1? I inherited an environment that had this configured and it is not working for CLI on FMC (CLI for FTD is working fine as is GUI). I verified the config in FMC and ISE as shown in your document as well as other sources, and it is the same. I am missing something or 6.6.1 broke something?
Well written document, thank you for taking the time to detail the setup of the FMC with ISE!