In this post we will see how to configure ISE Passive Identity using Windows Management Instrumentation (WMI). But let’s start off with a brief introduction of this feature. ISE Passive Identity is a cool feature that allows ISE to learn passively about the users identities. The entities that will provide ISE with those details are called providers. A provider can be an active directory, a Syslog server, a switch span port or even conducting API calls.
Active directory provider can work using WMI or installing an agent on the AD. Both have no impact on the AD performance, however, using WMI does not require installing any additional software on the AD. WMI is a tool that we can use to manage locally or remotely Windows devices.
When using WMI with Passive Identity, ISE will be able to perform some admin operations on the AD. One of those operations is to allow ISE to read the AD security events. The AD security events would include the users login and log off details from which ISE can build the user to IP mapping.
However, once the AD shares those details, ISE would try to lookup the AD for even more details regarding the users such as the UPNs and the DNs. When using WMI ISE would not be able to lookup for the users AD groups. ISE could then share this mapping with all these details with other entities, that would happen by using pxGrid which I will cover in one of the next coming posts.
An example of those entities would be an FMC. A couple of reasons why we might need to do that would be to allow the FMC to populate its events logs with the users contextual information shared by ISE when using identity policy. That would give us much clearer visibility when reviewing the logs or for reporting. Another reason would be to allow the FTD appliances managed by the FMC to enforce their access control policies when using identity policy. Both these two reason rely on the user to IP mappings.
Now let’s jump into the configuration part, we will be focusing only on WMI in this post. In future posts I will cover other passive identity providers.
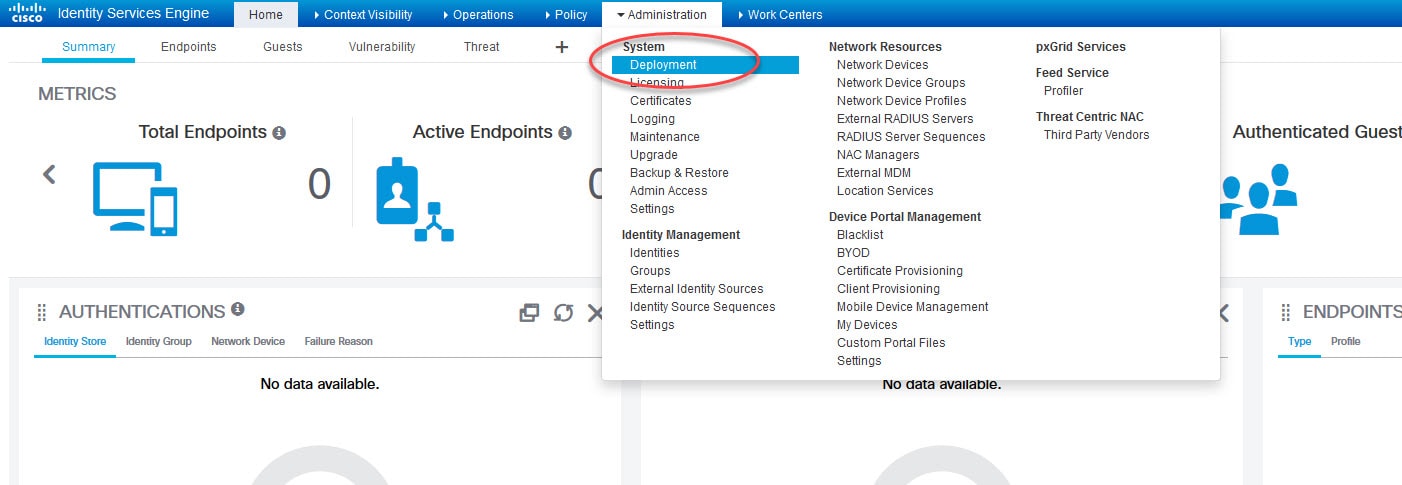
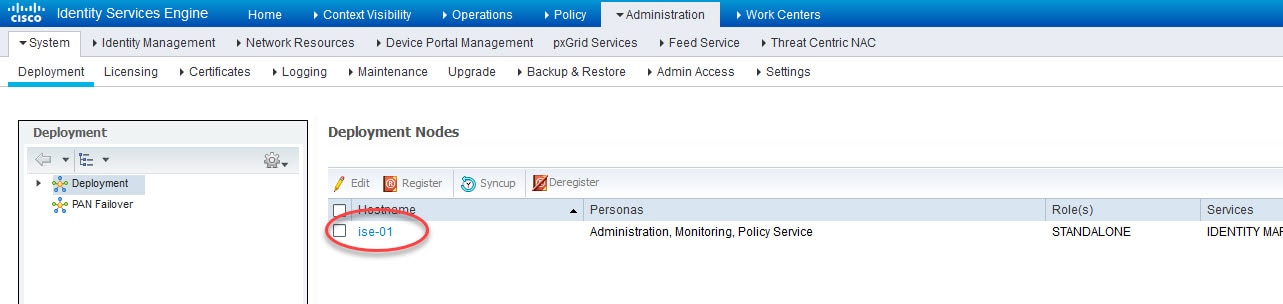
1) Go to Administration > Deployment to enable Passive Identity Service

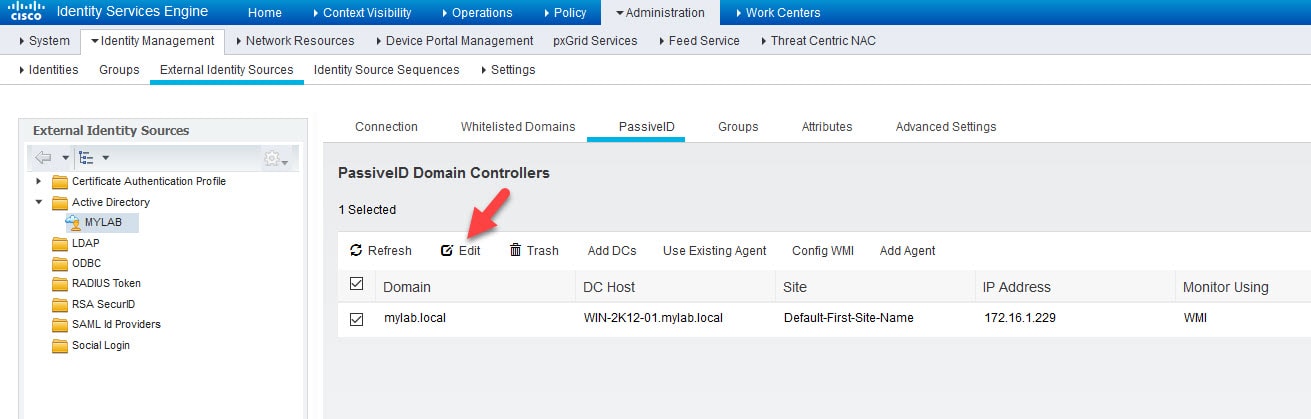
2) Go to Administration > External Identity Sources > Active Directory and click on the AD join point name and then go to PassiveID page
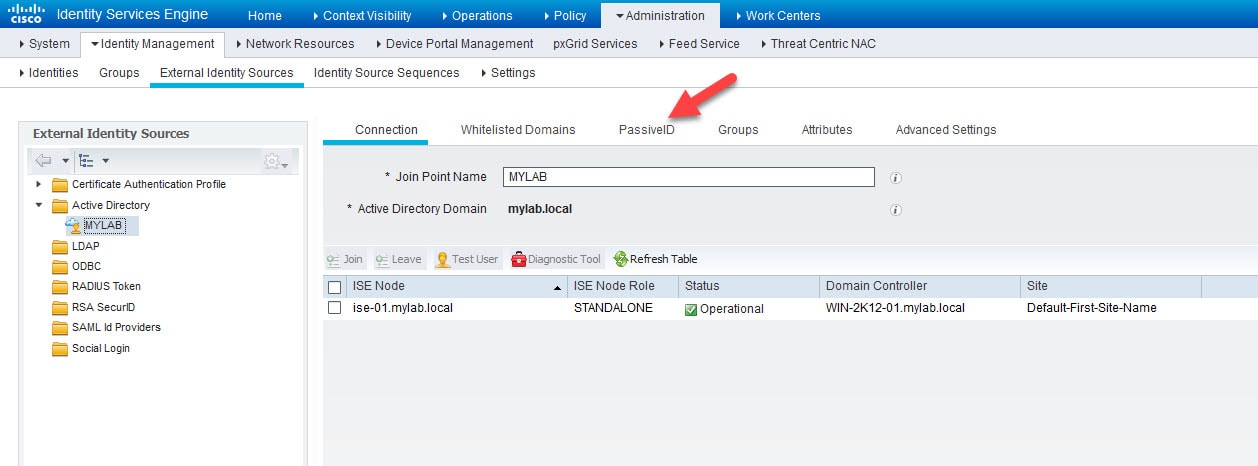
You can also go to the same page from Work Centers > PassiveID > Providers > Active Directory > PassiveID.
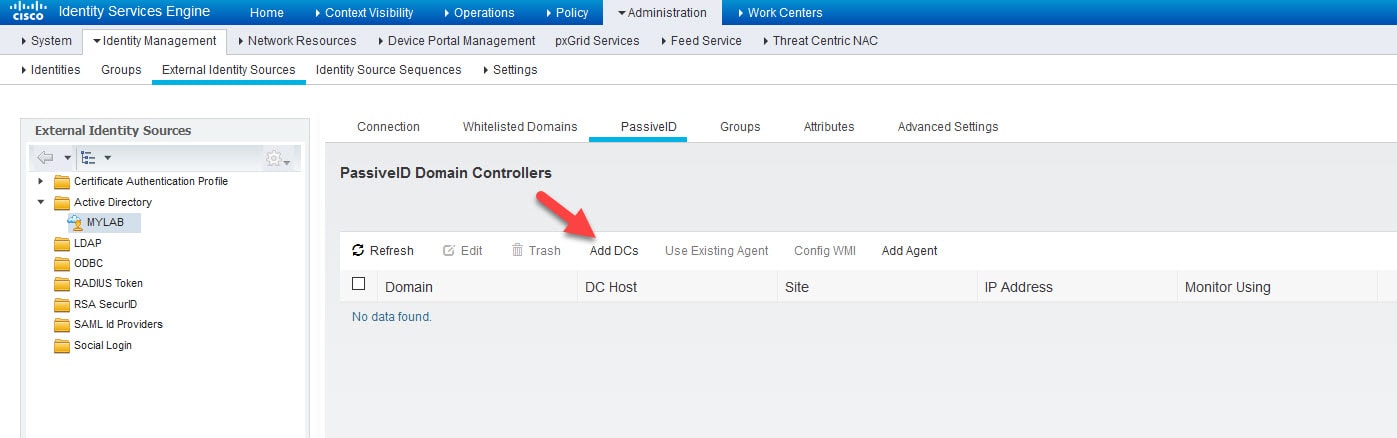
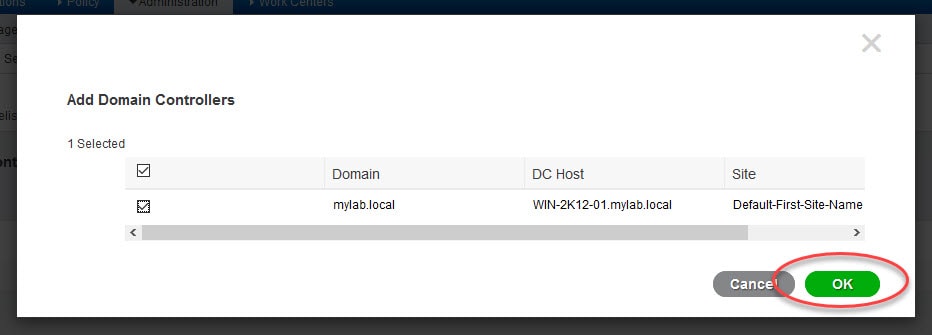
3) Click on Add DCs and select the AD from the list and click OK
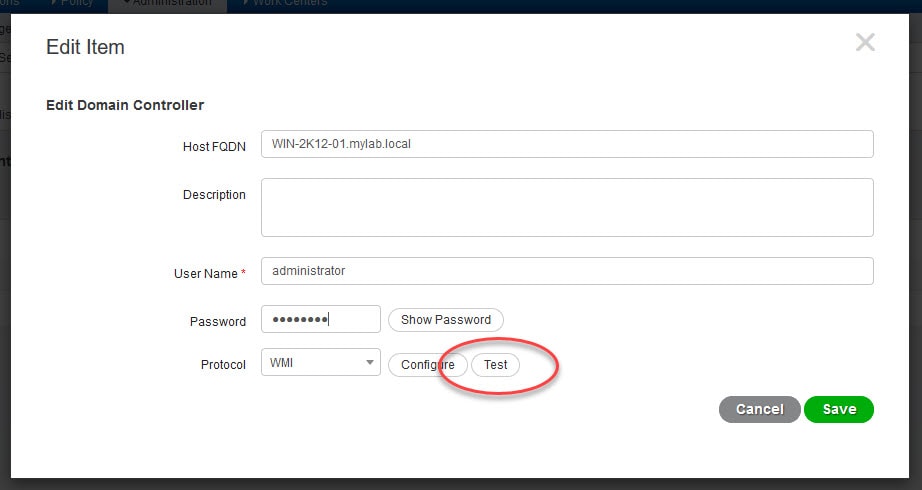
4) Click on Edit to configure and test the WMI connection
5) Type the AD account details that you have used when you joined ISE to the AD and click Configure
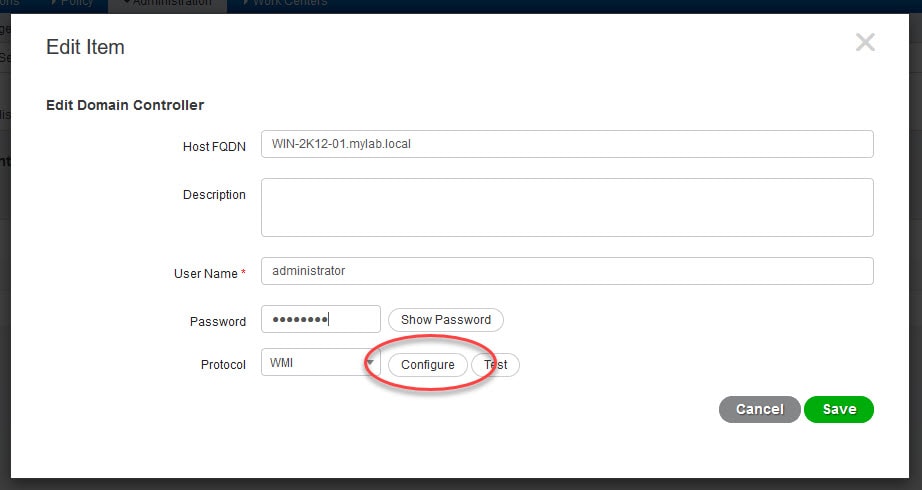
If you stored the account password when you had joined ISE to the AD on your deployment, the above step will not be required. In that case you can configure the WMI from the PassiveID Domain Controllers page shown in step 4.
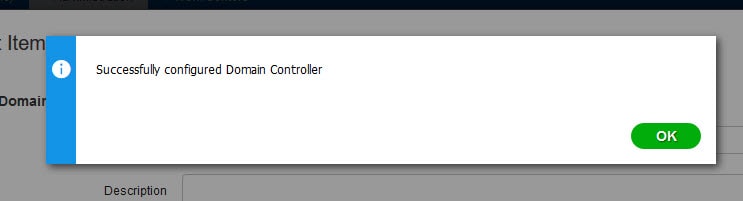
If the WMI configuration is successful you will get a similar message to this
6) Now click on Test to check if the connection is successful
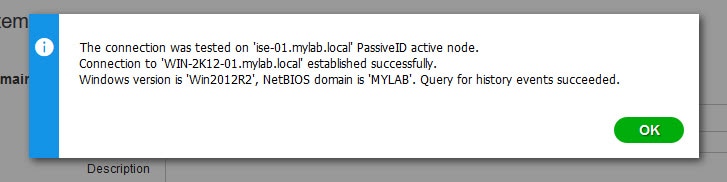
If successful you will get a message similar to this
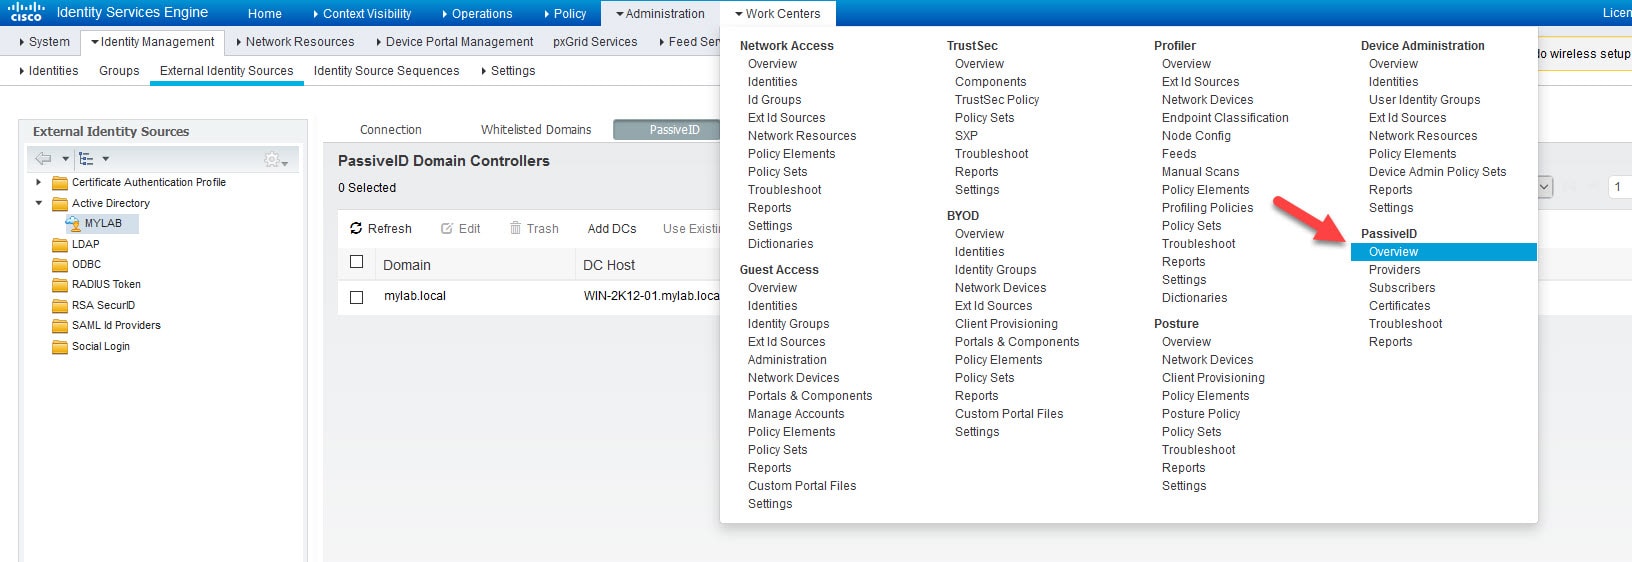
7) Click Save and go to Work Centers > PassiveID > Overview to check the new added provider
You should see a green check box next to the AD provider

If you see a red check box you can go to Reports > Reports > Passive ID Reports > PassiveID and check the errors.
8) Go to Live Sessions and check the user identities ISE learned from the AD
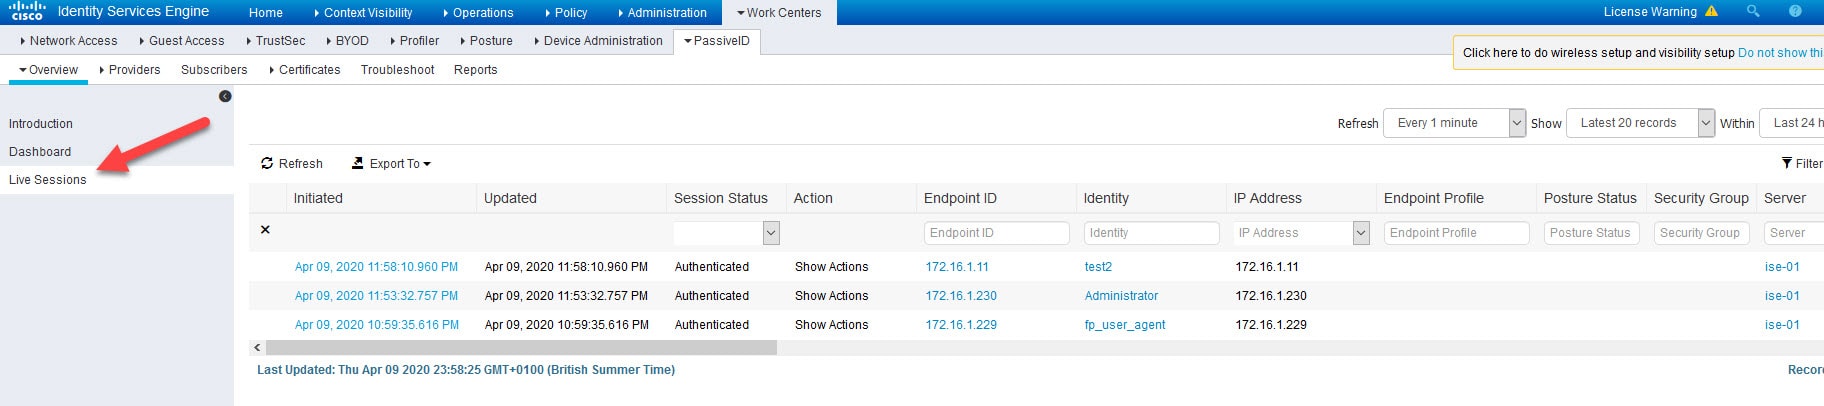
ISE will show the live sessions for all the users that authenticated to the AD after the passive identity has been configured on ISE. The old users sessions will not show up.
9) The logs will also show in Operations > RADIUS > Live Logs
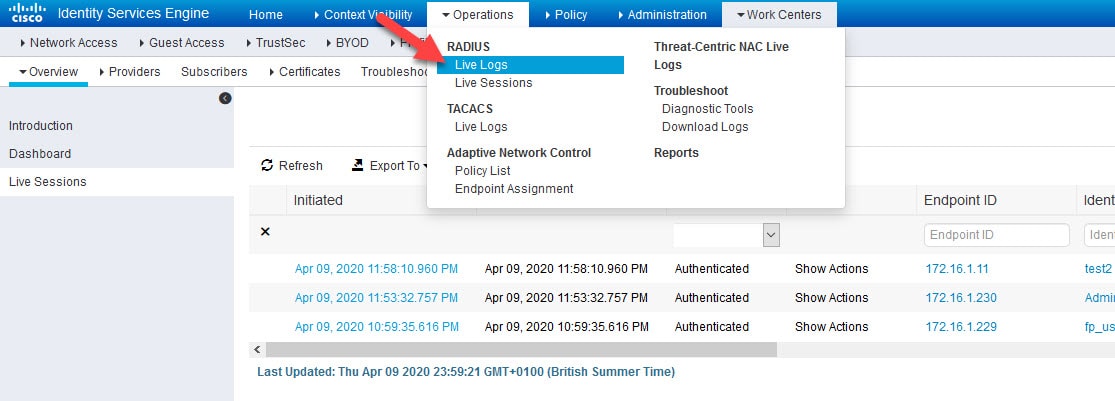

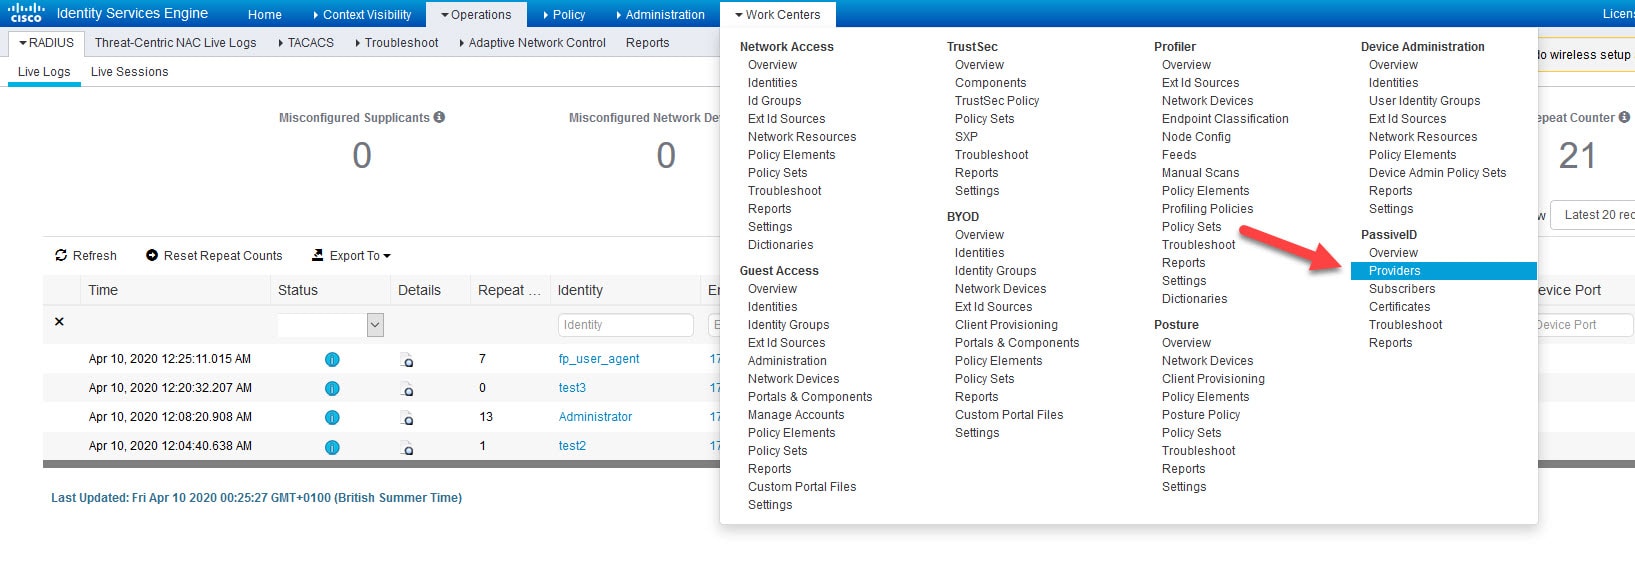
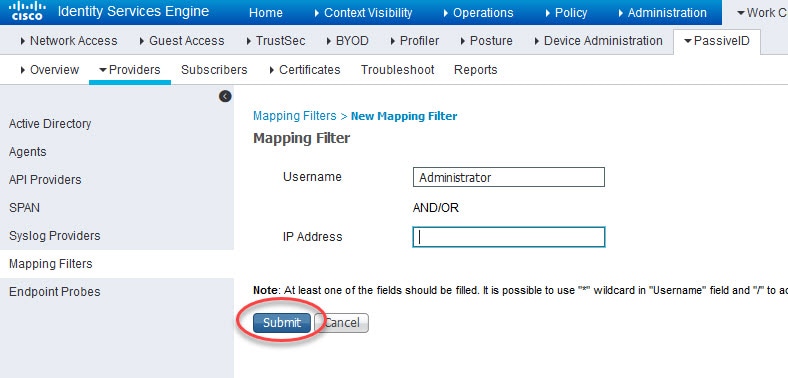
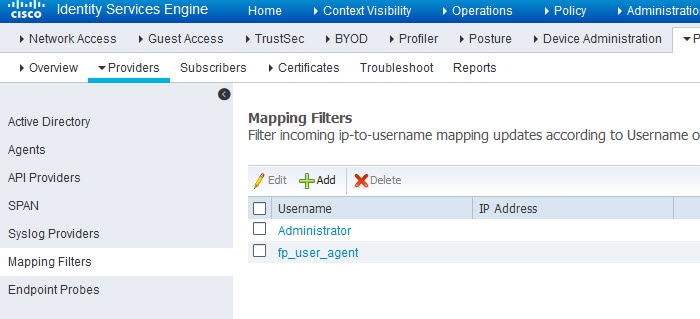
As you can see from the logs, the Administrator and the fp_user_agent account details have been provided by the AD. Most likely you would not want to monitor the activity of those users. To suppress them, you can go to Work Centers > PassiveID > Providers > Mapping Filters and add the filtering entries as shown below.

This wraps up this post of how to configure ISE Passive Identity using WMI.
Thank you for reading!