Depending on ISE deployment if small, medium or large, you might need to add additional nodes with different Personas. The Persona in ISE cube is just a fancy name to define what services would be running on a node. The main three Personas are Administration (PAN), Policy Service (PSN) and Monitoring and Troubleshooting (MnT). The primary/secondary concept exists only with PAN and MnT Personas, however, this is not applicable with PSN Persona. The maximum number of PANs and MnTs in any ISE cube you can get is two, however, you can have plenty of PSNs. In this post I am going to show you how to add a secondary ISE node in a small deployment.
In small deployments typically we would have two nodes that have all those three Personas running on each node and most likely we will have the PAN and MnT distributed as primary and secondary across both of them, which is a best practice.
Add a secondary ISE node is nothing complex. However, there is a specific prerequisite before we should jump into the configuration part on ISE, but I will show it to you in action when we get there. Now let’s start by going to Administration -> System -> Deployment page, and then we need to click on Register button:

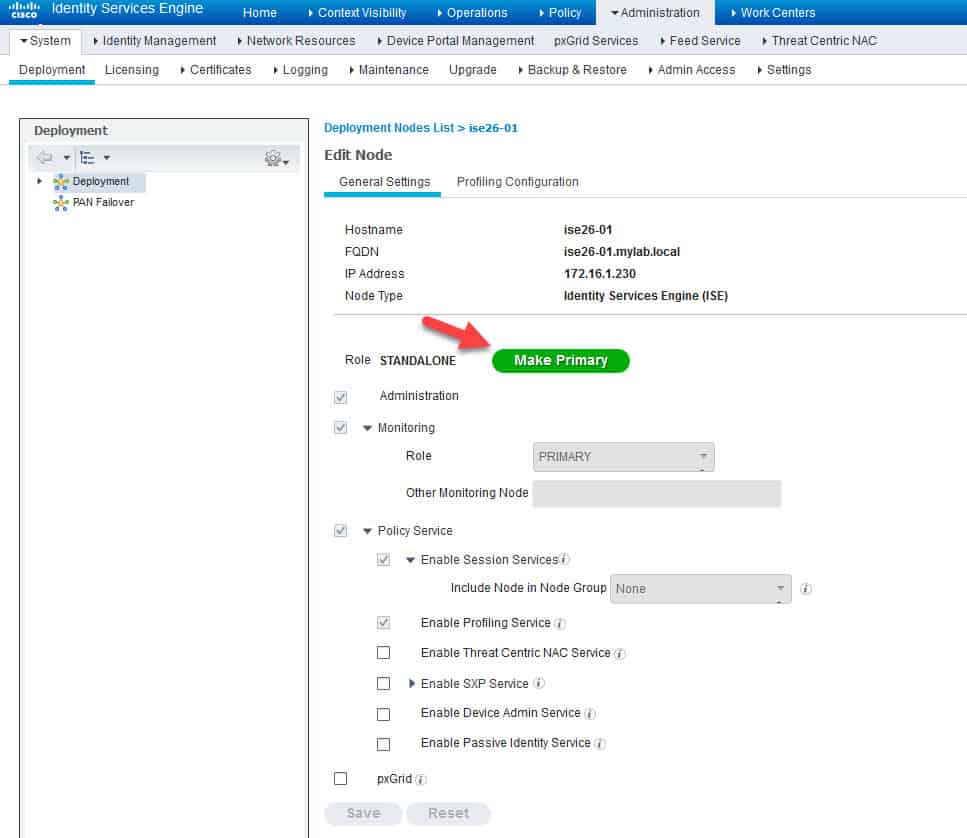
The Register button seems to be unclickable, in fact it is greyed out:

As you can see, there is a little forbidden circle when we try to click on Register button. The reason behind this is because when you deploy ISE cube with a single node, that node’s role is going to be a standalone, which makes sense right?!, and as a requirement we need to change that role to be Primary before we can register any additional node. To do that, we will click on the node hostname to go into the properties page, and then we need to click on Make Primary button:
After that the node will show up with the new role as a Primary node, and the button we used to make it a Primary node now shows Make Standalone:
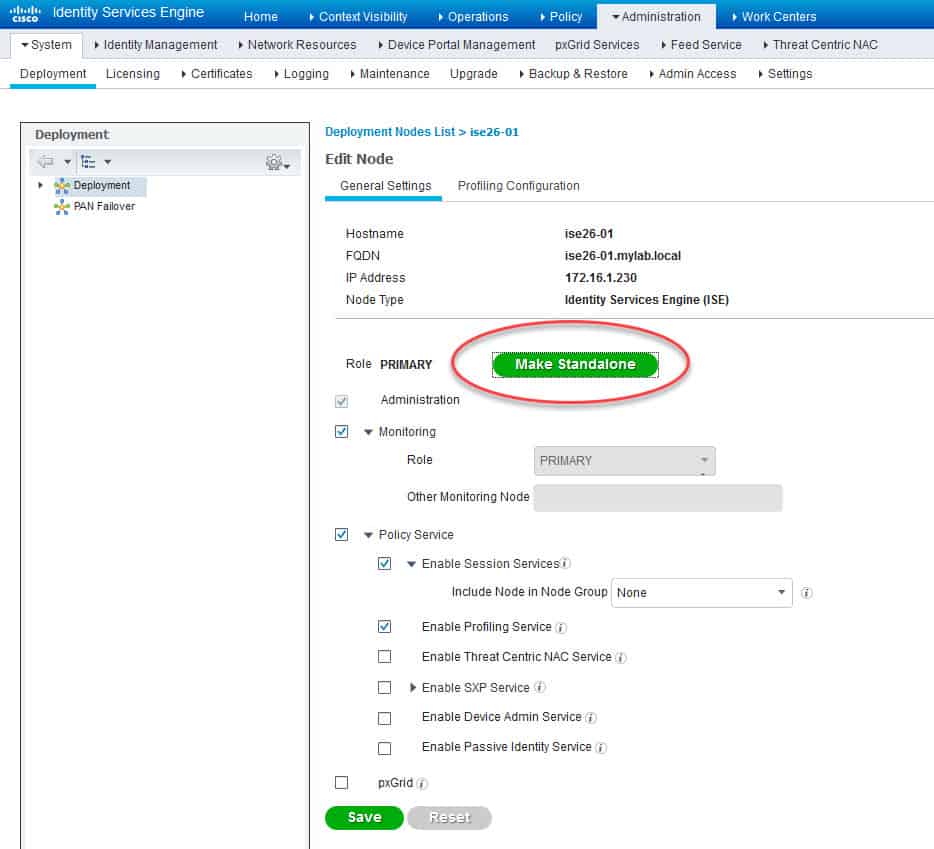
Now we need to click on the Save button at the bottom left of the page and wait until the changes have been saved:

Now let’s try again to click on Register button and see if it works:

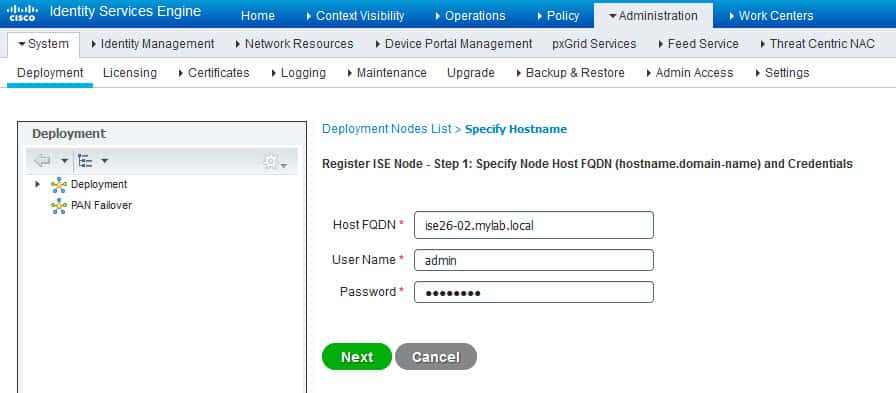
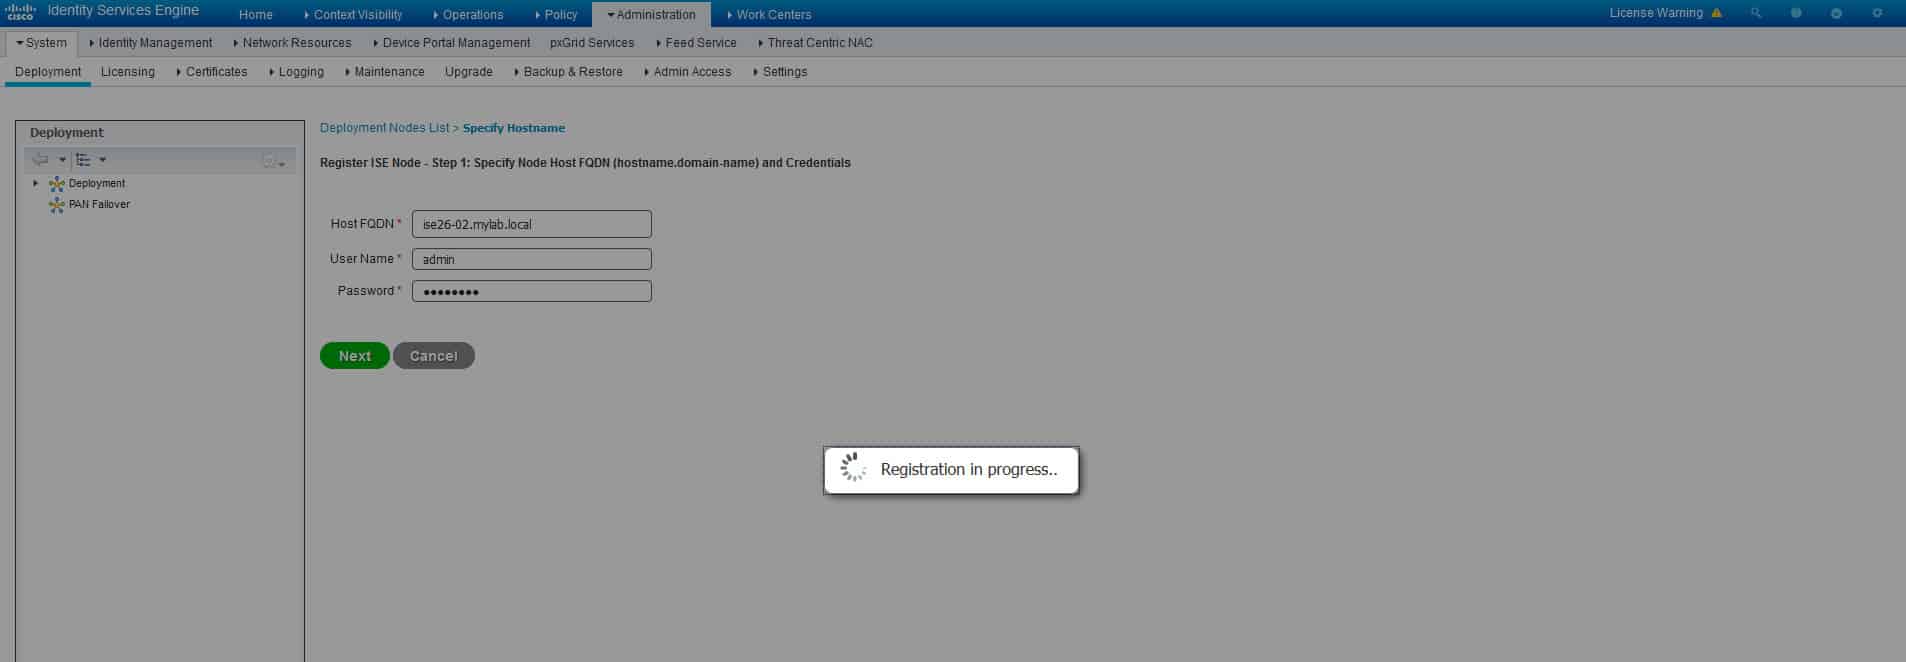
As you can see, now the Register button seems to be activated, so let’s click on it and go to the next step which is inserting the secondary node FQDN and access credentials, and then click on Next button:
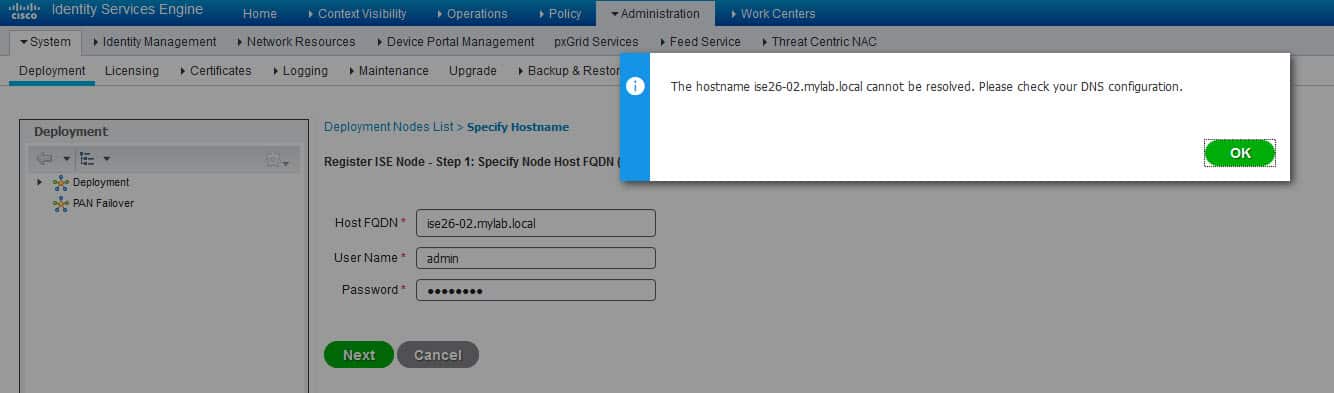
The above error is simply due to the fact that this new ISE node FQDN is not resolvable by the Primary node. This is the prerequisite I was referring to above. The fix is simple, we need to add this new node’s FQDN to our DNS server, and then try again:
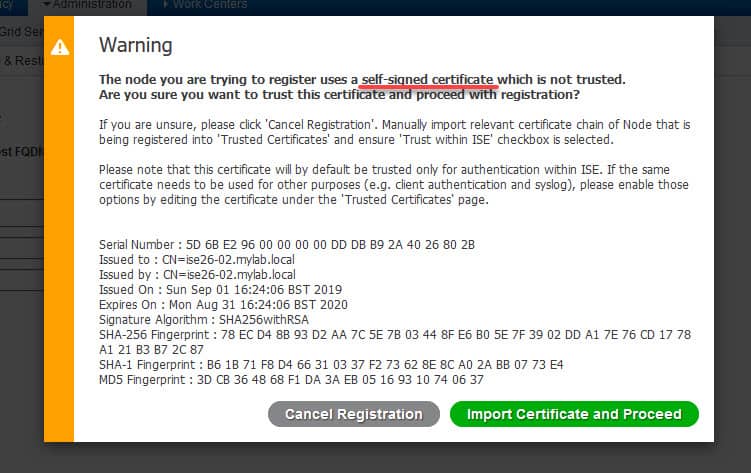
Now that we’ve added the DNS A record to our DNS server, we don’t get the first error, however, this time we are getting a security warning message. Reading the message carefully we can easily find out the reason. ISE Primary node is basically complaining about the source of the certificate being presented by the new node, it is untrusted. The reason of this is because the Secondary node is presenting a self-signed certificate. To fix this issue, we could go to the Secondary node and install a valid certificate issued by our internal CA, or maybe by a third party.
However, sometimes you would prefer to do the certificate works after you added the new node to the deployment. In that case what you would need to do for now is to crosscheck the certificate fingerprint you see on this warning message with the one you see through the Secondary node admin console. The secondary node admin console can be accessed in a similar way of the Primary which is through https://… . Let’s import this certificate and go to the next step:
After the registration is completed, we will get a similar page to the below. This page is very similar to the Primary node one. And as you can notice the MnT Persona role on this new node by default is configured as the Secondary. We can change the role if required which is a best practice so the two nodes would have the PAN and MnT Personas distributed across.
One thing worth mentioning here is that although you might have MnT Persona distributed across the two ISE nodes, the actual traffic destined to the two MnT Personas by the PSNs is going to be sent to both of them at the same time. That is regardless if the MnT Persona is the Primary or the Secondary. The reason behind this is to ensure the MnT db is synch’d up on the Secondary MnT in case the Primary MnT should fail.
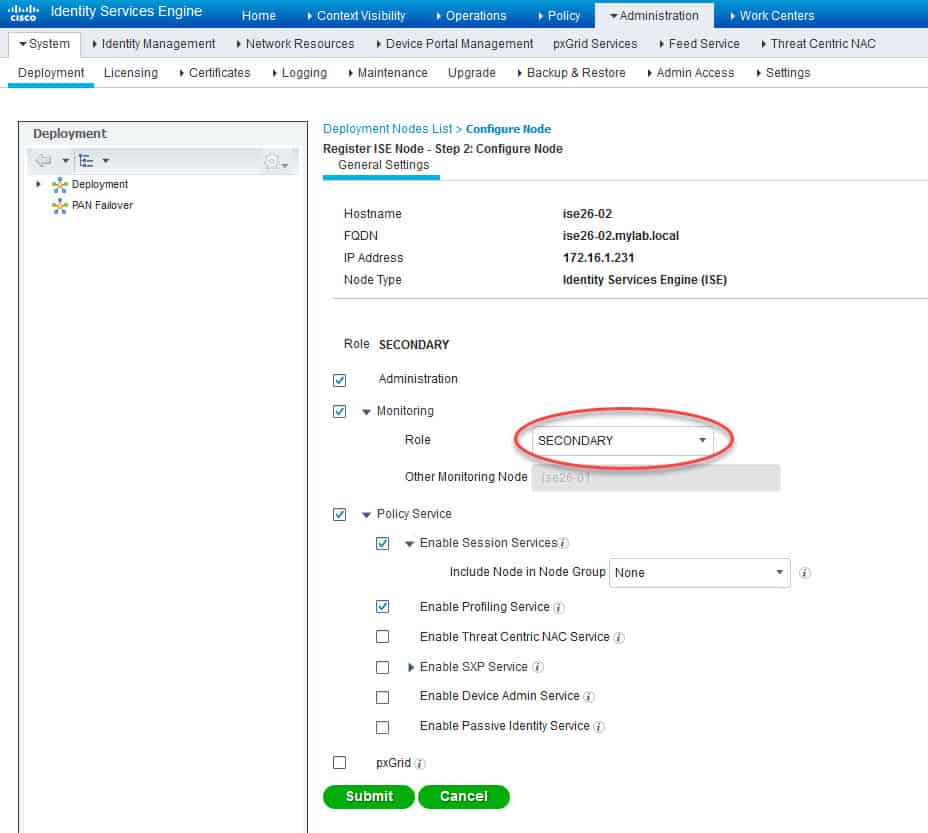
For this lab, we will leave the MnT on this new node as the Secondary. Let’s click on Submit button and go the next step:

After the changes have been applied, now we got the registration successful message of the new Secondary node. In the background this new node will be synch’ing up with the Primary node. This process can take some time, once it is completed, ISE services will be restarted on the new node.

We will still see the exclamation mark icon under the Secondary node status column until the above tasks are completed. If we hover the mouse on that icon a little message stating the tasks are in progress. We can just wait, the icon will turn green once all required tasks are completed:


After all the tasks are completed, the Secondary node status is now in green. Which means the new node has successfully added, and synch’d with the deployment, and ready to go:

This wraps up our lab of how to add a secondary ISE node. The above steps are very similar to what we would have done if we were adding a new PSN node. There would be some exceptions with the PSN though which we will see those in another post dedicated to that.
I hope you enjoyed reading this post, and as always, I would love to hear your feedback. Thanks for reading!
Share via: