In this post I will show you how Cisco ASA TCP State Bypass works and how to configure it. One of the security features Cisco ASA provides for new connections is to ensure the 3-Way Handshake is completed between two hosts before allowing any further tcp traffic between the two hosts. The 3-Way Handshake is simply exchanging the SYN, SYN-ACK and ACK between two hosts, each sends the relevant packets based if it acts as a sender or a receiver.
If the ASA should see a SYN-ACK packet sent by a host to another before seeing the initial SYN packet, the traffic will be dropped. Similar if the ASA should see an ACK packet before seeing the previous two packets SYN and SYN-ACK exchanged between the two hosts.
The ASA does this by inspecting each packet and creating a state for each connection. This feature is called TCP State Bypass. It is a nice feature, however, in some legitimate scenarios it might create some issues and preventing the traffic from being delivered between the two hosts. Let’s see what would be an example scenario for this, and how to apply the fix.
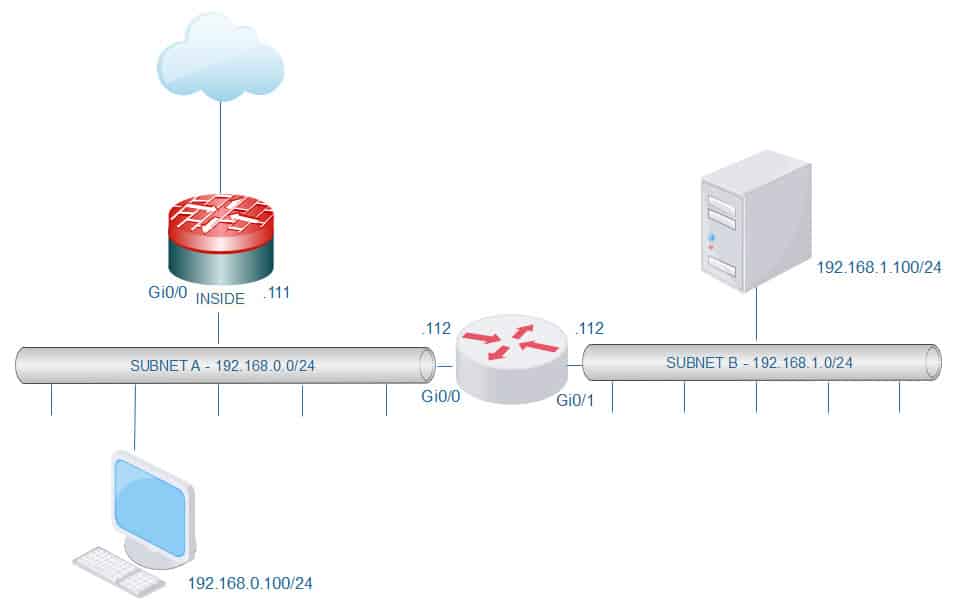
In this topology we have two hosts, one is a client and another is a server. The client and the server are located in two different subnets. The client uses the ASA as its default gateway, and the server uses the router that is dividing the two broadcast domains as its default gateway.
Please note that on this lab I am using an IOSv to simulate the server with ip routing disabled. ICMP is allowed through the ASA, so the client can ping the server with no restrictions, and the client can also connect to the server on port 80/tcp.
Here are the interested parts of the configuration on all the involved devices:
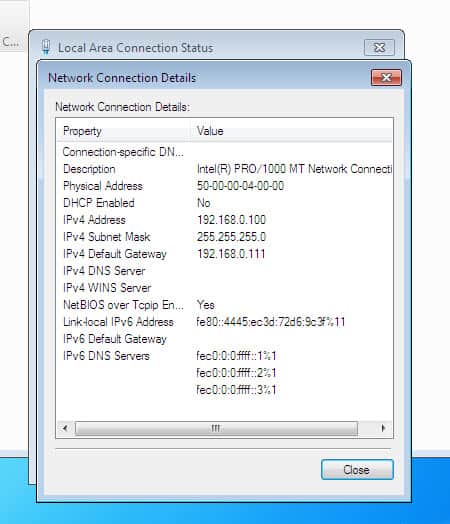
Client
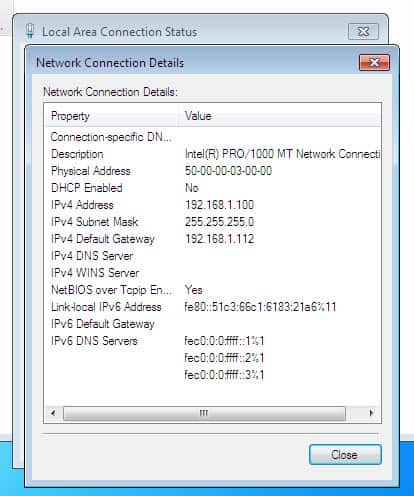
Server
ASA
ciscoasa# sh route | be Gate
Gateway of last resort is not set
c
C 192.168.0.0 255.255.255.0 is directly connected, inside
L 192.168.0.111 255.255.255.255 is directly connected, inside
S 192.168.1.0 255.255.255.0 [1/0] via 192.168.0.112, inside
Router
Router#sh ip route | be Gate
Gateway of last resort is 192.168.0.111 to network 0.0.0.0
c
S* 0.0.0.0/0 [1/0] via 192.168.0.111
192.168.0.0/24 is variably subnetted, 2 subnets, 2 masks
C 192.168.0.0/24 is directly connected, GigabitEthernet0/0
L 192.168.0.112/32 is directly connected, GigabitEthernet0/0
192.168.1.0/24 is variably subnetted, 2 subnets, 2 masks
C 192.168.1.0/24 is directly connected, GigabitEthernet0/1
L 192.168.1.112/32 is directly connected, GigabitEthernet0/1
Now let’s do some basic connectivity check between the client and the server by trying to ping the server and connecting to port 80/tcp, and then inspect the results:
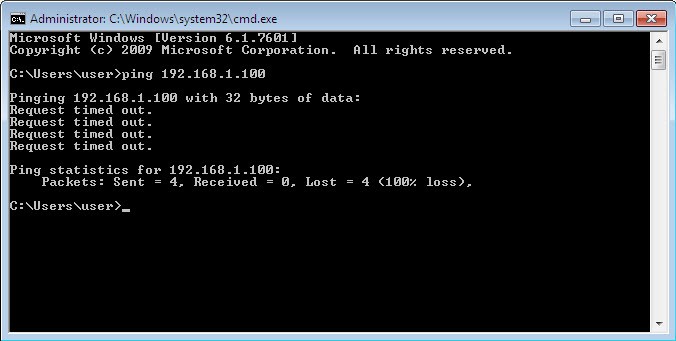
There are no access lists on the ASA or policy restrictions on the server to prevent ICMP traffic from passing through. Let’s look at the ASA logs and see if we get any useful messages that would help us in finding out why pings are failing:
%ASA-3-106014: Deny inbound icmp src inside:192.168.0.100 dst inside:192.168.1.100 (type 8, code 0)
%ASA-3-106014: Deny inbound icmp src inside:192.168.0.100 dst inside:192.168.1.100 (type 8, code 0)
Right, one of the default behaviors of the ASA is to prevent traffic from entering and exiting the same interface without passing through another interface. The fix for this is simple, we just need to apply a command to change this default behavior:
ciscoasa(config)# same-security-traffic permit intra-interface
Let’s try again and see if it works:
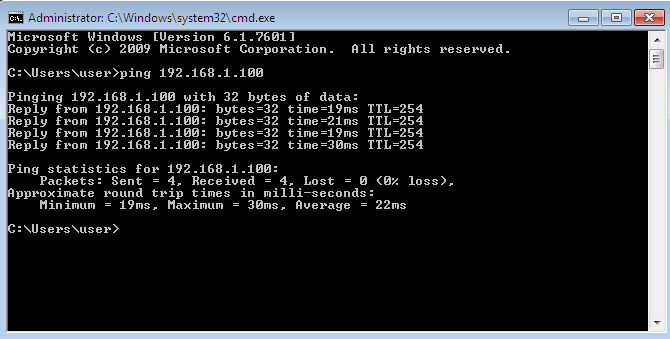
As we can see, ping is now successful. Now let’s try to connect to the server on port 80/tcp:
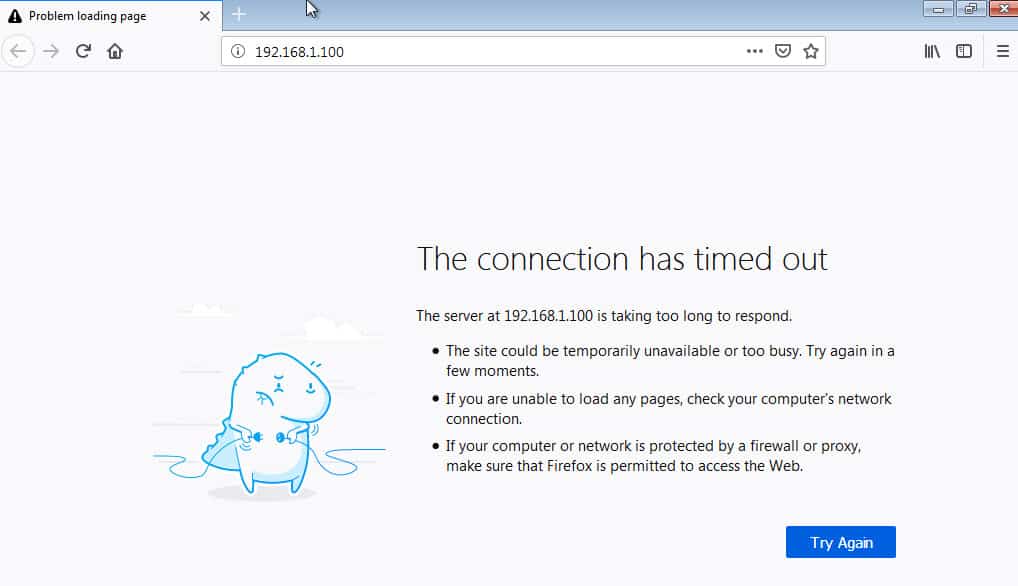
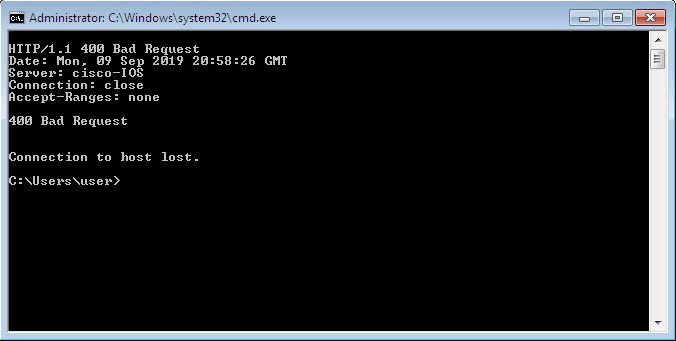
It does not seem to be working. Let’s try to use telnet and try to connect directly to port 80/tcp instead of using a browser:
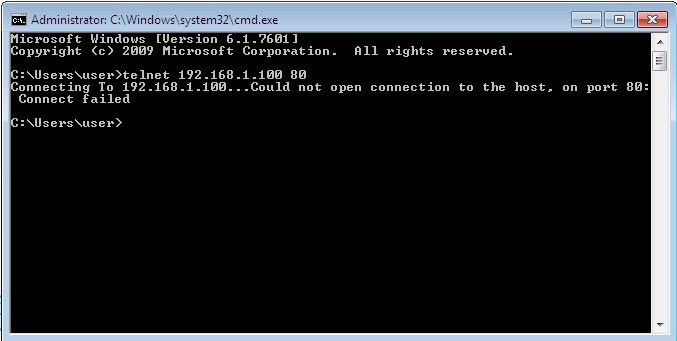
Still does not work. Maybe port 80/tcp is not open on the server?! let’s verify this from the ASA by initiating tcp ping to the server IP address on port 80:
ciscoasa# ping tcp inside 192.168.1.100 80
Type escape sequence to abort.
No source specified. Pinging from identity interface.
Sending 5 TCP SYN requests to 192.168.1.100 port 80
from 192.168.0.111, timeout is 2 seconds:
!!!!!
Success rate is 100 percent (5/5), round-trip min/avg/max = 23/32/38 ms
The ASA seems to be able to reach the server on port 80/tcp as we can see. Let’s run some packet capture on the ASA’s inside interface and see if we get anything useful to help us finding out the issue when we try again to connect to port 80/tcp from the client:
ciscoasa# cap AREF1 interface inside match tcp any any eq 80
ciscoasa# sh cap AREF1
10 packets captured
c
1: 18:59:12.650463 192.168.0.100.49173 > 192.168.1.100.80: S 3043385393:3043385393(0) win 8192 <mss 1460,nop,wscale 8,nop,nop,sackOK>
2: 18:59:12.650753 192.168.0.100.49173 > 192.168.1.100.80: S 717772821:717772821(0) win 8192 <mss 1380,nop,wscale 8,nop,nop,sackOK>
3: 18:59:12.679972 192.168.0.100.49173 > 192.168.1.100.80: R 717772822:717772822(0) win 0
4: 18:59:12.680003 192.168.0.100.49173 > 192.168.1.100.80: R 2687127546:2687127546(0) win 0
5: 18:59:14.686411 192.168.0.100.49173 > 192.168.1.100.80: R 717772822:717772822(0) win 0
6: 18:59:15.634229 192.168.0.100.49173 > 192.168.1.100.80: S 3043385393:3043385393(0) win 8192 <mss 1460,nop,wscale 8,nop,nop,sackOK>
7: 18:59:15.634473 192.168.0.100.49173 > 192.168.1.100.80: S 3285732147:3285732147(0) win 8192 <mss 1380,nop,wscale 8,nop,nop,sackOK>
8: 18:59:15.651135 192.168.0.100.49173 > 192.168.1.100.80: R 717772822:717772822(0) win 0
9: 18:59:15.651165 192.168.0.100.49173 > 192.168.1.100.80: R 960119576:960119576(0) win 0
10: 18:59:18.699930 192.168.0.100.49173 > 192.168.1.100.80: R 717772822:717772822(0) win 0
As we can see there are some Syn packets and some resets. The flow does not seem to be healthy. Let’s run some packet capture to see if there are any drops on the ASA related to this traffic:
ciscoasa# cap AREF type asp-drop all real-time
Warning: using this option with a slow console connection may result in an excessive amount of
non-displayed packets due to performance limitations.
c
Use ctrl-c to terminate real-time capture
c
1: 18:38:26.373744 192.168.0.100.49171 > 192.168.1.100.80: R 3742760035:3742760035(0) win 0 Drop-reason: (tcp-not-syn) First TCP packet not SYN
2: 18:38:30.402170 192.168.0.100.49171 > 192.168.1.100.80: R 3742760035:3742760035(0) win 0 Drop-reason: (tcp-not-syn) First TCP packet not SYN
3: 18:38:38.422478 192.168.0.100.49171 > 192.168.1.100.80: R 3742760035:3742760035(0) win 0 Drop-reason: (tcp-not-syn) First TCP packet not SYN
c
3 packets shown.
0 packets not shown due to performance limitations.
As we can see from the packet capture, the ASA is dropping some packets we are sending from the clients to the server. The reason behind this is because from the ASA perspective those packet are not SYN packets and the first tcp packet is not a SYN. Let’s try to interpret this message by analyzing the traffic flow.
When the client initiates tcp traffic to the server, the client first sends a SYN packet through its default gateway which is the ASA inside interface IP address. This is because the server is located on a different subnet. When the ASA receives this SYN packet it does a lookup on its routing table to see if it has a route to the server. In our case the ASA has a route to the server’s subnet 192.168.1.0/24 via the next hop 192.168.0.112 which is the router interface facing the ASA.
The ASA routes the SYN packet to the router, and the router then routes the packet to the server via its connected interface GigabitEthernet0/1. When the server responds back with a SYN-ACK packet to the client, the server sends the packet to its default gateway, again this is because the client is located on a different subnet.
The router then does a lookup on its routing table to see if it has a route to the client, in our case the router has a route to the client’s subnet via its directly connected interface GigabitEthernet0/0. This means that from the router perspective the traffic destined to the subnet 192.168.0.0/24 will be routed via its directly connected interface GigabitEthernet0/0, so the ASA is not being involved at all in this piece.
When the client receives the SYN-ACK packet from the router, the client finally sends the ACK packet to the server to complete the 3-Way Handshake. This final packet will be sent again through the ASA. Here the ASA drops the packet and reset the connection.
The reason behind this is because the ASA treats this traffic as illegitimate since it did not see the whole 3-Way Handshake flow. The ASA in this case has seen the SYN packet and the ACK packet, but it did not see the SYN-ACK packet the server sent to the client, because as we have seen, that packet was sent directly the router to the client.
You might be wondering why the traffic sent by the client to the server on port 80/tcp fails, but the pings were successful. The reason is because with ICMP traffic there is no 3-Way Handshake at all. Also ICMP echo and echo-reply packets are kind of independent.
One thing worth mentioning here is that in this specific scenario even if we don’t enable the ICMP inspection on the ASA global policy map, pings will still be successful. The reason as we could see is because the ASA in this case does not receive the echo-reply packets as those are sent directly by the router to the client.
This issue could be seen in topologies similar to the one we have on this lab, and also on topologies where legitimate asymmetric routing could happen. In both these cases we need to fix this issue by bypassing this default check by the ASA. The way to fix this is going to be by applying a policy map on the ASA interested interface where the traffic is being routed, which is the inside interface in our case. Let’s apply the required configuration and test again.
This fix will be compound of three objects, an access list to match the traffic we want the TCP State Bypass to be applied, a class map to tie the access list in a policy map, a policy map to define the action and finally we need to apply the policy map on the interested interface which is in our case the ASA inside interface.
Step 1: Create the access list to match traffic sent by the client to the server on port 80/tcp
ciscoasa(config)# access-list EXCLUDE-TCP-STATE extended permit tcp host 192.168.0.100 host 192.168.1.100 eq 80
Step 2: Create the class map and bind the access list we created
ciscoasa(config)# class-map CM-EXCLUDE-TCP-STATE
ciscoasa(config-cmap)# match access-list EXCLUDE-TCP-STATE
Step 3: Create the policy map and applying the TCP State Bypass to the class map we created
ciscoasa(config)# policy-map PM-EXCLUDE-TCP-STATE
ciscoasa(config-pmap)# class CM-EXCLUDE-TCP-STATE
ciscoasa(config-pmap-c)# set connection advanced-options tcp-state-bypass
Step 4: Apply the policy map we created to the ASA inside interface
ciscoasa(config)# service-policy PM-EXCLUDE-TCP-STATE interface inside
Now that we applied all the required configuration, let’s test again and see if the tcp traffic now is working:
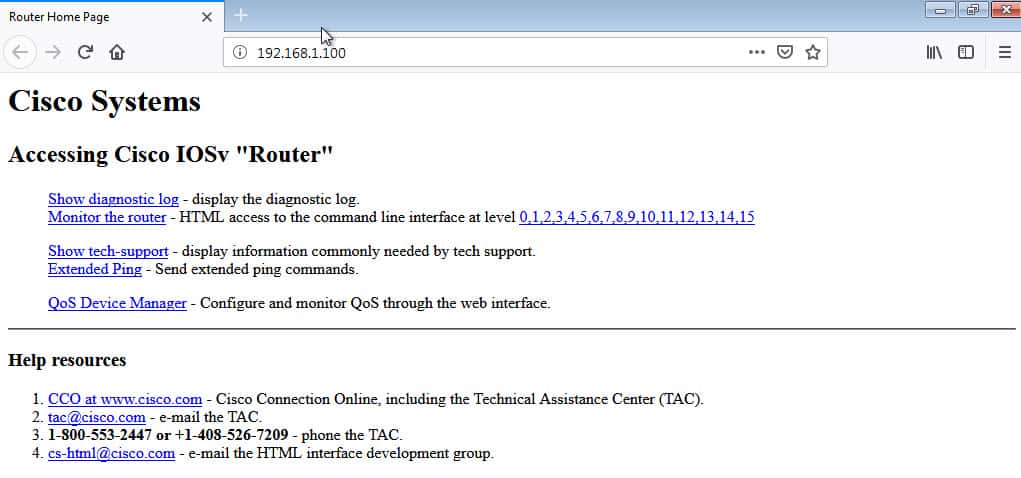
As we can see now the client can successfully connect to the server web page on port 80/tcp.
This wraps up our post about Cisco ASA TCP State Bypass.
Thanks for reading!
Thank you for your article!!! It’s very helpful for me!
Thank you very much for the information very helpful when reconfiguring hardware.
Here’s some more information: https://www.cisco.com/c/en/us/support/docs/security/asa-5500-x-series-next-generation-firewalls/118995-configure-asa-00.html
The only caveat is that with such a TCP bypass setting, the Firepower module stops working, since traffic does not pass through the SFR
This article was a saving grace. Thank you for taking the time to create it.
Very clear!! thank you very much.