In this post I'm going to show you how to configure Windows AD as the external authentication server for ISE CLI access. When you deploy ISE for the first time, you use the command "setup" at the login prompt to start the bootstrap process which will take you through a list of required steps to complete the appliance initial configuration.
Once that is completed, the appliance will be ready for the next level of configuration which will be done through the GUI. One of the required steps during the bootstrap process is to configure the CLI admin account. You can choose to create a new admin account or you can accept the default account which is "admin". This default account cannot be deleted, it can be disabled or downgraded to a read-only account though.
This admin account will only be used for CLI access, it does not apply for GUI access. Even if you accept the default CLI "admin" account which has same username as the one on GUI, you still cannot use it to get access to GUI. The reason behind this is because ISE has two separate databases in which the users details are stored. One database is for CLI users and another is for GUI users.
The GUI admin account can do pretty much everything on the appliance with the exception of a few admin tasks that could be done only through CLI. Generally speaking, once the initial configuration has been completed through CLI, you wouldn't need to go back to CLI unless you need to do some admin tasks that would be supported only in CLI. From GUI you can manage ISE deployment and apply all the configurations you need to get ISE ready to start managing and enforcing accesses in the environment.
A few examples of those configurations would be setting up the deployment, defining personas, managing certificates, installing licenses, enabling profiling, configuring authentication and authorization, managing network devices, configuring external identities, etc. However, as mentioned there are some low-level admin tasks that could be done only through CLI such as stop/start ISE application services, monitoring the low-level system logs, changing IP addresses, reloading the appliance, etc.
The admin access through the GUI can be configured to authenticate against an external authentication server (you can still use the local admin account by selecting Internal as the identity source at the login page) such as Windows AD domain, and implementing RBAC to provide different access levels based on the AD groups. However, that was not the case for CLI access until ISE 2.6 came out. Prior to ISE 2.6 only the local users database could be used to authenticate the CLI access. Creating multiple CLI local admin users is allowed prior and post ISE 2.6.
The new added feature to ISE 2.6 allows configuring Windows AD domain as the external authentication server for CLI access and accordingly authenticate the CLI users against that server. However, it also requires some specific LDAP attributes to be applied at the user level on the AD domain, you will see the complete configuration steps below in this post. Those attributes will define if the access to CLI is going to be a full access or a read-only access.
If the AD domain that will be used for both CLI and GUI is the same, then configuring the CLI access through AD domain should be done before you join the AD domain in the GUI. The reason behind this is because if configure the CLI through AD domain after you joined the AD domain in the GUI, then you need to leave and re-join the AD domain in the GUI, otherwise authentications to that domain will fail.
One thing to mention here is that although you will see the AD domain status in ISE GUI as Operational with the green check before you leave and re-join the domain, leaving the re-joining is still required. In fact if you don't do that and you run the Diagnostic Tool you will see that it will fail a couple of Kerberos checks. After the configurations steps below I will show you what I mean by this. Now let's jump in the configuration part.
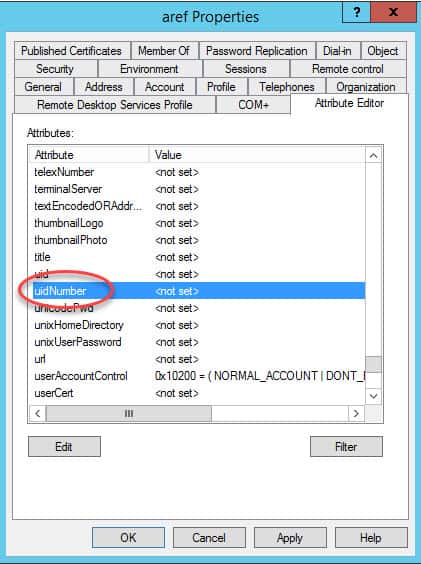
Step 1: Go to Active Directory Users and Computers on the AD, and right click on the user account you want to grant access to ISE CLI and click on Properties

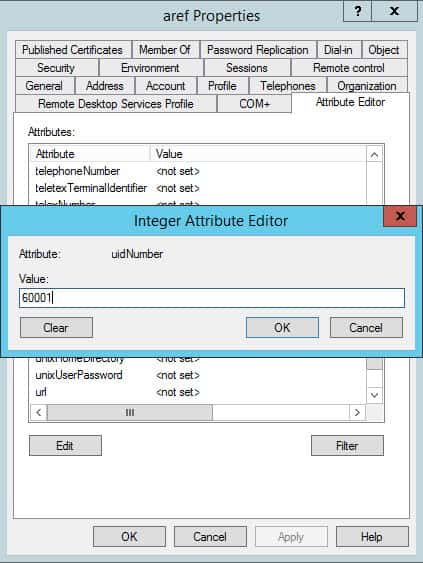
Step 2: Go to Attribute Editor, scroll down until you find the uidNumber attribute and change it to any value greater than 60000
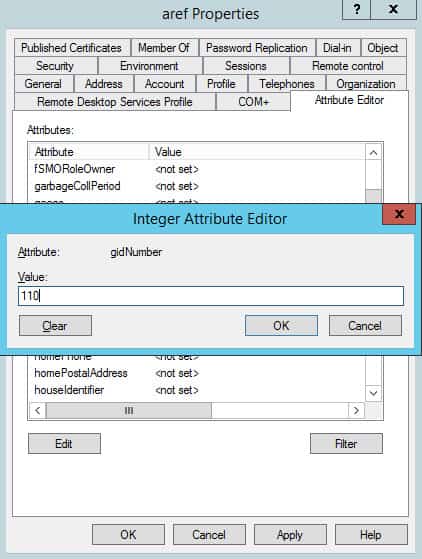
The uidNumber must be a value greater than 60000 and it must be unique across all the users in the AD domain. However, the gidNumber value can be set to 110 or 111. Depending on what access level you want to grant to the user, the 110 value is used to grant full access, and the 111 value is used for read-only access. The uidNumber value should not be changed once it is configured. However, the gidNumber can be changed and in that case you should wait a few minutes before trying again to access to the CLI with that account.
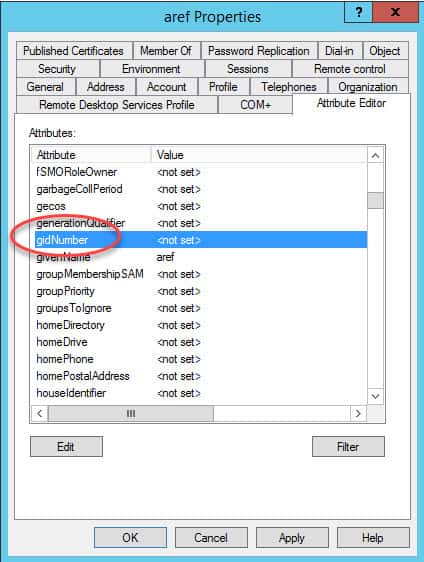
Step 3: Scroll up on the same list until you find the gidNumber attribute and change it to 110
Step 4: Login to ISE CLI as the local admin, and configure the AD as the external authentication server for the AD user account
![]()
Notice the message regarding leaving and re-joining the AD domain.
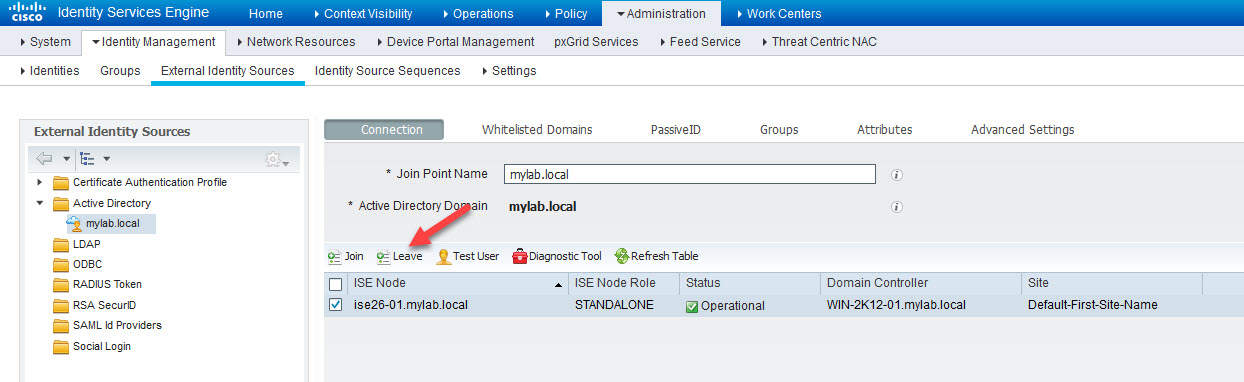
Step 5: Assuming the AD was already joined in ISE GUI, we need to leave it and re-join it. Go to ISE GUI and login as the local admin, and go to Administration -> External Identity Sources, on the left side click on the AD domain name in the Active Directory section

Step 6: Select the ISE node and click on Leave
Step 7: Type the AD admin username and password (you can use any user account with machine write privileges) and click ok
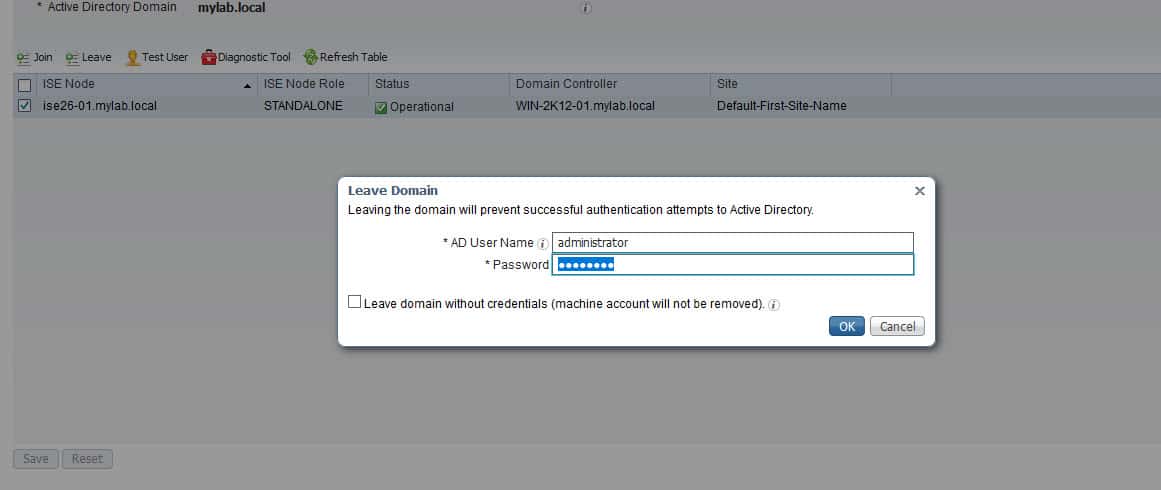
Step 8: Close this window

Step 9: Click on Join
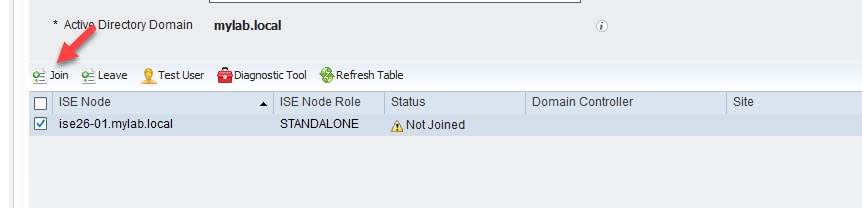
Notice the Status of the AD domain is now shows up as Not Joined.
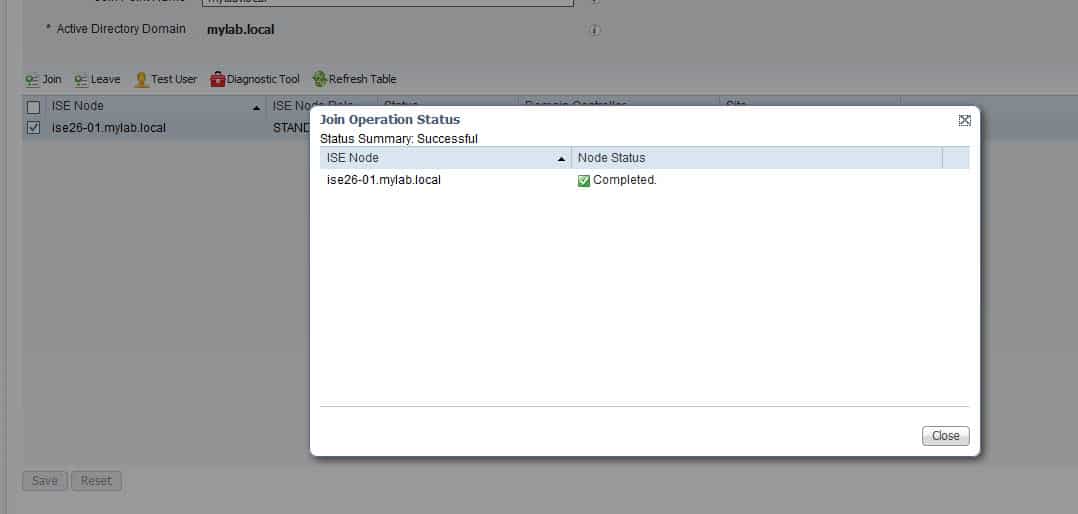
Step 10: Type the AD admin username and password (you can use any user account with machine write privileges) and click ok

Step 10: Close this window
Now that we have completed all these steps let's test the CLI access with the username we configured to authenticate against the AD domain:

As you can see, the new admin account is working as expected, it also has same privileges as the local admin account. Now the next step would be to disable the CLI local admin account or to downgrade its privileges, this step is not required but you might want to do it.
To disable the CLI local admin account
![]()
Although the email address should be the correct one, however, even if you use any other email address it will work.
To re-enable the CLI local admin account
![]()
To downgrade the CLI local admin account privileges from full access to read-only
![]()
Note the user keyword which assigns read-only privileges to the user.
To upgrade the CLI local admin account to full access privileges
![]()
Note the admin keyword which assigns full access privileges to the user.
Any of the above commands must be saved:
![]()
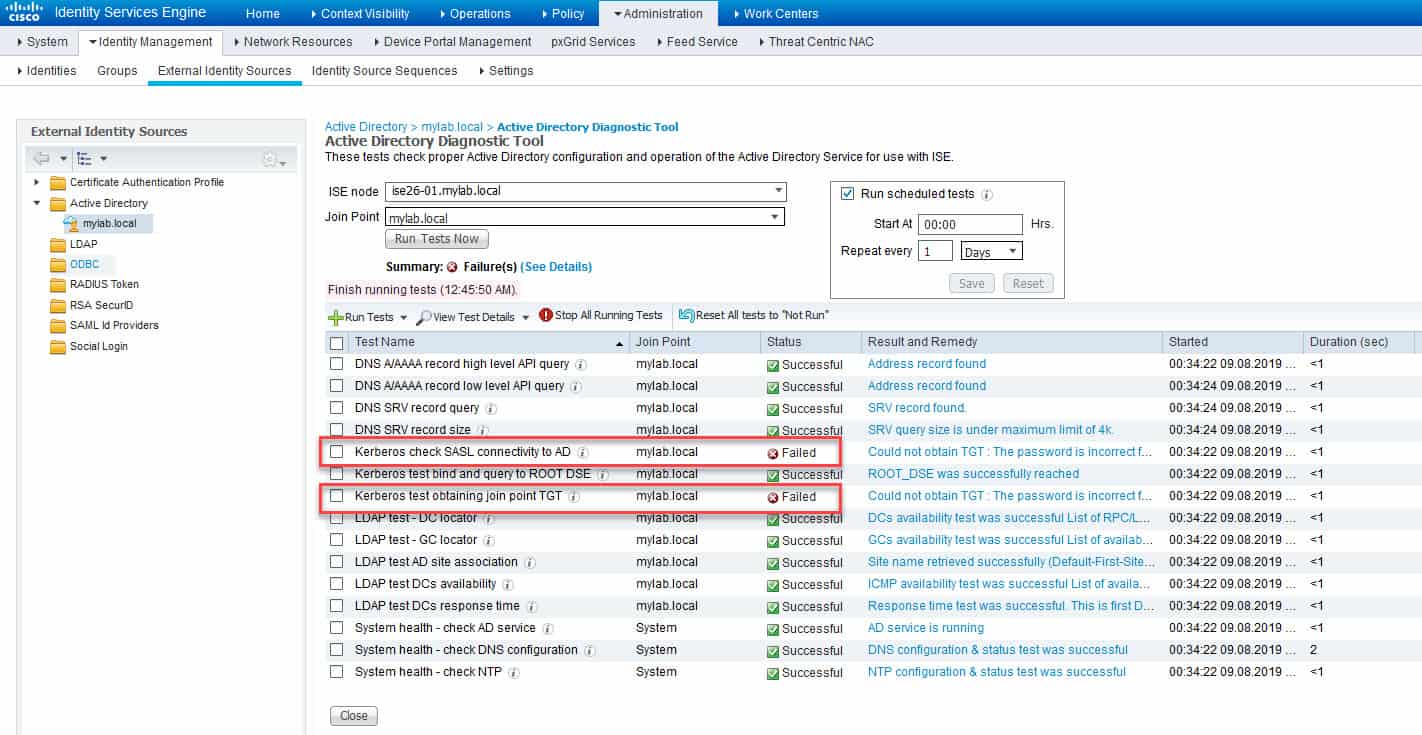
Here a note regarding leaving and re-joining the AD domain after you configured the CLI access through the AD domain. Assuming the AD domain was already joined before you configured the CLI access through the AD domain, if you go to check the status of the AD domain in ISE GUI you will that it will show as Operational, so you might think that you don't have to leave and re-join the domain. However, if you run the Diagnostic Tool you will see that it fails a couple of Kerberos checks. This would mean that leaving and re-joining the domain is indeed required.
Here is how it would look like when you run the Diagnostic Tool before leaving and re-joining the domain:
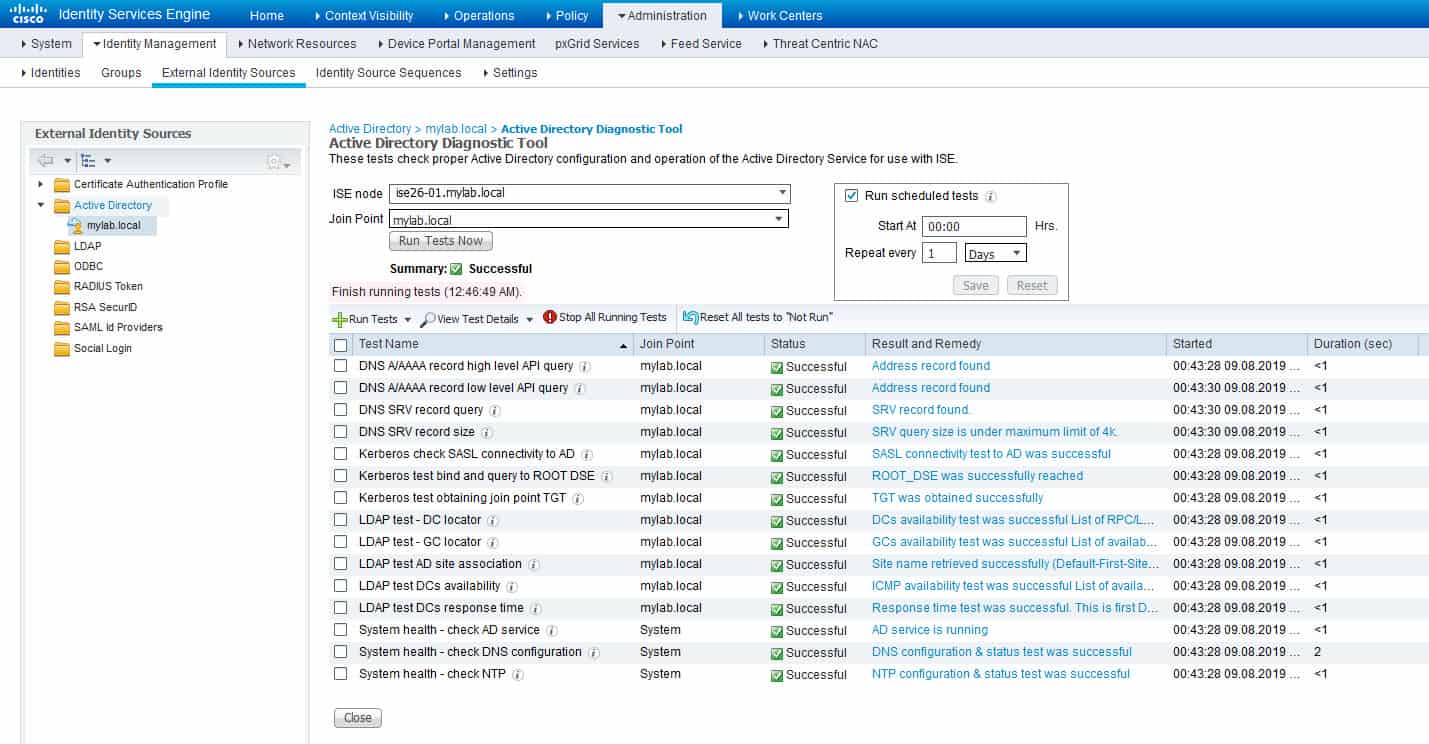
And here is how it would look like after leaving and re-joining it:
Finally, here is how a read-only local user account would look like when connected to ISE CLI:
![]()

As you can see, the read-only user account is limited just to a few commands with no access to any privileged command.
This wraps up this post of using Windows AD as the external authentication server for ISE CLI access.
Thank you for reading!
Wow.. Thank you ..Your Post helped me a lot.
Thanks, this helps a lot !