This post will show you how to integrate Cisco FMC with ISE using pxGrid. Let's first start off with some brief description of what pxGrid is. pxGrid stands for Platform Exchange Grid. and it is a technology that allows integrating multiple vendors security products together and grouping them in an ecosystem domain. The main purpose of using pxGrid is to share contextual data between the integrated partners, but it is not limited only to this. We can leverage pxGrid to help remediate in security incident events.
pxGrid is a secure protocol and it uses certificates to create a mutual trust relationship between the integrated partners with the controller, which is Cisco ISE. This means that in order for pxGrid to work each partner in the ecosystem must have its own identity certificated installed.
There are different options to enrol certificates to the ecosystem partners. One option would be to use the corporate internal CA to issue the identity certificates to all partners. pxGrid certificate does not necessarily have to be separate than the normal identity certificate.
With this being said, if we have multiple partners residing on the same network, and all of them have already an identity certificate issued by the corporate internal CA, then that certificate can also be used for pxGrid integration. In that case, we are one step ahead since we don't have to issue new certificates for those partners.
Another option would be to use ISE as the certificate issuer for the partners pxGrid certificates. In this case we need to make sure that ISE root certificate is installed as a trusted root CA on all the ecosystem partners.
All pxGrid ecosystem partners will integrate with ISE, ISE will be the controller for the whole ecosystem domain. Any contextual data sharing must happen through ISE, which means that if two partners want to share data between each other, they must pass through ISE since there would be no direct relationship between them.
Although ISE will be the pxGrid controller, it can also share and learn contextual data similar to any other partner. The data that will be shared through pxGrid does not necessarily have to be learned through pxGrid. For example, a partner can learn some contextual data from an external source, and then share that data with the partners interested in that data.
A real use case of this is when using passive identity connector between ISE and Active Directory where pxGrid is not required nor supported on AD. In that case ISE learns passively the users' identities and then it shares them with the partners through pxGrid.
pxGrid uses a built-in API in ISE and it is comprised of three main components which are the controller, publisher and the subscriber. The controller is the core component to make everything working and as said is going to be ISE. The publisher instead is the partner that has some contextual data to be shared with the other partners. And finally the subscriber is the partner that is interested in parsing some contextual data from the other partners.
That was what pxGrid is in a nutshell, now let's see how to integrate Cisco FMC with ISE using pxGrid in practice. Let's dive into the configuration.
Topology

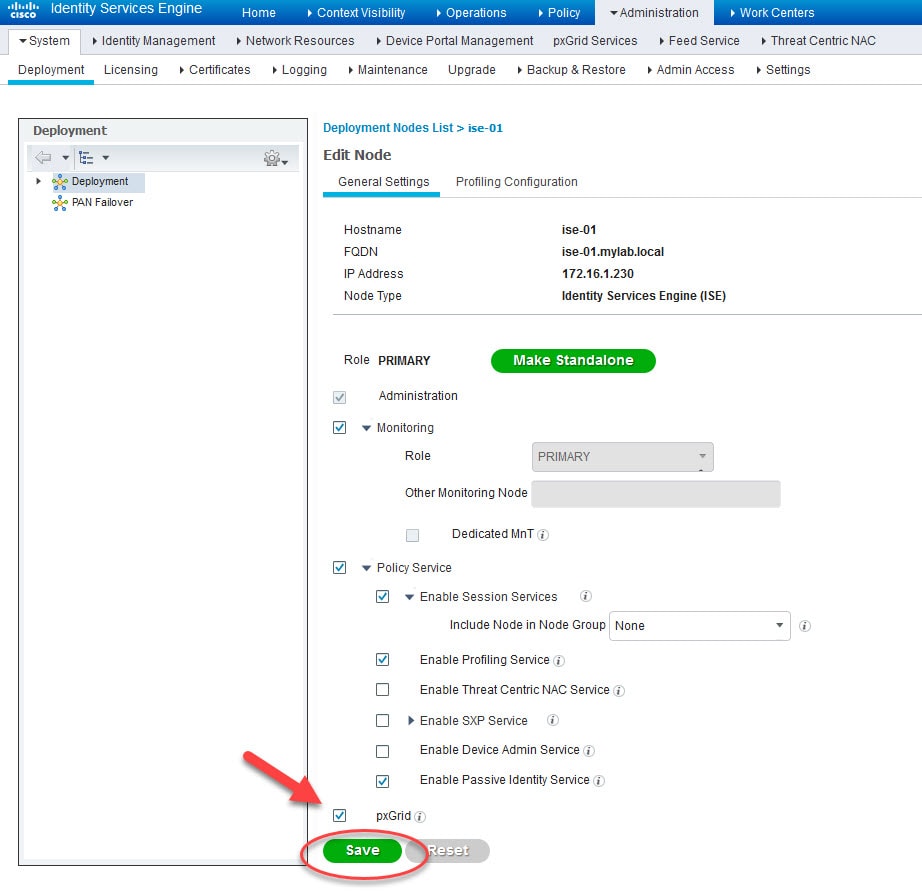
Step 1: Enable pxGrid Persona
Go to Administration > System > Deployment and click on ISE node

Enable the tick box next to pxGrid and click Save
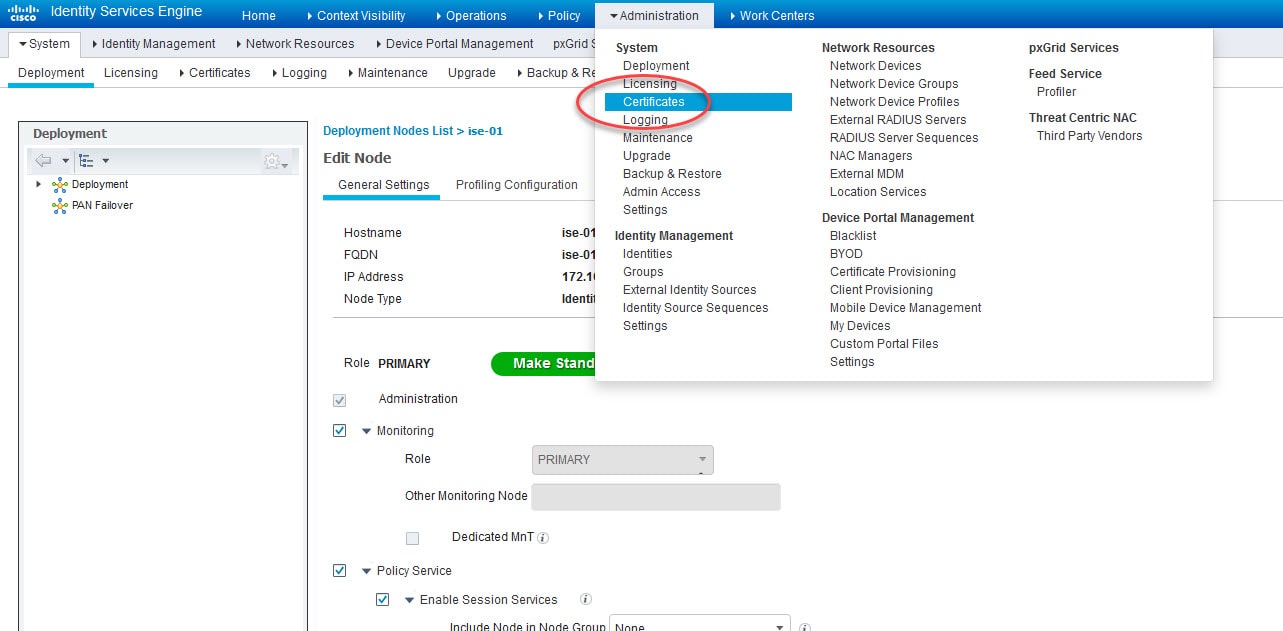
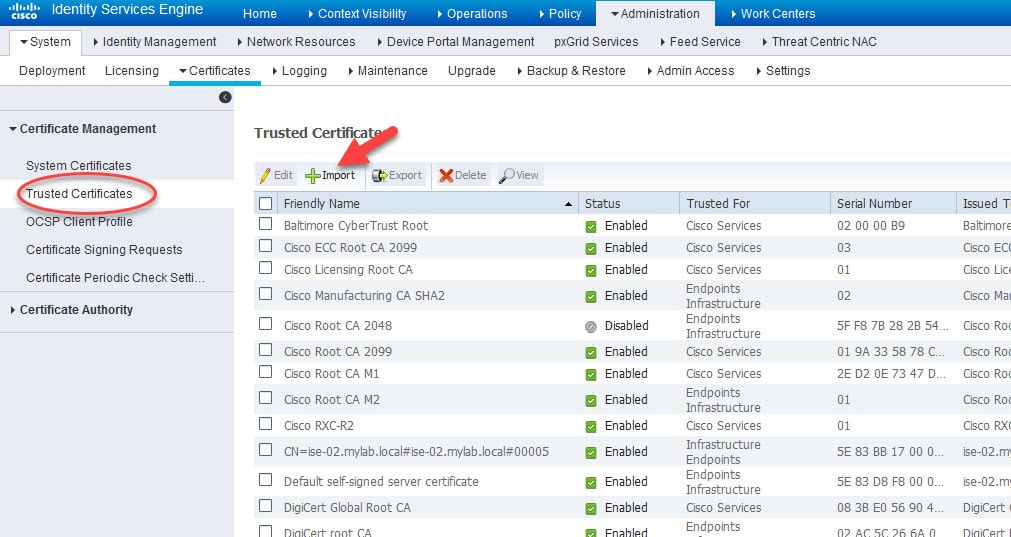
Step 2: Import the internal CA public certificate
Go to Administration > Certificates > Certificate Management > Trusted Certificates > Import and select the internal CA public certificate
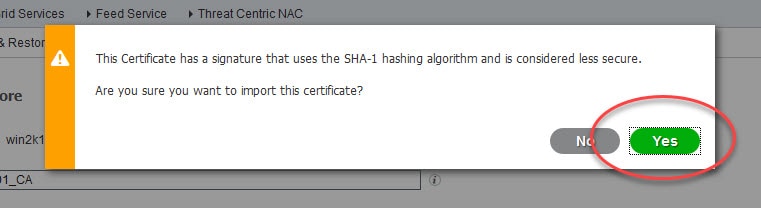
Depends on the certificate you are importing, if it uses a higher SHA algorithm than SHA 1 you will not get the above warning message.
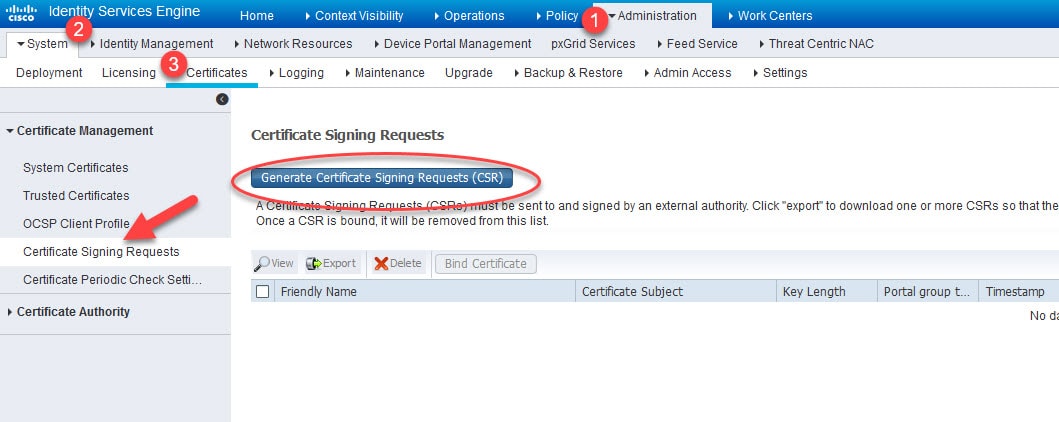
Step 3: Generate a CSR on ISE to issue a certificate by the internal CA
Go to Administration > System > Certificates > Certificate Management > Certificate Signing Requests and click on Generate Certificate Signing Requests (CSR)
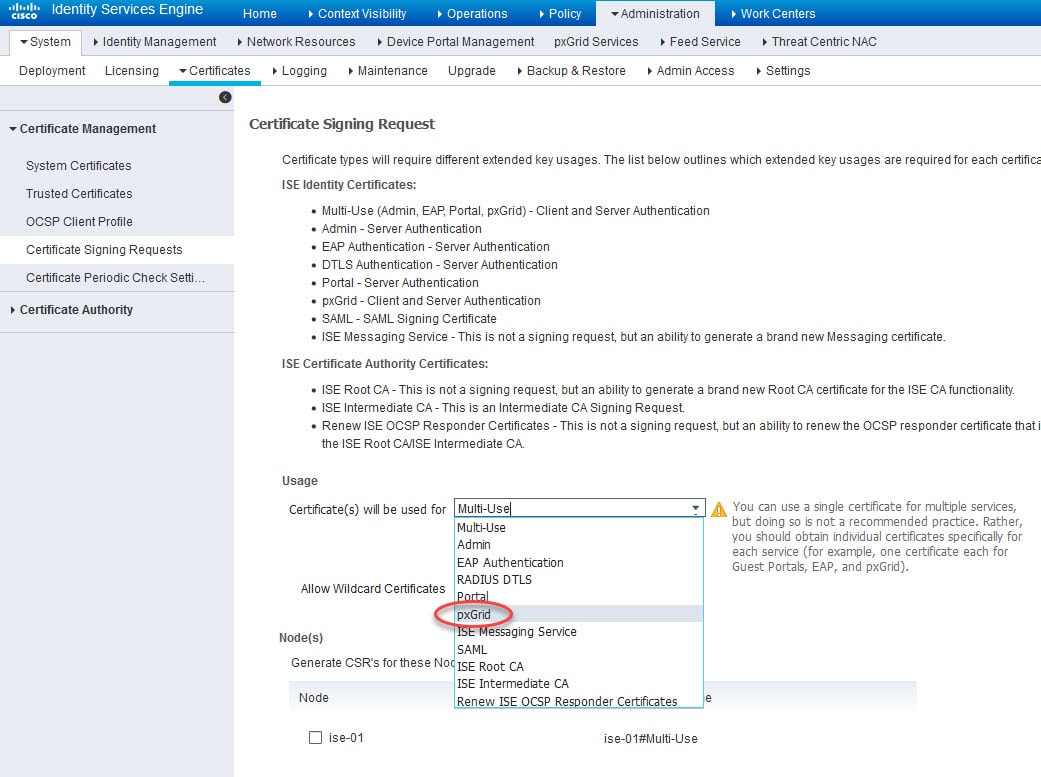
Select pxGrid from the Certificate Usage list, select ISE node in the Node(s) section, insert the CN value that you want to use in the pxGrid certificate, and click Generate
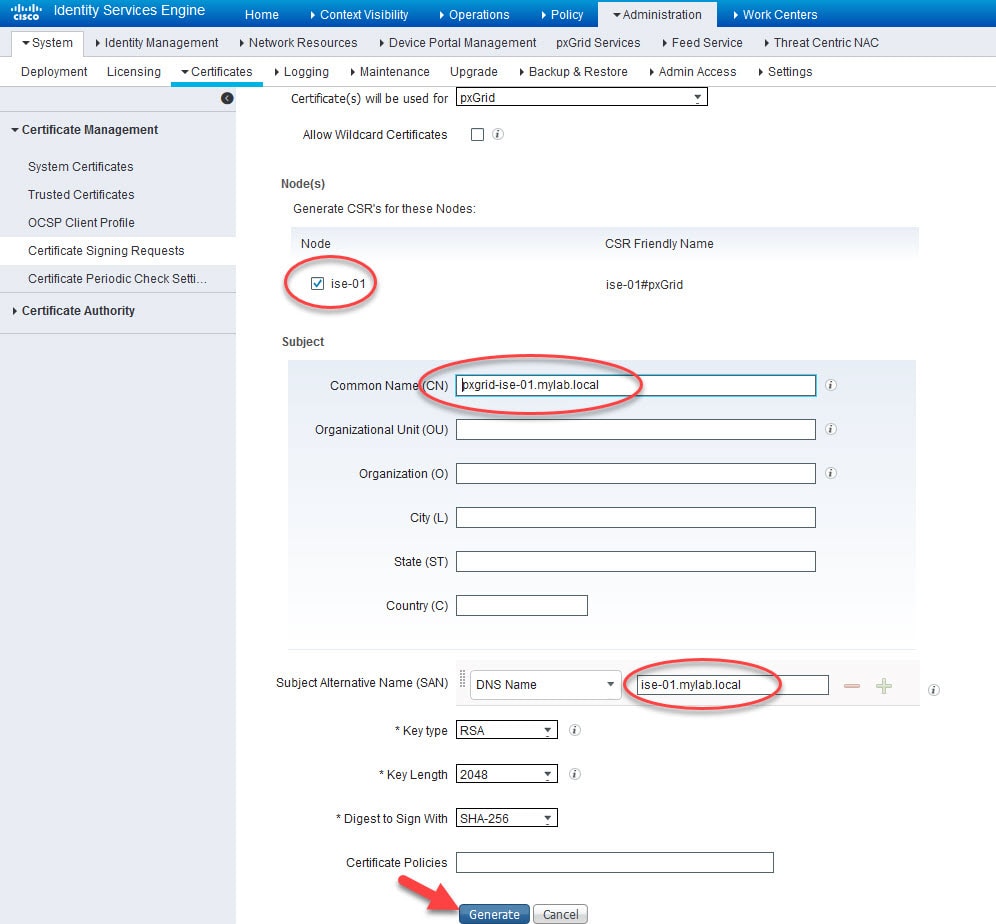
When using a CN value different than the actual node FQDN, the node FQDN must be added in the SAN. Also, the CN and SAN values should be resolvable, I've already added the DNS A records on the AD.
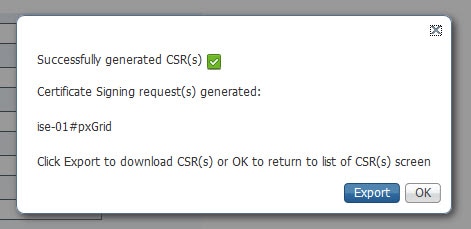
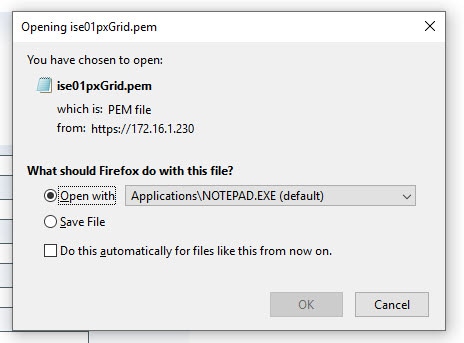
Step 4: Export the CSR
Click on Export and open the .pem file with Notepad and copy the whole content
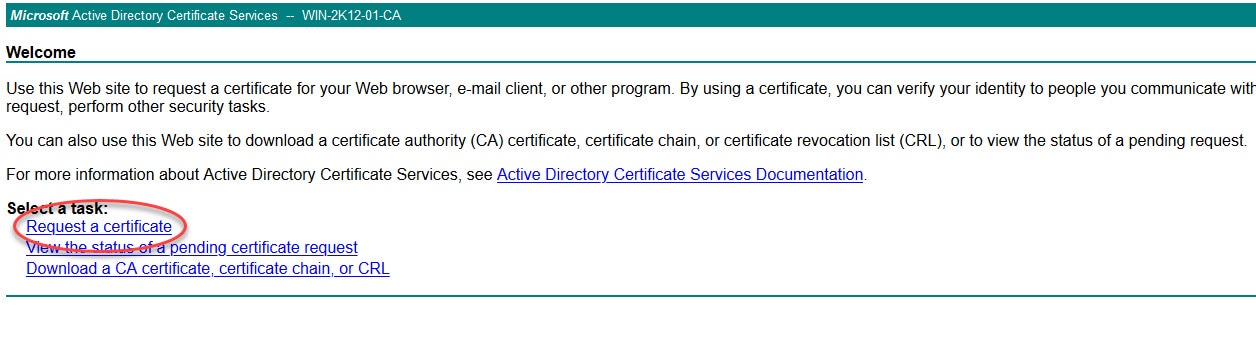
Step 5: Issue the pxGrid certificate from the internal CA
Click on Request a certificate
Click on Submit a certificate request by using a base-64-encoded CMC or PKCS #10 file, or submit a renewal request by using a base-64-encoded PKCS #7 file.

Paste the .pem file content you copied in step 5 in the Saved Request section and select the pxGrid template
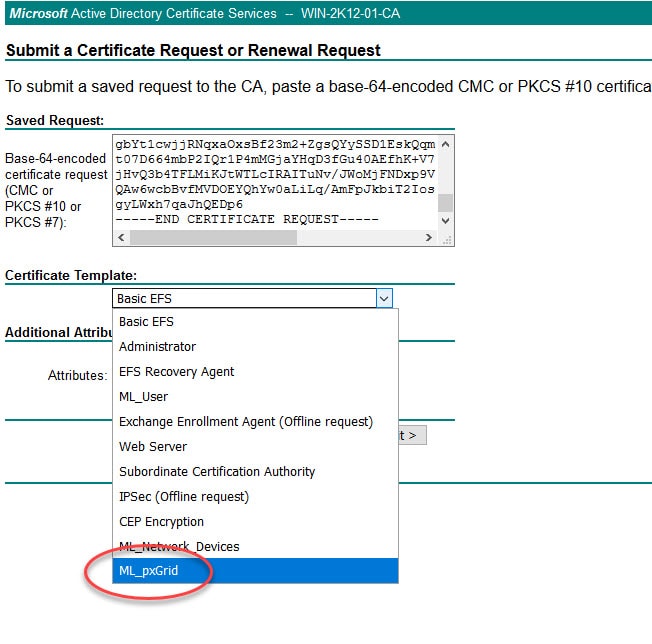
I will show you the relevant parameters I used to create the ML_pxGrid at the end of this post.
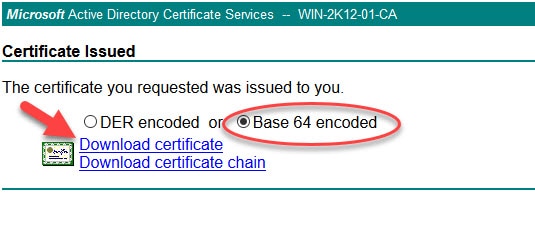
Select Base 64 encoded and Download certificate
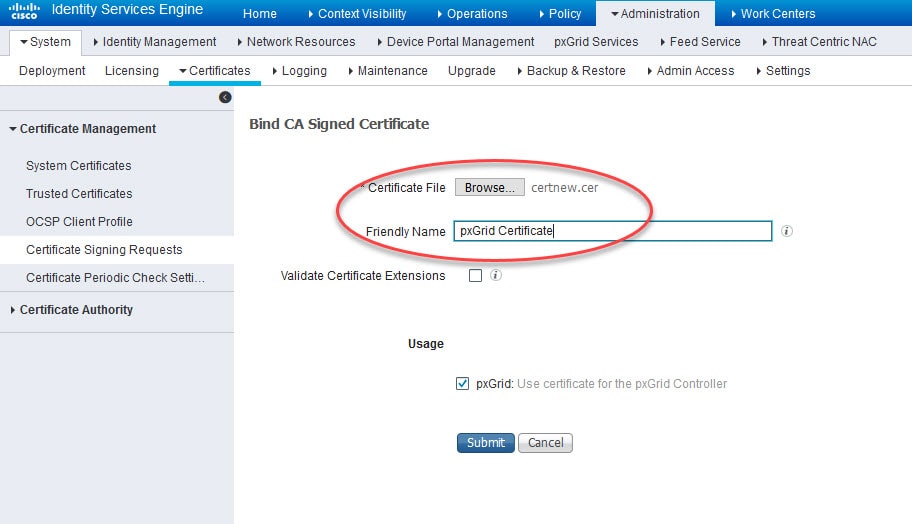
Step 6: Bind the issued certificate to the generated CSR
Go back to Administration > System > Certificates > Certificate Management > Certificate Signing Requests, select the CSR we generated and click Bind Certificate
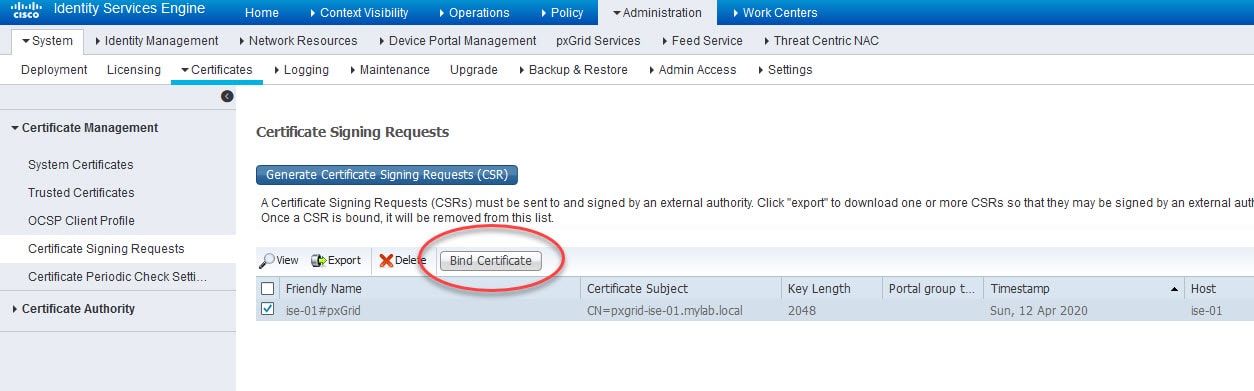
Browse the certificate you downloaded in the previous step and give it a friendly name and click Submit
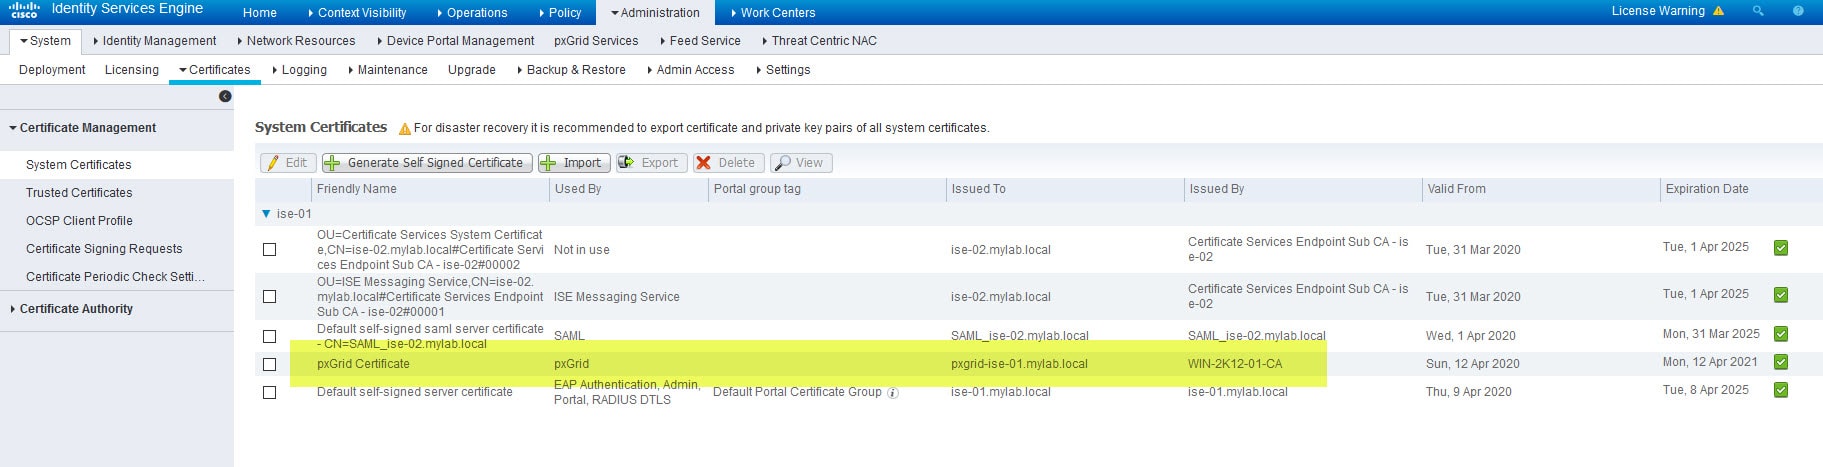
Step 7: Verify the certificate has been successfully imported and associated to pxGrid Persona
Go to Administration > System > Certificates > Certificate Management > System Certificates
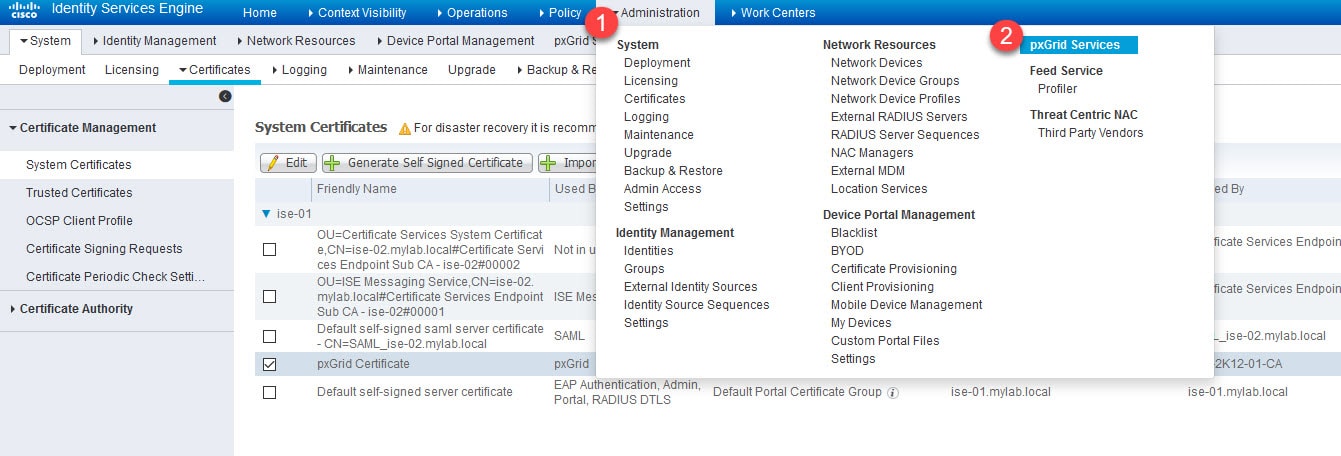
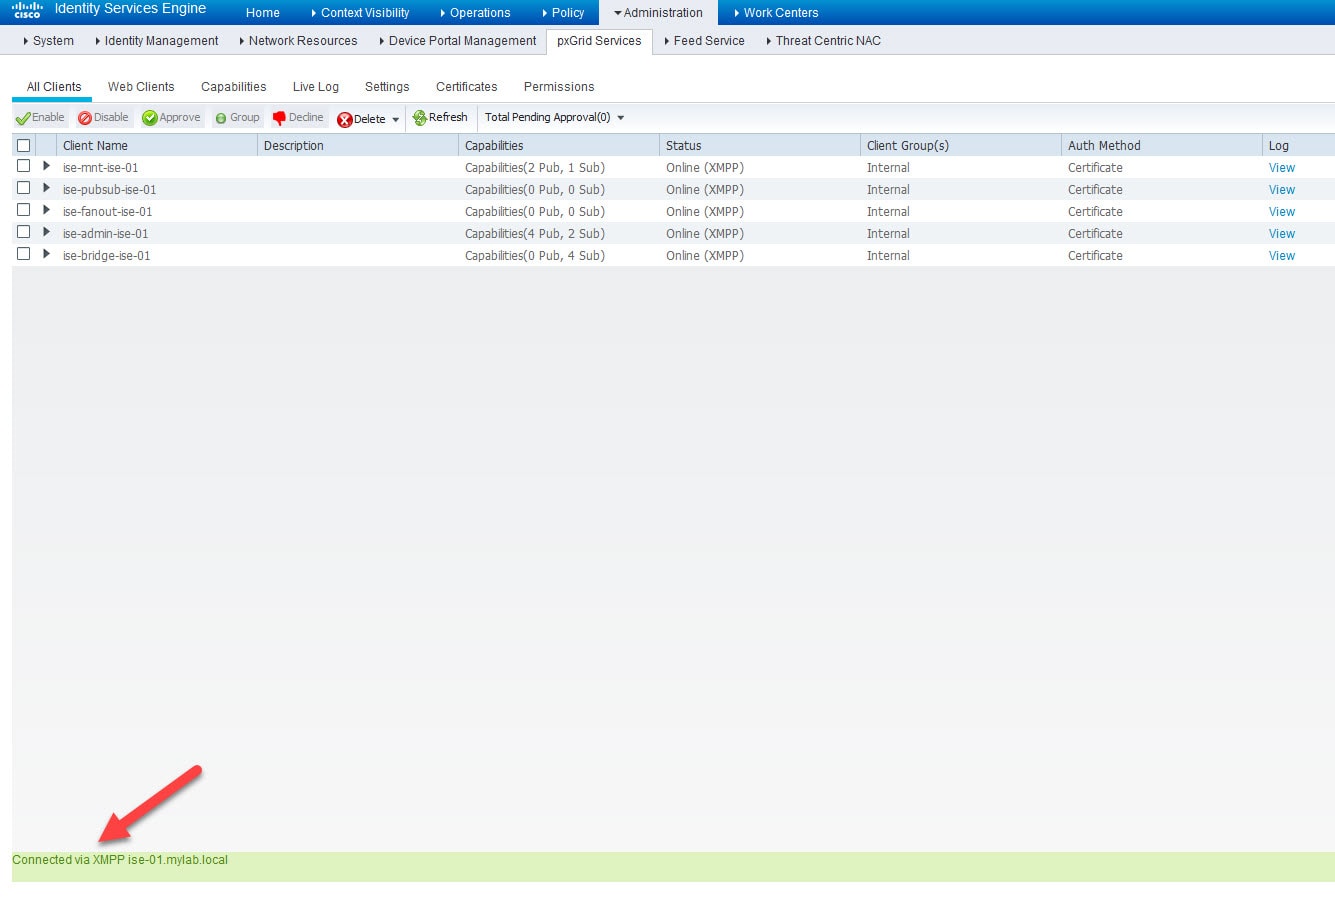
Step 8: Verify pxGrid services are up and running
Go to Administration > pxGrid Services
Now let's move on to the FMC.
Step 9: Import the internal CA public certificate
Go to Objects > Object Management > PKI > Trusted CAs

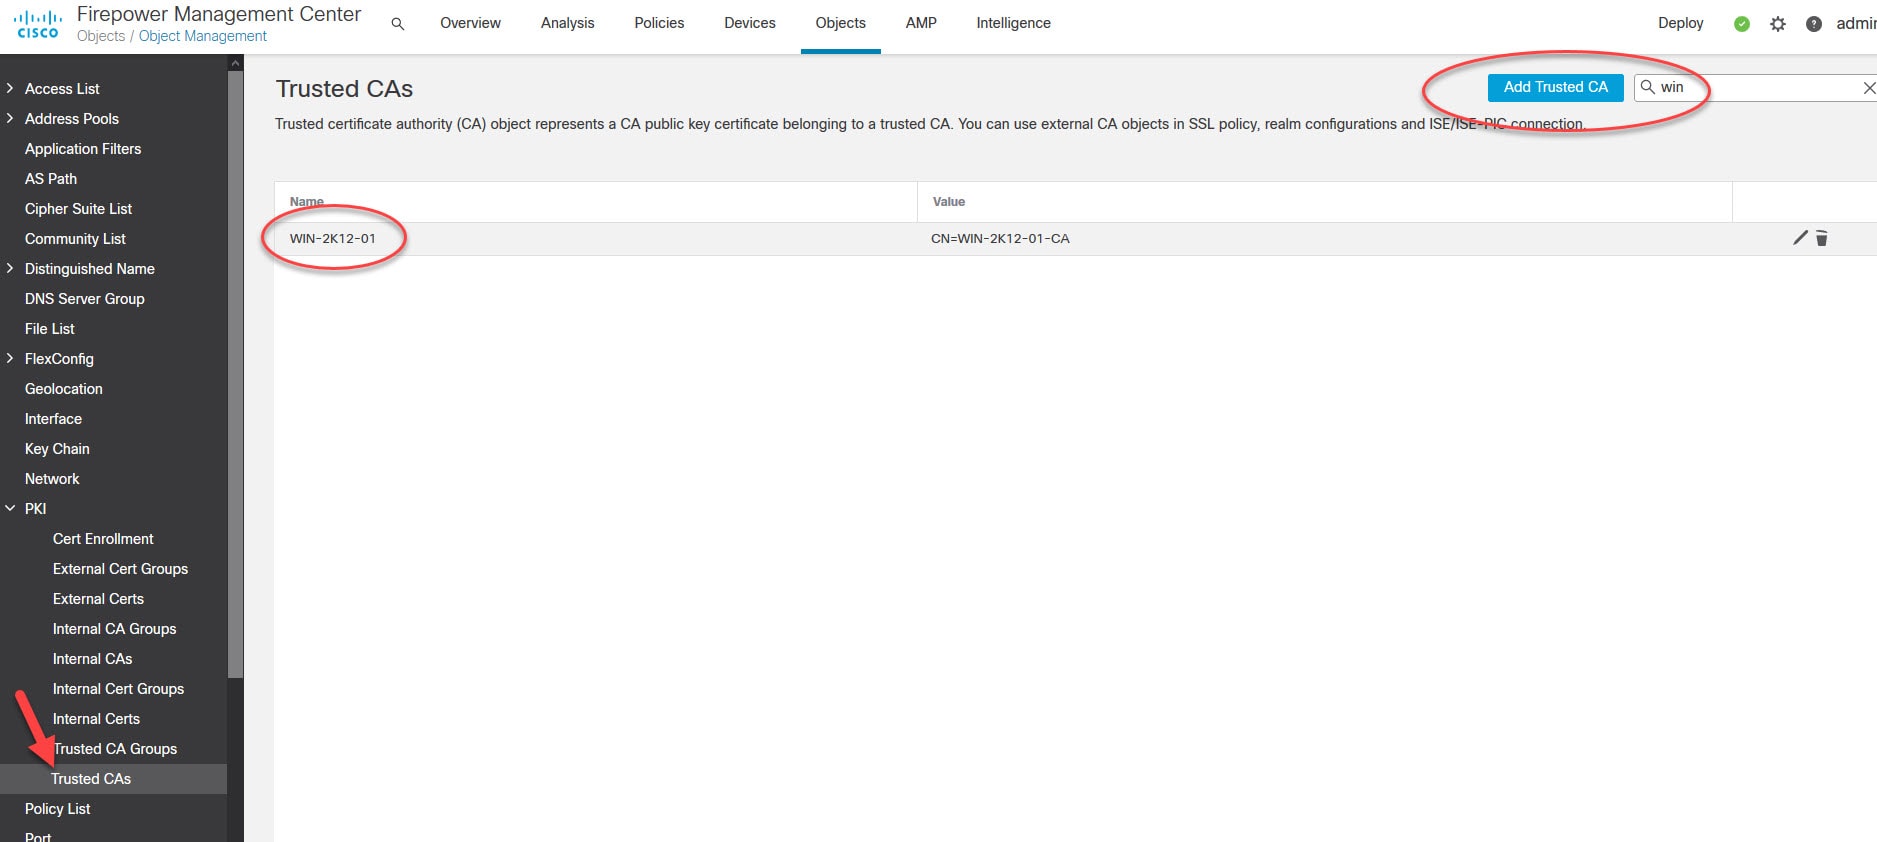
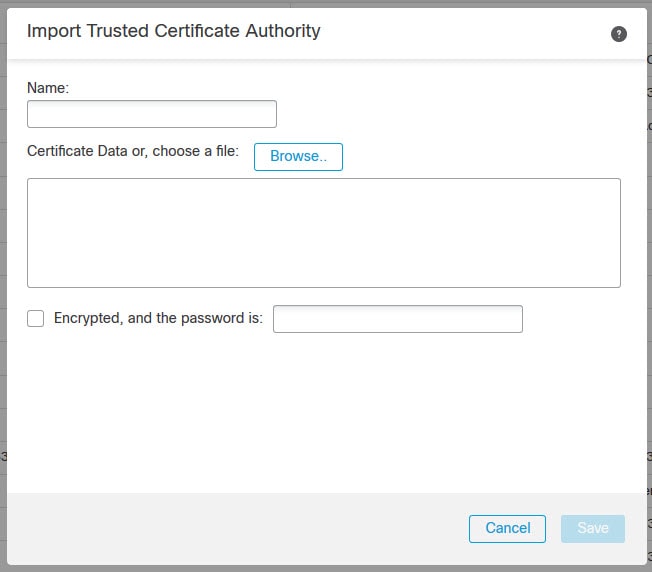
I had already imported the internal CA public certificate as you can see above. Otherwise, click on Add Trusted CA, give the certificate a name, browse the certificate file or paste its content, type the password if the certificate is encrypted, and finally click Save. Below is how the Add Trusted CA window looks like.
Step 10: Generate the CSR for the FMC certificate
As of FMC version 6.6.0 which we are using in our lab, the FMC still does not support generating the CSR from the UI. This means we need to generate the CSR manually. We can do so through the FMC CLI or somewhere else using OpenSSL or any other similar tool. Once we generate the CSR, we need to copy the content of the CSR and paste it into the internal CA certificate request window, similar to what we have done in step 5. I will generate the CSR from the FMC CLI as it has already the OpenSSL application installed.
admin@fmcv-02:~$ openssl req -newkey rsa:2048 -keyout FMCv-02.key -out FMCv-02.csr
Generating a RSA private key
.......................
...
writing new private key to 'FMCv-02.key'
Enter PEM pass phrase:
Verifying - Enter PEM pass phrase:
-----
You are about to be asked to enter information that will be incorporated
into your certificate request.
What you are about to enter is what is called a Distinguished Name or a DN.
There are quite a few fields but you can leave some blank
For some fields there will be a default value,
If you enter '.', the field will be left blank.
-----
Country Code []:
State or Province Name []:
Locality Name []:
Organization Name []:
Organizational Unit Name []:
Common Name []:fmcv-02.mylab.local
Email Address []:
Verify the private key and the CSR file have been created successfully
admin@fmcv-02:~$ ls
FMCv-02.csr FMCv-02.key
Copy the two files to a remote SCP server
admin@fmcv-02:~$ scp FMCv-02.* scpuser@172.16.1.229:/
The authenticity of host '172.16.1.229 (172.16.1.229)' can't be established.
RSA key fingerprint is SHA256:<// omitted //>.
Are you sure you want to continue connecting (yes/no)? yes
Warning: Permanently added '172.16.1.229' (RSA) to the list of known hosts.
scpuser@172.16.1.229's password:
FMCv-02.csr 100% 903 266.3KB/s 00:00
FMCv-02.key 100% 1834 482.4KB/s 00:00
Step 11: Repeat the same process as in step 5
Step 12: Import the issued certificate by the internal CA in FMC
Go to Objects > Object Management > PKI > Internal Certs > Add Internal Cert

Give the internal certificate a name, paste the content of the issued certificate by the internal CA, paste the private key content, tick the box next to Encrypted, and the password is and type the password you used when you generated the FMC CSR in the previous step, and finally click Save

Step 13: Integrate Cisco FMC with ISE using pxGrid
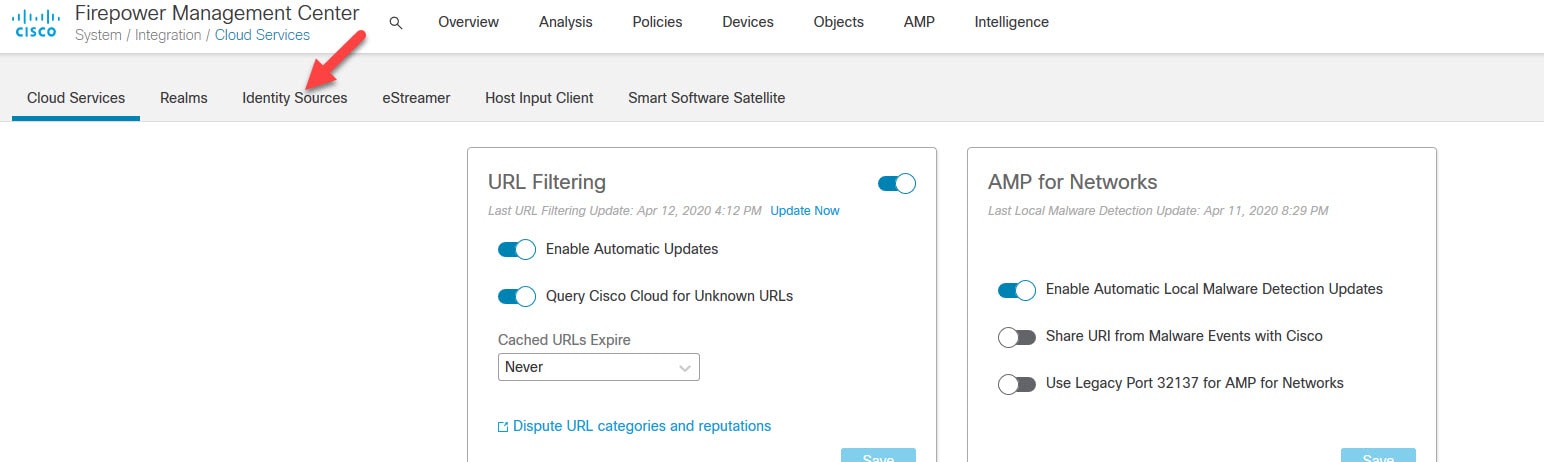
Go to the cog icon on the top right then Configuration > Integration
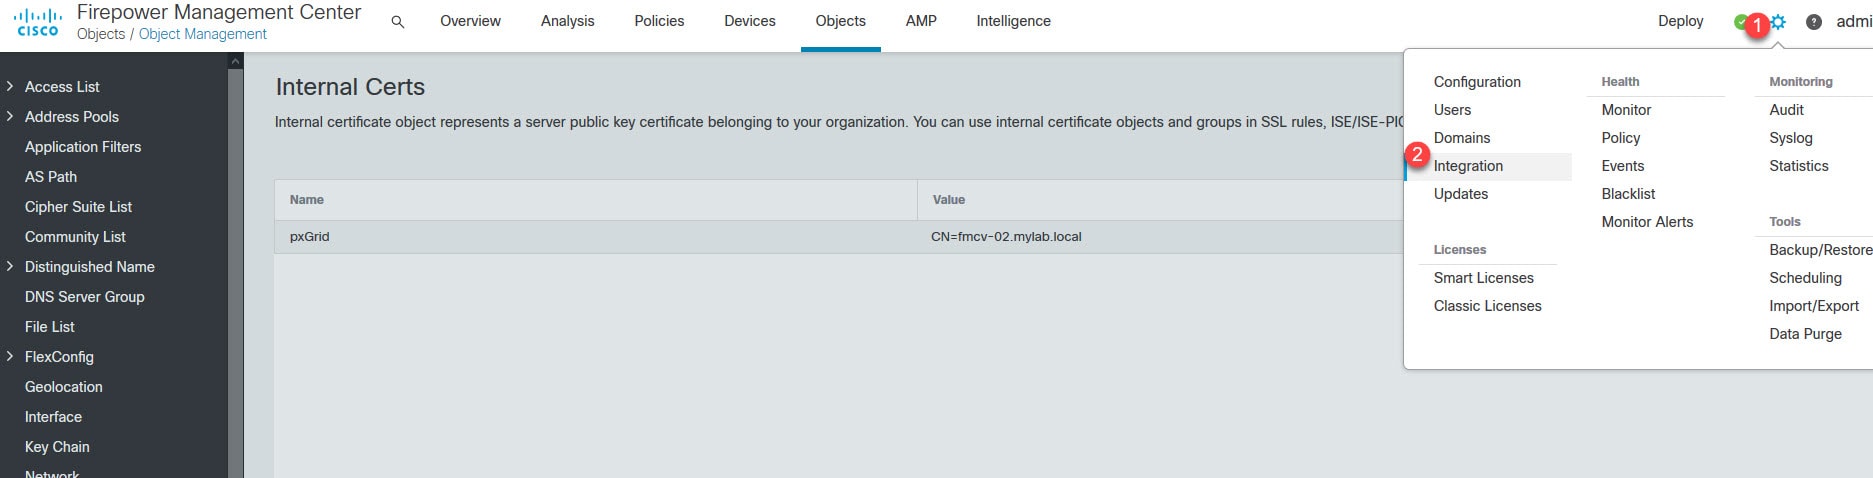
Go to Identity Sources
Type ISE node IP address, import the internal CA public certificate on both pxGrid Server CA and MNT Server CA, select the FMC certificate you imported in step 12, and click Test
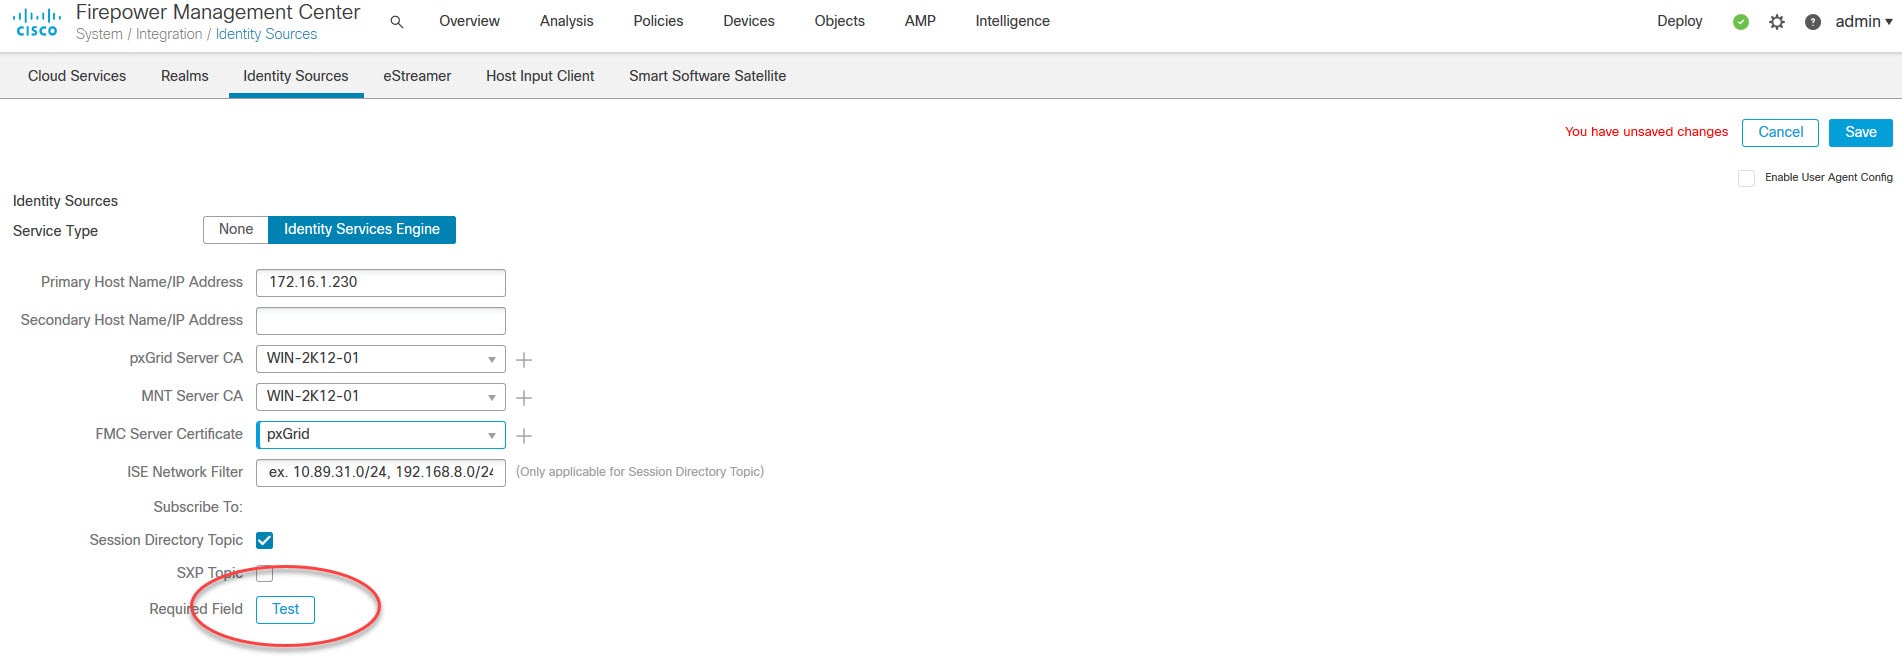
You might be wondering why we had to import the internal CA public certificate for MNT Server CA!. The reason of this is because the FMC would learn the contextual data from ISE pxGrid Persona. However, once those contextual data are learned, the FMC talks directly to ISE MnT Persona to download the actual data. Therefore, a mutual trust must be established between the FMC and both ISE pxGrid and MnT Personas. If this trust is not established with any of these two Personas the whole integration would not work.
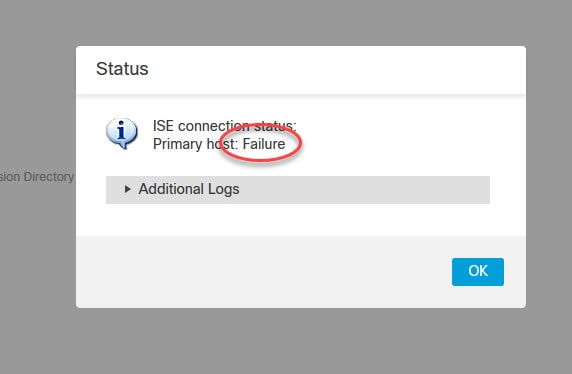
As you can see, we are getting an error when we tried to test the FMC integration with ISE. The reason of this is because on ISE we did not enable the automatic approval for the new pxGrid accounts creation. This means that when we clicked on the Test button, we had to go on ISE and manually approve that request. Although, on many resources you might find the recommendation to enable the automatic approval feature, personally I would prefer leaving it disabled, and approve manually the pxGrid integrations. Also, please keep in mind that right after you save the config on the FMC, another request will be sent to ISE, so you need to approve that one as well. You will see this in step 14.
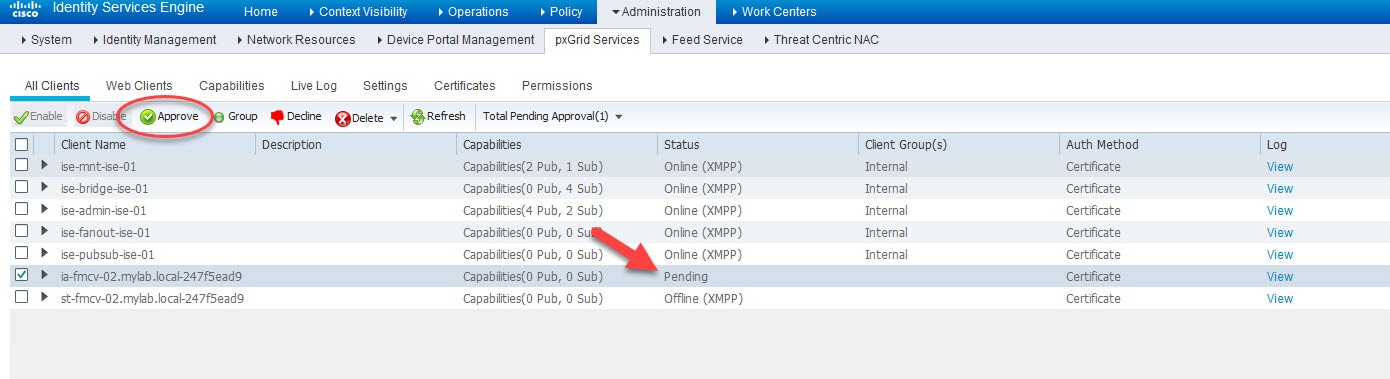
Go to ISE Administration > pxGrid Services and check how the FMC test request shows in Pending state

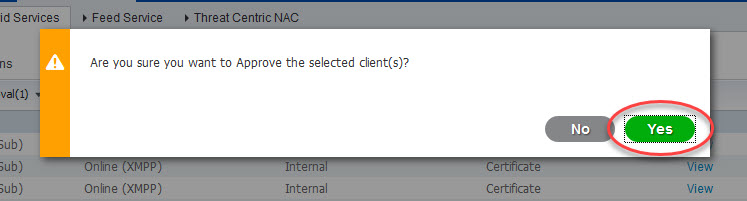
Select the pending request of FMC, click on the Approve button, and go back to FMC and test again

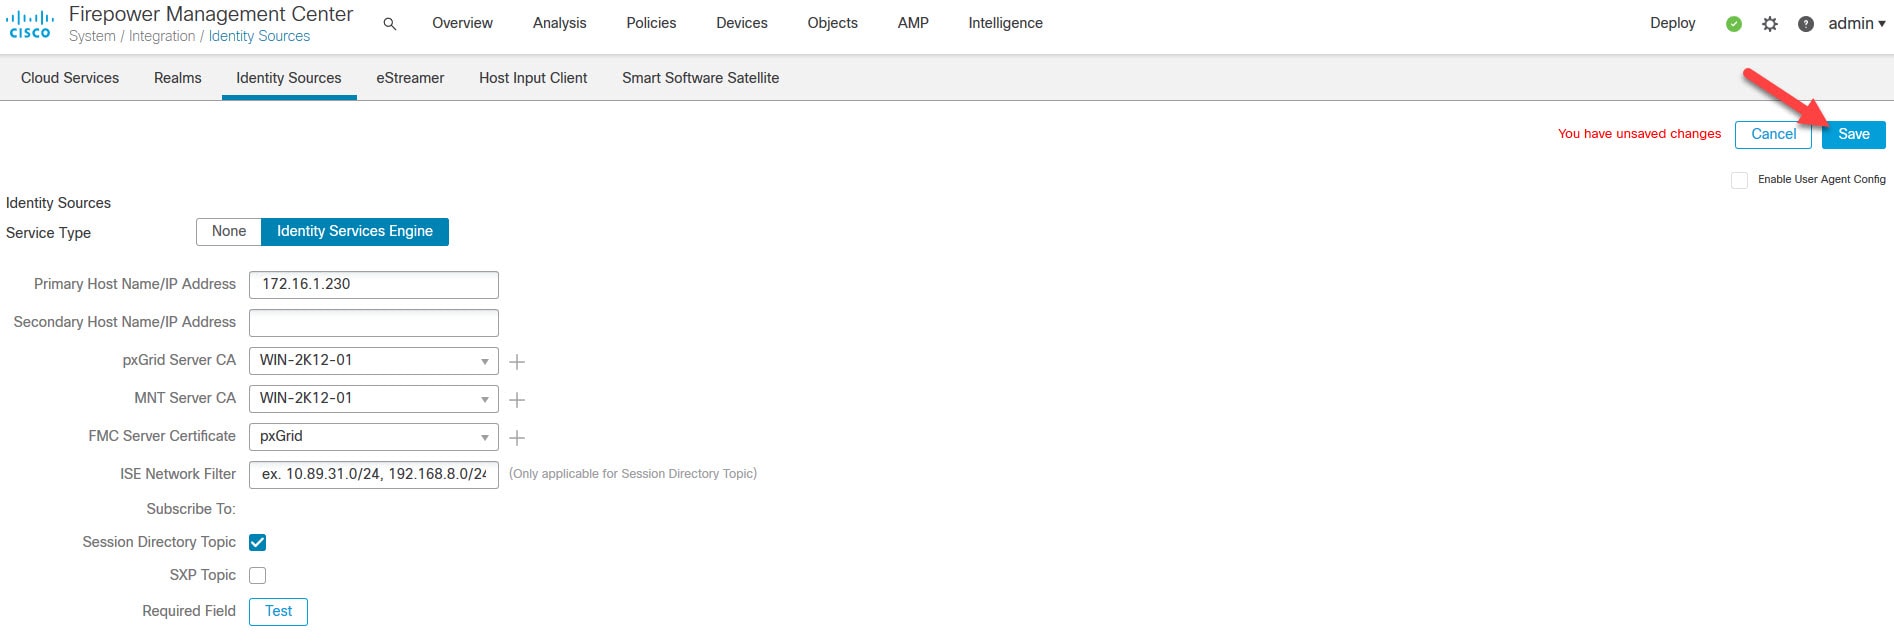
Click on Save to save the identity source we've just created
Step 14: Approve the FMC pxGrid integration request on ISE
Go back to ISE Administration > pxGrid Services, select the new FMC pxGrid request and click Approve
Step 15: Verification
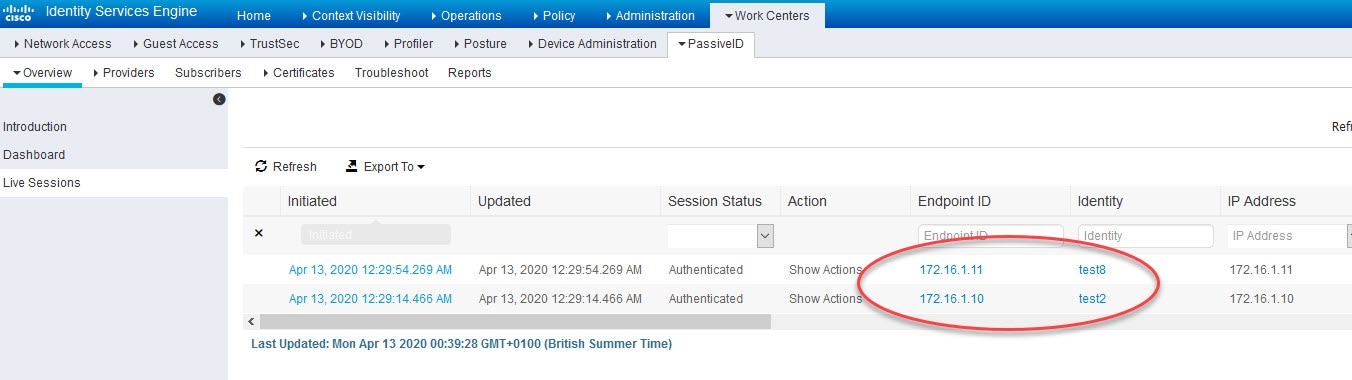
To test the FMC integration with ISE that we created, I logged on to the two Windows clients shown on the topology. On the client with the IP address 172.16.1.10 I logged on as test2 user. And on the client with the IP address 172.16.1.11 I logged on as test8.
ISE will learn about these logins from our AD via Passive Identity which I covered in this previous post, and because of the FMC pxGrid integration with ISE that we implemented in this lab, ISE will share the users identities with FMC.
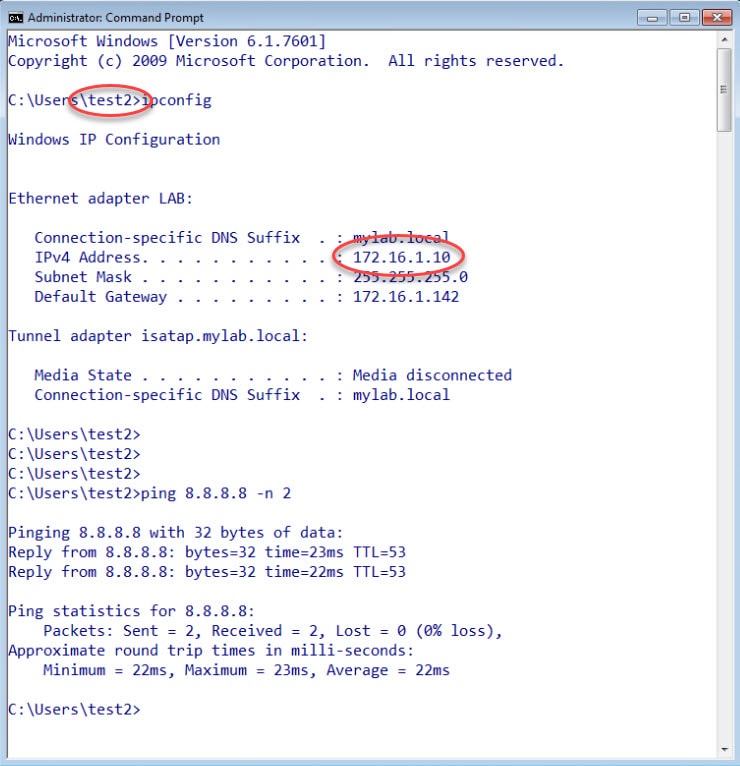
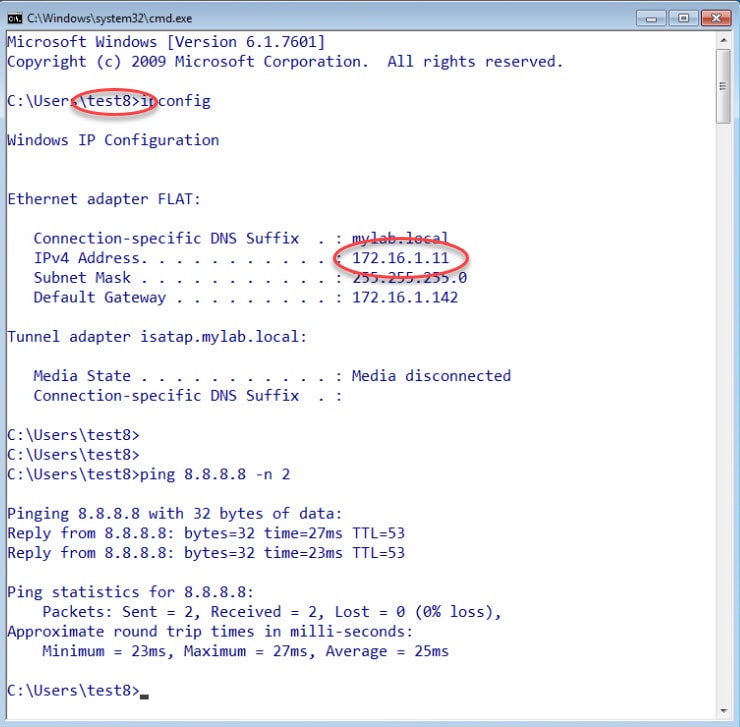
Here is how ISE learned about these two users from the AD via Passive Identity
And because we have already a realm and an identity policy configured and attached to our access control policy on our FMC, the FMC can now show the users' identities which we can see on the connections event logs below

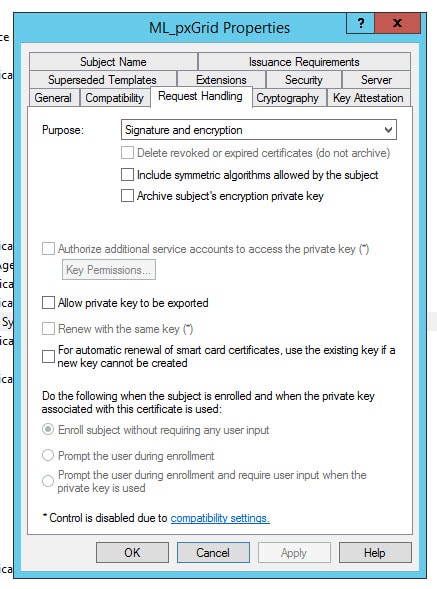
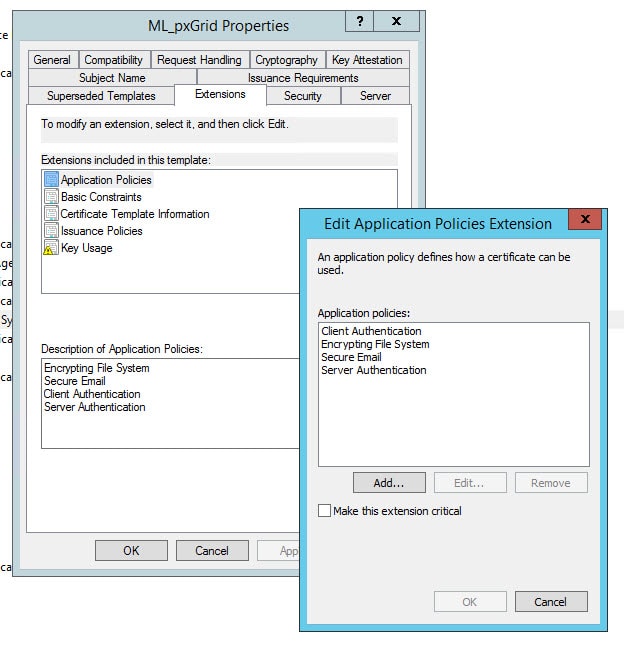
Finally, here is the relevant parts of the ML_pxGrid certificate template I created on the AD

This wraps up this post about how to integrate Cisco FMC with ISE using pxGrid.
Thank you for reading!
Is it possible to achieve the same for ISE guest users? which are registered through ISE self-registration portal, not AD users. Can ISE send guest users data to FMC?
Yes that is possible. The guest contextual data will be shared with the FMC, technically speaking the FMC would pull them down from ISE MnT Persona. I don’t believe you can see the user to IP mapping on the FMC Connections events for those users though, but you can still see them in the Active Sessions events.
Thank you
Hi, i made a lab using ISE Guest Portal, FMC and the users appears on active sessions on FMC, but dont on connections events. Is there anyway to appears on connections events too?
Tks